A pork shank is a lean leg cut packed with connective tissue that turns incredibly tender when you braise it low and slow. I’d sear it until mahogany-brown, then braise at 325°F for about three hours in stock, beer, and aromatic vegetables. The collagen breaks down into silky gelatin, and the marrow enriches the braising liquid into a concentrated glaze. Your fork should slip through effortlessly when it’s done. There’s quite a bit more technique to master this cut perfectly.
What Is a Pork Shank and Where It Comes From?

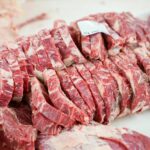
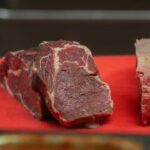
Ever wonder what makes a pork shank such a prized cut for slow-cooked meals? I’m excited to share that a pork shank comes from the lower portion of the pig’s leg, positioned above the hock and below the shoulder or ham. You’ll find it on either the front or back leg, depending on your butcher’s selection.
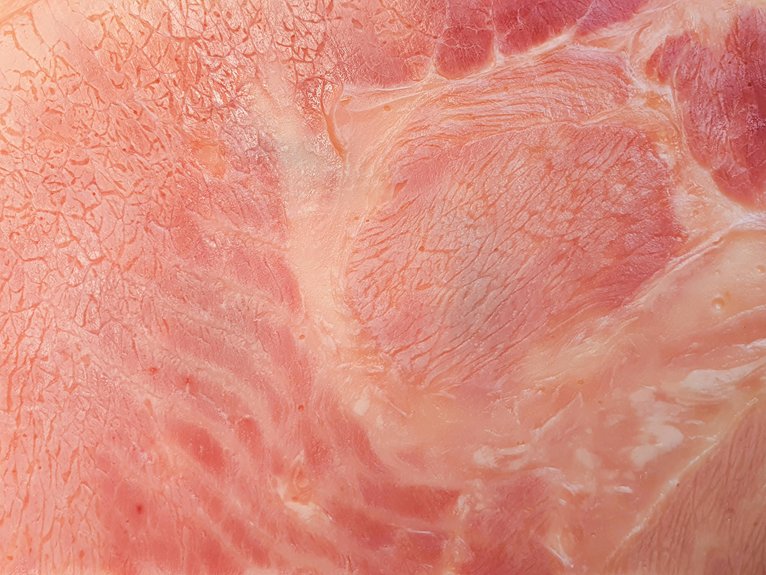
This cut of pork isn’t your everyday steak—it’s loaded with lean meat, connective tissue, and a marrow-rich bone that’s basically a flavor goldmine. That’s why braising and slow cooking are your best friends here. The fatty, muscular composition keeps everything moist during those long, low-heat sessions. When you’re ready to plunge into this delicious cut, you’ll understand why experienced cooks keep reaching for it.
Essential Ingredients for Beer-Braised Pork Shanks

To make beer-braised pork shanks that’ll knock your socks off, you’ll need to gather ingredients across four main categories: pantry staples and seasonings, proteins, vegetables, and stock. I’m talking about items like garlic, beer, and broth that’ll create that deep, rich flavor you’re after, plus the pork shanks themselves and fresh veggies that’ll break down and flavor everything around them. Getting these components ready before you start cooking means you won’t be scrambling mid-braise, which is honestly half the battle.
Pantry Staples and Seasonings
What makes beer-braised pork shanks so incredibly flavorful? It’s all about the pantry staples you choose. I’ve found that building your braising foundation transforms an ordinary shank into something spectacular.
Here’s what I keep on hand:
- Quality broth—beef or chicken—instead of plain water, which deepens every bite
- Minced garlic added during cooking, bringing warmth and complexity to your glaze
- Soy sauce mixed with honey, creating that glossy, caramelized finish you’re after
- Beer itself, the star ingredient that tenderizes connective tissue beautifully
These pantry staples work together during the low-and-slow braising process. When you submerge your shank completely in this flavorful liquid, magic happens. The broth becomes infused with rich, savory notes. Your finished shank emerges fork-tender with a honey-soy glaze that’ll make you feel like you’ve truly mastered this dish.
Proteins, Vegetables, and Stock
Building a great beer-braised pork shank starts with gathering your main players: quality pork shanks, a solid stock base, and vegetables that’ll carry flavor through your braise. I recommend using a mirepoix—celery, carrots, and onions—as your vegetable foundation. These aromatics develop sweetness when sautéed first, creating your braise’s flavor backbone.
For stock, I use a combination of chicken and beef, covering the shanks about three-quarters of the way. This liquid system ensures even cooking and tender meat. Add mushrooms, garlic, and potatoes for extra depth and substance.
| Ingredient | Amount | Purpose |
|---|---|---|
| Pork shanks | 4-6 pieces | Main protein |
| Stock (mixed) | 4-6 cups | Braising liquid |
| Mirepoix vegetables | 2 cups | Aromatic base |
| Mushrooms | 8 oz | Umami depth |
How to Sear Pork Shanks: Building Flavor Before the Braise

Searing’s where the magic happens—it’s the essential step that transforms bland meat into something genuinely delicious. I’ll walk you through building those deep, complex flavors that make braised pork shanks memorable.
Here’s what makes searing work:
- Heat your pan until it’s smoking hot, then sear shanks two minutes per side for a mahogany crust
- Dredge floured shanks beforehand to create texture and thicken your braising liquid later
- Leave the browned bits (fond) untouched—they’re flavor gold
- Deglaze with beer or stock to lift that fond and form your braising base
The Maillard reaction during searing develops rich, savory notes you can’t get any other way. Set your shanks aside while you prep vegetables in that same pan. You’re already becoming part of the community of cooks who understand that this step separates good braises from extraordinary ones.
Deglazing Pork Shanks and Choosing the Right Stock

How do you capture all that caramelized flavor stuck to your pan? Deglazing does exactly that. After searing your pork shanks, pour beer or wine into the hot pan and scrape the browned bits—called fond—from the bottom. This releases concentrated flavor into your liquid, creating a deeper, richer base.
Next comes choosing your stock. I’d recommend using beef or chicken stock, or combine both for balanced richness. The choice depends on your preference and what you’ve got on hand. During braising, make sure your pork shanks are mostly covered by stock and vegetables.
For the best results, after deglazing with beer, add your chosen stock and tomato paste. Simmer everything together so the flavors integrate into one cohesive braising liquid that’ll make your shanks absolutely delicious.
Braising Pork Shanks: 3 Hours at 325 Degrees

Now that your shanks are seared and your liquid’s ready, I’ll walk you through the actual braising process—which is where the magic happens over those three hours at 325 degrees. You’ll need to prepare a braising liquid by combining your deglaed pan drippings with stock, then add aromatics like onions, carrots, and garlic to build flavor as the shanks cook low and slow. Once everything’s in the oven, you’ll monitor the temperature to keep a gentle simmer going, check the meat’s tenderness by piercing it with a fork (it should practically fall apart when it’s done), and watch as the connective tissue breaks down into something absolutely delicious.
Preparing Your Braising Liquid
What makes a truly great braise? It’s the liquid that transforms a pork shank into something magical. I’ll walk you through creating the perfect braising liquid that’ll make you feel like a real cook.
Start by building your foundation with these essentials:
- Combine chicken or beef stock—or both for deeper flavor
- Add beer to deglaze the pan and create complexity
- Stir in tomato paste for richness and body
- Layer in fresh herbs to tie everything together
After searing your pork shank, deglaze the pan with your stock-and-beer mixture. This captures all those flavorful browned bits. Then add tomato paste and herbs, simmering for five minutes before braising. You’re creating layers of taste that’ll have everyone asking for your secret.
Monitoring Temperature and Time
Once you’ve got your braising liquid simmering and your seared shanks nestled into the pot, you’ll want to set your oven to 325 degrees Fahrenheit and let time do the labor. This temperature creates the perfect environment for transforming tough meat into fork-tender perfection.
| Time (Minutes) | Temperature | Liquid Level | Doneness Check | Action |
|---|---|---|---|---|
| 0-60 | 325°F | 3/4 covered | Firm resistance | Monitor |
| 60-120 | 325°F | 3/4 covered | Slight give | Monitor |
| 120-180 | 325°F | 3/4 covered | Easy shred | Check doneness |
| 180+ | 325°F | Partially uncovered | Falls from bone | Reduce sauce |
| Beyond 180 | 325°F | Uncovered | Perfect tenderness | Finish braising |
Around three hours usually delivers tender shanks. However, don’t panic if yours need extra time—continue braising in fifteen to twenty-minute increments. During the final stretch, uncover your pot slightly to concentrate those beautiful flavors. You’re almost there, and your patience will absolutely pay off.
Testing for Meat Tenderness
After you’ve let your shanks braise for about three hours, you’re ready to figure out if they’ve reached that coveted fall-off-the-bone stage.
Here’s how I test for perfect tenderness:
- Pull the meat gently away from the bone—it should separate with almost zero resistance
- Insert a fork into the thickest part and notice how it slides through like butter
- Check that the bone’s starting to detach from the surrounding meat
- Observe if the braising liquid’s reduced and concentrated
If your shanks aren’t quite there yet, don’t worry. Continue braising in 15–20 minute increments while monitoring the sauce thickness and bone detachment. The key’s patience. Once those forks slip in effortlessly and meat pulls free easily, you’ve nailed it. Your braising journey’s complete, and you’re joining the ranks of pork shank masters.
Why Slow Cooking Makes Pork Shanks Tender

How does a tough, chewy cut of meat transform into something so tender it practically melts off the bone? The answer lies in understanding your shank meat’s structure. Pork shanks contain lots of connective tissue and collagen surrounding lean muscle. When you apply slow cooking—braising in liquid or roasting low and slow for 2–3 hours—something magical happens. The extended heat breaks down that connective tissue into gelatin, rendering the fat and transforming the texture completely. I recommend cooking at 300–325°F to achieve this without drying everything out. The continuous contact with moisture during braising prevents shrinkage while deepening flavors. You’re not just cooking; you’re unlocking tenderness that makes every bite satisfying and worth the wait.
Beer Alternatives for Pork Shanks (And Non-Alcoholic Options)

I’ll let you in on a secret: you don’t actually need beer to braise amazing pork shanks. If you want to skip the alcohol entirely, I’d swap in equal parts beef or chicken stock mixed with a splash of apple cider vinegar or a tablespoon of tomato paste—this combo gives you the depth and body that beer would’ve provided. Now, if you’re open to beer but want to choose wisely, I’d reach for a porter or stout for rich, roasted flavors, though a wheat beer works great if you prefer lighter malt notes, or you can go the fun route and use cola, root beer, or Dr. Pepper to deglaze the pan and add unexpected sweetness.
Beer Style Selection Options
What’s the best way to choose a beer for your pork shank braise? I’ll walk you through selecting the perfect style that matches your dish’s personality.
Here’s how I approach beer selection:
- Lighter ales bring subtle sweetness and won’t overpower delicate herbs like rosemary
- Porters and stouts add roasted, chocolatey depth that transforms your sauce into liquid gold
- Wheat beers offer balanced flavor without heaviness, perfect when you want brightness
- Non-alcoholic options deliver the same deglazing benefits and flavor compounds minus the alcohol
The key to flavor balance is matching your beer to your seasoning profile. If you’re using smoky spices, go darker and malt-forward. With fresh herbs? Pick something lighter. This simple strategy ensures your braising liquid complements every element of your pork shank perfectly.
Non-Alcoholic Beverage Substitutes
Sometimes you’ll want to skip the beer entirely—whether you’re cooking alcohol-free or simply don’t have any on hand—and the positive news is you’ve got plenty of solid options for braising your pork shanks. Non-alcoholic beverages work wonderfully for deglazing and braising. Try non-alcoholic beer for similar aroma and depth, or reach for Dr. Pepper, Root Beer, or Coca-Cola to add sweetness and caramelization. Chicken or beef stock alone provides savory richness and moisture. For a lighter approach, combine broth with apple cider vinegar to mimic tang and brightness. Whatever liquid substitute you choose, ensure your pork shanks remain mostly covered throughout braising. This guarantees even cooking and tender results—no beer required, no compromises made.
Flavor Impact and Preferences
Your choice of braising liquid shapes how your finished pork shanks’ll taste, and picking the right one makes a real difference. When you’re thinking about flavor depth and beer pairing, consider what you’re really after:
- Wheat beer delivers lighter sweetness that won’t overpower your pork shank
- Porter or stout contribute roasted, chocolatey notes that complement rich meat beautifully
- Non-alcoholic beer provides similar maltiness without the alcohol content
- Broth with caramelized sugar mimics malt sweetness if you’re skipping beer entirely
During braising, your chosen liquid deglazes the pan, lifting browned bits that dissolve into sauce and intensify umami. If you’re avoiding alcohol, combine equal parts stock with a splash of apple cider vinegar—you’ll achieve similar acidity and body that beer naturally provides. Pick what matches your family’s preferences.
Common Mistakes That Make Pork Shanks Tough or Dry

Why do some pork shanks end up rubbery and dry despite hours of cooking? I’ve learned that several common mistakes sabotage even patient braising efforts. Overcooking causes moisture loss—the meat fibers literally squeeze out their liquid. Cooking too hot or boiling aggressively collapses collagen too fast, creating that rubbery texture instead of tender meat. I always sear and deglaze first; skipping this step means losing fond that compensates for moisture in braising. Rushing the process with less than 3.5–4 hours prevents connective tissue breakdown entirely. Finally, inadequate liquid coverage or uneven heat distribution creates dry, tough edges while centers cook perfectly. I’ve discovered that respecting time, temperature, and technique transforms pork shanks from potential disasters into genuinely delicious meals.
Is Pork Shank Good for Pulled Pork?

Absolutely—pork shank makes excellent pulled pork when you give it the low-and-slow treatment it deserves. The shank’s collagen breaks down during braising, creating tender, shreddable meat that’s juicier than typical shoulder cuts. Here’s what makes it work:
- The bone adds remarkable flavor to your final dish
- Slow cooking releases collagen, transforming tough meat into silky strands
- Extra fat content keeps your pulled pork moist and delicious
- Braising at 375°F for several hours yields fall-apart texture
I’d braise your shank covered in the oven or use a pressure cooker for faster results. Once it’s tender enough to shred easily, pull the meat from the bone and mix with your favorite sauce. You’ve got restaurant-quality pulled pork that’ll make everyone wonder what your secret ingredient is.
Cooking Pork Shanks in a Pressure Cooker

When you’re craving that fall-apart tenderness but don’t have hours to spare, a pressure cooker transforms pork shanks into dinner-table gold in under an hour. I season my shanks with salt and pepper, then brown them in oil to lock in flavor. Next, I add enough braising liquid—broth or wine—to submerge the meat halfway. This liquid becomes your secret weapon for tenderizing collagen during cooking. I seal the cooker and cook on high pressure for 45–60 minutes, followed by a natural release of 10–15 minutes. The pressure cooking breaks down tough connective tissue beautifully. Afterward, I finish them under the broiler for a caramelized crust. The reduced braising liquid makes an incredible sauce that ties everything together.
Pork Shank vs. Pork Hock: Key Differences

Ever wonder what separates a pork shank from a pork hock at the butcher counter? I’ll help you understand these two cuts so you can pick the right one for your next meal.
Here’s what makes them different:
- Location – shanks come from above the trotter, while hocks sit below the shank
- Meat content – shanks offer more lean muscle for hearty main dishes
- Texture – hocks pack extra connective tissue, making them perfect for long stews
- Cooking method – shanks shine through braising, while hocks flavor broths beautifully
The pork shank delivers a larger, meatier portion when you’re braising or creating pulled pork. Pork hocks, tougher and skin-heavy, work best in soups where slow cooking breaks down that connective tissue into silky gelatin. Both cuts reward patience—that’s the real secret.
How to Reheat and Store Leftover Pork Shanks

Pork shanks’ve got a reputation for being tough to reheat, but I’ll show you how to bring them back to life without drying them out. First, store your leftovers in an airtight container in the refrigerator for up to 3 days, or freeze them for up to 3 months. When you’re ready to reheat, I recommend using your oven. Cover the shanks and heat them at 325–350°F for 20–30 minutes until warmed through. If you’re reheating from frozen, thaw them overnight in the refrigerator first. Alternatively, simmer them on the stovetop with a splash of broth on low heat. After reheating, let them rest for 5–10 minutes so the juices redistribute. This simple step transforms your storage strategy and keeps every bite tender.