You can’t brine a fully frozen turkey—salt can’t penetrate solid ice, so you’ll waste time and risk bacteria growth. Instead, thaw your turkey in the refrigerator first, which takes about 24 hours per 4–5 pounds. Once it’s partially thawed, submerge it in cold brine (40°F or below) for 24–48 hours, keeping it completely covered. Pat it dry, apply final seasonings, then cook. The science and safety details behind this process reveal why timing and temperature control make all the difference.
Why Brining a Fully Frozen Turkey Won’t Work (The Science Behind the Fail)

Ever wonder why tossing a rock-solid turkey into a brine bucket doesn’t magically season it? Here’s the truth: a fully frozen turkey behaves like an impenetrable block. Brine can’t penetrate solid ice, so flavoring simply won’t happen until thawing begins. When you attempt frozen turkey thawing in saltwater, the brine only touches the surface while your bird’s interior stays locked in ice for hours. This creates uneven seasoning—the outer layers absorb salt while the core remains completely untouched. Even worse, safety risks increase when frozen meat sits in brine too long. If temperature control slips, bacteria can multiply before brine penetration actually occurs. The bottom line: skip the frozen brine attempt. Thaw your turkey first, then brine it properly.
Why Salt Can’t Penetrate a Frozen Turkey (The Osmosis Problem Explained)

I want you to understand what’s really happening at the cellular level when you attempt to brine a frozen turkey: osmosis—the process where salt draws water across cell membranes—simply can’t work when those cells are locked in ice. Salt does lower water’s freezing point (a neat trick called freezing point depression), which means it can speed up surface thawing, but here’s the catch—osmosis only kicks into gear once tissue thaws enough to let water molecules actually move freely. So while your brine sits there looking productive, your turkey’s frozen interior remains a no-entry zone, stubbornly resisting the salt’s pull until thawing breaks the ice barrier first.
Osmosis Activation During Thawing
When you submerge a frozen turkey in brine, the salt’s work hasn’t actually begun yet—and that’s the core problem. Osmosis can’t happen until thawing progresses enough to create liquid water channels inside the meat. Here’s what’s really going on: as your turkey thaws from the outside in, water gradually converts from ice to liquid. Only then can salt ions actually penetrate the muscle tissue through osmosis. Until that thawing reaches deeper layers, the brine just sits on the surface doing minimal work. Think of it like trying to water a plant through frozen soil—the water can’t reach the roots until the ground thaws. That’s why patience matters. You’re essentially waiting for thawing to activate osmosis, making the entire brining process dependent on how thoroughly your turkey defrosts first.
Salt’s Freezing Point Effect
So the fact is: salt does lower water’s freezing point, which sounds like it’d help your turkey thaw faster and absorb brine more quickly. But here’s the catch—that freezing point effect only matters once your turkey’s interior has actually started thawing.
When your bird’s completely frozen solid, the brine can’t penetrate the icy tissue yet. Salt needs unfrozen water to work its magic through osmosis, and your frozen turkey simply doesn’t have that available. The outer layer thaws first and *might* absorb minimal salt, but your turkey’s core stays locked in ice, blocking effective brine penetration.
Think of it this way: you can’t speed up what you can’t reach. Patience beats shortcuts here. Let your turkey partially thaw before brining for real flavor results.
Food Safety Risks to Watch Out For Before You Start

Why does temperature matter so much when you’re brining a turkey? Because bacteria thrive above 40°F, and that’s where things get risky. I want you to succeed, so let’s talk about the dangers you’ll face.
| Risk | Temperature | Solution |
|---|---|---|
| Bacterial growth | Above 40°F | Keep brine temperature cold |
| Uneven seasoning | Fully frozen turkey | Wait until thaw begins |
| Surface contamination | Stagnant water | Use fresh, cold environment |
Thawing safety starts with choosing the right cold environment—your refrigerator, a cooler with ice, or another consistently cool spot. Monitor brine temperature regularly with a thermometer. Never let it climb above 40°F. Stagnant water invites trouble. Keep your brine fresh and moving when possible. This isn’t overthinking it; it’s protecting your meal and your family.
The Safe Path: Refrigerator Thawing + Overnight Brining (24–48 Hours)

Your refrigerator is honestly your best friend when you’re brining a frozen turkey safely. I’ll walk you through the process that keeps your bird delicious and danger-free.
Your refrigerator is your best friend when brining a frozen turkey safely—keeping your bird delicious and danger-free.
Here’s what makes this approach work:
- Refrigerator thawing first – Place your sealed turkey breast-side up in a pan at 35–40°F for about 4 hours per pound
- Wait before brining – Let it sit in the fridge for a couple days after thawing; patience pays off
- Submerge in cold brine – Once thawed, soak your turkey for 24–48 hours in a cold brine solution to ensure even flavor
This method maintains consistent safety throughout. You’re avoiding room temperature dangers while getting that perfectly seasoned turkey. The brining process works best when your turkey stays cold the entire time, so you’re joining countless cooks who’ve mastered this reliable technique.
Fast-Track Option: Partial Thaw + Accelerated Brining (Not Ideal, But Possible)

If you’re short on time and can’t wait for a full refrigerator thaw, there’s a faster approach that works—though it demands careful attention. Start by letting your turkey thaw partially until the outer layers soften while the interior stays frozen. Once the surface yields to pressure, submerge it in brine and keep everything at 40°F or below using ice packs. Here’s the catch: you’ll need 6–12 extra hours of brining time because salt penetrates slowly through thawing meat. Monitor temperature religiously—think of it as babysitting your turkey. After brining finishes, rinse thoroughly and pat dry to prevent uneven seasoning. This method works when you’re in a pinch, but honestly, refrigerator thawing gives superior, more consistent results. Choose this route only when time truly pressures you.
Temperature Checkpoints for Frozen Turkey Brining

you’ve got to keep everything at 40°F or below, no exceptions. This safety temperature 40°F rule prevents bacterial growth while your turkey thaws and absorbs that flavorful brine.
- Check your brine temperature every morning and evening if you’re using a cooler—don’t let it creep above 40°F or you’re playing with food poisoning risk.
- Use ice packs or cold water to maintain proper brine temperature throughout the thawing process, replacing them as needed.
- Monitor thawing progress daily so you know when salt penetration actually begins working.
Your turkey’s safety depends on staying disciplined with these checkpoints. You’re investing time smartly by keeping cold temperatures consistent from start to finish.
Mistakes That Make Frozen Turkey Brining Unsafe

Because salt can’t penetrate frozen meat, attempting to brine a completely solid turkey wastes both your time and seasoning effort. I’ve learned that submerging a fully frozen bird creates uneven salting—outer surfaces thaw first and absorb salt while your interior stays solid. This temperature imbalance during the thawing process causes inconsistent flavor throughout.
The biggest safety mistake? Letting your brine sit above 40°F. I can’t stress this enough: bacteria thrive in warm conditions. If you’re using a cooler setup, you’ll need ice packs or frozen bottles and daily temperature checks. Even with proper brining safety measures, leaving a frozen turkey in brine too long leads to over-salting once thawing accelerates.
Partial thawing before brining prevents these problems entirely.
The Complete Timeline: From Frozen Turkey to Brined Bird (Day by Day)

I’ll walk you through a practical day-by-day timeline that transforms your frozen turkey into a properly brined bird, because rushing this process is where things go wrong. Day One focuses on your prep work—thawing your turkey in the refrigerator (allowing roughly 24 hours per 4–5 pounds) while you gather your brine ingredients and sanitize your brining vessel. By Day Two, once your turkey’s exterior and some interior portions have thawed, you’ll submerge it in your cold brine at 40°F or below, then let it sit for the next 24–48 hours as the salt gradually penetrates deeper into the meat.
Day One: Preparation Setup
While your turkey’s still mostly frozen, it’s time to get your brining operation ready—think of it as laying out all your game pieces before you start playing. I’m gathering everything now so there’s no scrambling later.
Here’s what I’m doing:
- Selecting a non-metal vessel large enough to hold my turkey completely submerged with room for brine
- Preparing my cold brine mixture (water, salt, sugar, and aromatics) and chilling it to near freezing
- Monitoring my freezer space to keep the brined turkey at or below 40°F throughout the process
As my frozen turkey begins partial thawing, I’ll position it breast-side-down in the vessel. This orientation lets the outer regions contact brine first, ensuring even salt penetration. I’ll add extra ice or cold water to keep my brine temperature steady and cover everything tightly. This setup prevents temperature swings that could compromise food safety.
Day Two: Thawing Begins Brining
As your turkey sits in its brining vessel, the real magic starts happening—the outer portions begin thawing while simultaneously absorbing salt from the brine, which is basically a two-for-one deal in terms of flavor and texture. Keep everything in your refrigerator or cooler at 40°F or below to stop bacteria from growing. Make sure your frozen turkey stays completely submerged in the brine. You’ll want to monitor the temperature regularly with a thermometer, aiming for 4°C (39°F) or colder. As your turkey continues to thaw brine, the salt penetrates deeper into the meat. Depending on your turkey’s size, you’ll need 24–48 hours of total brining time from this point. Keep that vessel covered throughout the entire process for even flavor absorption.
Day Three: Complete Seasoning Ready
By now, your turkey’s transformation is nearly complete—it’s fully thawed and has soaked up all that salty, flavorful brine for a solid 24–48 hours. You’re in the home stretch, and safety remains your priority.
Here’s what you need to do:
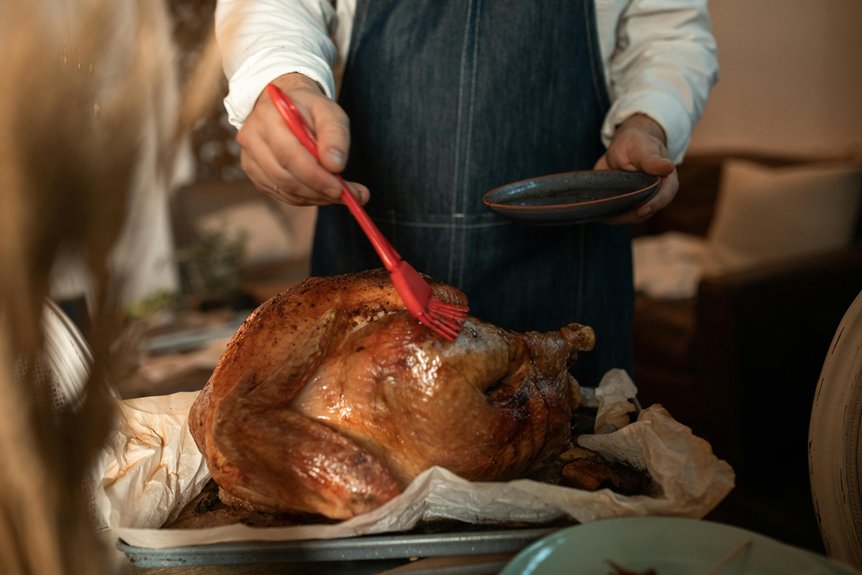
- Pat your turkey completely dry using paper towels, removing excess moisture that prevents browning
- Keep the safety temperature at 40°F (4°C) or below until you’re ready to cook
- Apply your final seasonings—oil and dry rub over the brining residue for maximum flavor
This is where thawing, brining, and safety temperature management come together. Your bird is ready to deliver restaurant-quality results. You’ve done the work; now comes the delicious payoff.