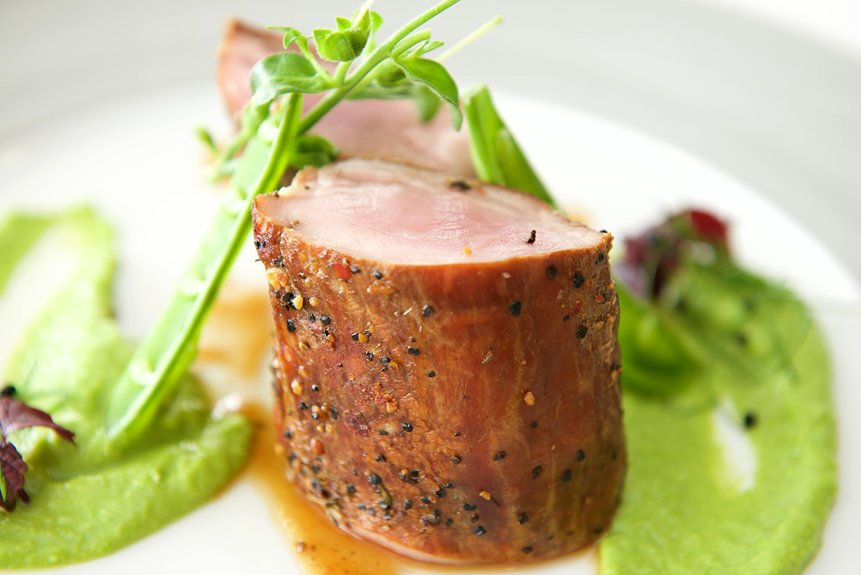
Cook your pork tenderloin to 145°F (63°C) at its thickest part—that’s the magic number that kills harmful bacteria while keeping the meat juicy. Don’t rely on cooking time; use a meat thermometer instead, since ovens vary and thickness differs. After hitting 145°F, rest it for about 15 minutes so carryover cooking raises the temperature slightly and juices redistribute throughout the meat. This approach guarantees tender, moist results every time. There’s more to master about searing, slicing, and rescue strategies if things don’t go perfectly.
The Safe Internal Temperature for Pork Tenderloin: 145°F

Ever wonder why some pork tenderloin turns out dry and disappointing while other versions stay juicy and tender? I’ll let you in on the secret: nailing the internal temperature makes all the difference.
The safe internal temperature for pork tenderloin is 145°F (63°C). This temperature eliminates harmful bacteria while keeping your meat perfectly moist. Use a digital thermometer to check the thickest part, away from bone, for accuracy.
Here’s where it gets interesting: resting after cooking is crucial. After removing your tenderloin from heat, let it rest before slicing. During this time, carryover cooking raises the final temperature slightly above 145°F. This resting period allows juices to redistribute throughout the meat, creating that tender, succulent texture you’re after. Your guests will appreciate the difference.
Why Pork Tenderloin Temperature Matters More Than Cooking Time

I’ll tell you straight: relying on cooking time alone is a recipe for either undercooked or dried-out pork, which is why I’m going to show you how temperature is your real safety net. Every oven cooks differently, and factors like the tenderloin’s thickness, starting temperature, and even your oven’s accuracy mean that a “15 minutes per pound” guideline might leave you with raw centers or rubbery meat. That’s exactly why I use a meat thermometer to hit 145°F in the thickest part—it guarantees both food safety and juicy results that time-based cooking just can’t promise.
Safety Over Cooking Time
Why does your pork tenderloin turn out dry one night and juicy the next, even though you cooked it for the same amount of time? The answer is simple: you’re trusting time instead of temperature. I’ve learned that a digital thermometer is your real kitchen companion. Insert it into the thickest part, and when it hits 145°F, you’re done—no guessing required. Here’s the trick: I pull mine at 135°F because carryover cooking raises the internal temperature another 5–10 degrees while it rests. Those three minutes of resting aren’t optional; they let juices redistribute, keeping your meat tender and flavorful. Forget preset cooking times. They vary wildly depending on thickness and your oven’s personality. Temperature is your only reliable guide to safety and juiciness.
Achieving Optimal Juiciness
You’ve probably noticed that hitting 145°F isn’t where the magic ends—it’s actually where it begins. Here’s what separates juicy pork from the dry stuff:
- Use your thermometer strategically—check the thickest part away from bone for accuracy, ensuring you nail the internal temperature without guessing.
- Plan for carryover cooking—pull your tenderloin at 135°F and let it rest 15 minutes while residual heat pushes it to that perfect 140–145°F range.
- Choose quick, high-heat methods—fast cooking preserves juiciness better than prolonged low-heat approaches that risk overdrying your meat.
The real trick? Respecting that brief window between safety and succulence. When you understand how temperature and resting time work together, you’re not just cooking pork—you’re joining the crowd who actually gets it right.
Preventing Dryness And Toughness
They rely on cooking time instead of temperature, and that’s precisely why their pork tenderloin turns out tough and dry. I’ve learned the hard way that this lean cut demands precision—not guesswork.
Here’s what actually works: pull your tenderloin at 135°F internal temperature, then let carryover cooking push it to safely above 140°F during resting. This approach requires a digital thermometer placed in the thickest part, away from bones. Don’t skip the resting time; I rest mine for 15 minutes, allowing juices to redistribute throughout the meat.
Temperature matters infinitely more than time here. Your tenderloin cooks so quickly that time-based cues won’t cut it. Trust your thermometer. That’s how you’ll join the crowd serving juicy, tender pork instead of the dry stuff everyone dreads.
How to Use a Meat Thermometer Correctly

When’s the best moment to check if your pork tenderloin’s actually done? I’d say right when it comes off heat—that’s when you’ll get the most accurate reading. Here’s how I do it:
- Insert your digital thermometer into the thickest part, steering clear of any bone
- Read the internal temperature immediately while the meat’s still hot
- Test multiple spots to confirm the whole tenderloin’s reached 145°F
After you’ve hit that target, don’t skip the rest time. Let your meat sit for about 3 minutes. That’s when carryover cooking kicks in, raising the temperature to around 150°F. This matters because it ensures food safety while keeping everything juicy and tender—no guessing games needed.
The Critical Role of Resting After Cooking

Why does resting matter so much after you’ve cooked your pork tenderloin? I’ll tell you—it’s genuinely one of the most important steps you can take. When you pull your tenderloin from heat at 135°F, carryover cooking continues working its magic. That internal temperature rises further, reaching above 140°F while you wait. This isn’t wasted time; it’s where the real transformation happens. During resting, the meat’s fibers relax and reabsorb their juices instead of spilling everywhere when you slice it. I recommend resting for about 15 minutes—long enough to make a real difference in tenderness and moisture. Tent it loosely with foil to keep warmth in without trapping steam that’d dry things out. That’s the simple trick separating dry, disappointing pork from juicy, restaurant-quality results.
How to Sear Your Tenderloin Before Roasting for Flavor and Juiciness

I’ll show you why searing your pork tenderloin before roasting makes such a difference in flavor and moisture. When you sear the meat in a hot pan with oil until it’s dark golden brown on all sides, you’re creating a flavorful crust through a chemical reaction that locks in those precious juices—think of it as building a tasty seal around your lean meat. This technique takes just a few minutes but transforms your tenderloin from decent to delicious, setting you up for success before you finish it in the oven.
Searing Creates Flavorful Crust
Searing your pork tenderloin before roasting transforms the outside into a deeply golden, caramelized crust that locks in flavor and moisture—and honestly, it’s one of the easiest ways to elevate your dish. Here’s what happens when you sear:
- Browning creates complex flavors through the Maillard reaction, developing rich tastes you can’t achieve any other way
- Moisture gets sealed in so your meat stays juicy during roasting
- Visual appeal improves dramatically with that appetizing golden-brown exterior
Start by patting your tenderloin dry and seasoning generously. Heat oil in a pan on medium-high until it shimmers. Sear all sides until deeply golden—about 2–3 minutes per side. A meat thermometer ensures you hit your internal temperature target of 145°F without guessing. This crust-building step takes minutes but transforms your entire dish.
Building Moisture and Tenderness
How do you keep pork tenderloin juicy while still getting that golden, flavorful crust? Here’s the secret: searing locks in those precious juices before roasting. When you sear your meat in a hot pan first, you’re creating a moisture-trapping barrier that keeps the inside tender and succulent.
After searing all sides until they’re beautifully browned, transfer your tenderloin to the oven at 350–400°F. Cook until your pork tenderloin temperature reaches 145°F in the thickest part—check with a digital thermometer, not guesswork. Then comes the game-changer: resting your meat for a few minutes allows carryover moisture to redistribute throughout, making each bite incredibly juicy. This simple two-step process prevents dry, disappointing results and delivers restaurant-quality tenderness every time.
Technique for Perfect Results
What’s the real secret to restaurant-quality pork tenderloin? Searing. Here’s how I nail it every time:
- Pat and season generously – Dry meat browns better, and bold seasoning creates that savory crust you’re after.
- Sear all sides briefly – I use a hot pan with oil, hitting each side for 1–2 minutes until deeply golden-brown.
- Finish in the oven – Transfer to a 350–425°F preheated oven until your internal temperature hits 145°F.
The magic happens during carryover cooking. That resting period of 5–15 minutes lets juices redistribute throughout the meat, preventing them from flooding your plate when you slice. You’ll notice the internal temperature climbing slightly during rest. That’s exactly what you want—tender, juicy results.
Why Pork Tenderloin Gets Dry: Five Common Mistakes

Ever wondered why your pork tenderloin turned out tough and dry despite your best efforts? I’ve found five culprits sabotaging your results.
First, overcooking past 145°F causes moisture loss without carryover cooking protection. Second, skipping the thermometer means you’re basically playing temperature roulette—thickness varies, so guessing by time fails. Third, high heat like 400°F dries the exterior before the center cooks through. Fourth, searing without finishing at proper internal temperature creates uneven doneness. Finally, cutting too soon releases juices, making slices look drier than they actually are.
The fix? Use a thermometer, cook at moderate temperatures, allow resting time for carryover cooking, and wait before slicing. You’ve got this.
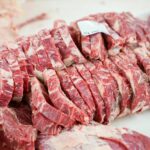
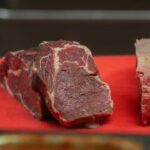
Pork Tenderloin vs. Pork Loin: What’s the Difference?

Now that you’ve learned how to avoid drying out your pork, it’s worth knowing that the cut you’re working with makes a real difference in how you’ll cook it. Tenderloin and loin aren’t interchangeable, and understanding their distinctions helps you nail the internal temperature and doneness comparison every time.
Here’s what separates them:
- Size and shape – Tenderloin weighs about 1 pound per fillet, while loin is a larger roast ranging 3–5 pounds with a fat cap
- Cooking speed – Tenderloin cooks quickly and needs precise temperature control; loin takes longer
- Temperature targets – Both reach 145°F safely, though loin can go up to 160°F depending on preference
The key difference? Tenderloin’s tenderness demands careful cooking to avoid toughness, making temperature control essential for your success.
How to Roast Pork Tenderloin: Temperature and Timing

Getting your pork tenderloin to that perfect sweet spot—juicy on the inside, golden on the outside—comes down to one thing: nailing the temperature.
Here’s what I do: I use a digital thermometer to check the internal temperature at the thickest part, away from any bones. I remove the tenderloin from heat when it hits 145°F (63°C). Some folks finish at 135°F and let carryover cooking do the rest—your call.
Then comes the magic part. I let it rest for about 15 minutes. During this resting temperature window, the heat continues climbing while the juices redistribute throughout the meat. This isn’t wasting time; you’re actually locking in flavor and tenderness. Skip the resting period, and you’ll lose all that hard work.
Pork Tenderloin Undercooked? How to Salvage It

So you’ve sliced into your pork tenderloin and discovered it’s not quite done—the center reads below 145°F (63°C) on your digital thermometer. Don’t panic; you’ve got solid salvage options.
Here’s your game plan:
- Sear the exterior briefly to re-crisp exposed surfaces, then finish in a hot oven while monitoring with your thermometer
- Cut into medallions if it’s significantly undercooked—thinner pieces cook faster to your 145°F target
- Rest strategically after reaching 145°F; carryover cooking raises internal temp during a 5–15 minute rest, pushing toward that juicy sweet spot
Once your tenderloin hits 145°F at the center, remove it from heat immediately. A 3-minute rest ensures both safety and optimal juiciness. You’ll nail it next time, and honestly, this recovery method often delivers results just as delicious as a perfectly timed cook.