

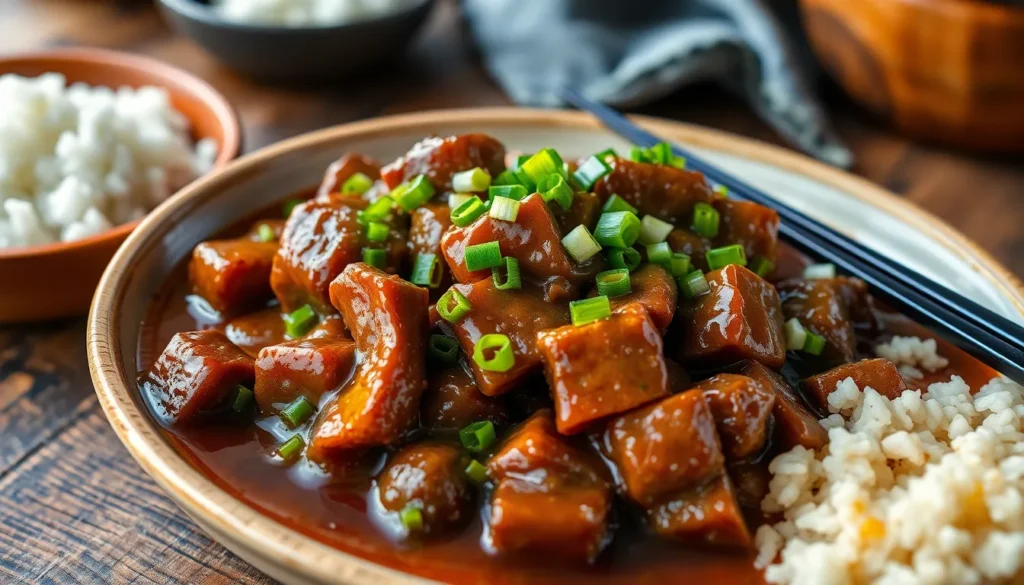
We’ve discovered the perfect solution for busy weeknight dinners that doesn’t compromise on flavor – pressure cooker Mongolian beef. This restaurant-quality dish transforms tough cuts of beef into tender, melt-in-your-mouth perfection in just minutes thanks to the magic of pressure cooking.
Traditional Mongolian beef typically requires careful timing and constant attention over a hot stove. Our pressure cooker version eliminates the guesswork while delivering that signature sweet and savory glaze that coats every bite. The high-pressure environment breaks down the meat fibers quickly while infusing every piece with rich soy-based flavors.
What makes this recipe truly irresistible is how it delivers maximum taste with minimal effort. We’ll show you how to achieve that perfect balance of tender beef, crispy vegetables, and glossy sauce that rivals your favorite takeout spot – all in one pot and ready in under 30 minutes.
Equipment Needed
Creating this pressure cooker Mongolian beef requires minimal equipment that most home cooks already have in their kitchens. We need an electric or stovetop pressure cooker as the star of our cooking setup. The pressure cooker should hold at least 6 quarts to accommodate the beef and vegetables comfortably without overcrowding.
Our cutting board becomes essential for prepping the flank steak into thin strips. We recommend using a sharp chef’s knife to slice against the grain for maximum tenderness. A large mixing bowl helps us marinate the beef with cornstarch and seasonings before cooking.
Measuring cups and spoons ensure we get the sauce ratios perfect every time. We use these to portion out soy sauce, brown sugar, garlic, and ginger accurately. A wooden spoon or silicone spatula works best for stirring ingredients without scratching the pressure cooker’s interior surface.
We keep a small bowl nearby for mixing the cornstarch slurry that thickens our sauce. This simple mixture transforms the cooking liquid into that glossy coating we love in restaurant-style Mongolian beef. A ladle helps us serve the finished dish over rice or noodles.
| Equipment | Purpose | Size/Type |
|---|---|---|
| Pressure Cooker | Main cooking vessel | 6+ quarts |
| Chef’s Knife | Slicing beef | 8-10 inch |
| Cutting Board | Food prep surface | Large |
| Mixing Bowl | Marinating beef | Medium to large |
| Measuring Cups | Sauce ingredients | Standard set |
| Measuring Spoons | Seasonings | Standard set |
| Wooden Spoon | Stirring | Heat-resistant |
| Small Bowl | Cornstarch slurry | 1-2 cup capacity |
The beauty of this recipe lies in its simplicity. We avoid complicated gadgets or specialized tools that clutter our kitchen counters. Every piece of equipment serves a exact purpose in creating tender beef with perfectly balanced flavors.


Ingredients
 1")
We’ve organized our ingredients into three categories to make shopping and prep work straightforward. Each component plays a crucial role in creating the perfect balance of tender beef and rich sauce.
For the Beef
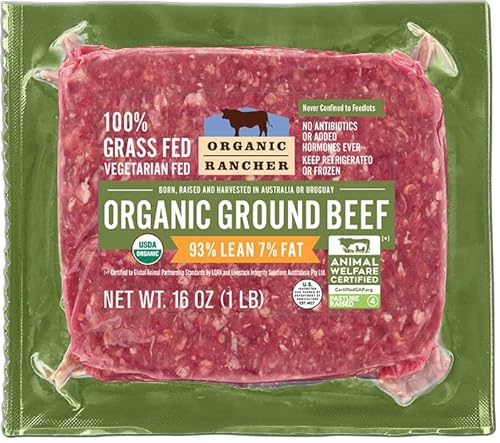
- 1.5 to 2 pounds flank steak, sliced thinly against the grain into 1/4 to 1/2 inch strips
- 1 to 2 tablespoons cornstarch (for coating the beef)
- 1 to 2 tablespoons vegetable oil or olive oil (for browning the beef)
For the Sauce
- 1/2 to 2/3 cup soy sauce (low sodium preferred)
- 1/2 to 1 cup water
- 2/3 cup to 3/4 cup dark brown sugar (for the signature sweet flavor)
- 4 to 8 cloves garlic, minced (adjust for garlic intensity)
- 1 tablespoon fresh minced ginger
- 1 tablespoon rice vinegar (optional, for slight tanginess)
- 1/2 teaspoon red pepper flakes (optional for spiciness)
- 2 tablespoons cornstarch (for thickening)
- 3 to 1/2 cup water (to make cornstarch slurry)
For Garnish
- 2 to 3 green onions, sliced into 1-inch pieces
- 1 teaspoon sesame seeds (optional)


Prep Work
 2")
With our equipment and ingredients ready, we can begin the essential preparation steps that ensure our Mongolian beef turns out perfectly tender and flavorful. These foundational steps create the base for a restaurant-quality dish that comes together quickly in the pressure cooker.
Preparing the Beef
We start by cutting our 2 pounds of flank steak into thin strips, slicing against the grain at approximately 1/4-inch thickness. This technique breaks down the muscle fibers and guarantees tender pieces in every bite. Next, we place the beef strips into a large resealable bag with cornstarch, sealing it tightly and shaking until each piece is evenly coated.
This coating process, known as velveting, serves two crucial purposes in our recipe. The cornstarch creates a protective barrier that keeps the beef tender during pressure cooking while also providing the foundation for our glossy sauce later. We ensure every strip gets thoroughly coated by massaging the bag gently with our hands.
Once our beef is properly coated, we heat 1 tablespoon of vegetable or olive oil using the sauté function on our pressure cooker. Working in batches to avoid overcrowding, we brown the beef strips for 2-3 minutes per side until they develop a nice sear. The browning process locks in juices and adds depth of flavor that makes our homemade version rival any restaurant dish.
After transferring the browned beef to a plate, we add 3-4 cloves of minced garlic to the same pot, along with 1/2 teaspoon of minced fresh ginger if desired. We sauté these aromatics for about one minute until they become fragrant, creating the flavor base for our sauce.
Making the Sauce
We combine our sauce ingredients directly in the pressure cooker pot while the garlic and ginger are still hot and fragrant. Starting with 1/2 cup of low sodium soy sauce, we add 1/2 cup of water and 2/3 cup of packed dark brown sugar, stirring until the sugar begins to dissolve.
For extra tang and complexity, we include 1-2 tablespoons of rice vinegar, though this remains optional based on taste preferences. The vinegar brightens the overall flavor profile and balances the sweetness from the brown sugar. We stir the mixture thoroughly to ensure all ingredients are well combined and the sugar is fully incorporated.
Once our sauce is mixed, we return the browned beef to the pot along with any accumulated juices from the plate. These drippings contain concentrated beef flavor that enhances our final dish significantly. We stir everything together gently, making sure the beef is well coated with the sauce mixture before proceeding to the pressure cooking phase.


Instructions
 3")
Now that we have prepared our ingredients and equipment, let’s walk through the step-by-step process to create this restaurant-quality Mongolian beef in our pressure cooker. Each stage builds upon the last to develop maximum flavor and achieve perfectly tender results.
Browning the Beef
We begin by seasoning our flank steak strips generously with salt and pepper. Place the seasoned beef strips in a mixing bowl and toss them with cornstarch until each piece is lightly coated. Allow the coated beef to rest for approximately 5 minutes while the cornstarch adheres to the surface.
Set your pressure cooker to “Sauté” or “Browning” mode and add oil to the pot. Wait until the oil becomes hot and begins to sizzle before proceeding. Add the beef strips to the pot in small batches to prevent overcrowding, which would cause steaming rather than browning.
Brown each batch thoroughly on all sides, creating a beautiful caramelized exterior that locks in the beef’s natural juices. Transfer the browned beef to a clean plate and repeat with remaining batches. Once all beef has been browned and removed, add minced garlic to the same pot and sauté for about 1 minute until fragrant.
Pressure Cooking
Add soy sauce, brown sugar, water (approximately ½ cup), and minced ginger to the aromatic garlic in the pot. Stir the mixture thoroughly to combine all ingredients and dissolve the brown sugar completely.
Return the browned beef and any accumulated juices from the plate back into the pot. The accumulated juices contain concentrated flavors that enhance the final dish significantly.
Secure the pressure cooker lid and set the valve to sealing position. Select high pressure and set the timer for 11 to 12 minutes. The pressure cooking time allows the tough fibers in the flank steak to break down while infusing the meat with our flavorful sauce.
When the cooking cycle completes, perform a quick pressure release by carefully turning the valve to the venting position. Wait for all steam to release before removing the lid safely.
Final Steps
Create a cornstarch slurry by whisking together 3 tablespoons of water with cornstarch in a small bowl until smooth. This mixture will thicken our sauce to the perfect consistency.
Add the cornstarch slurry to the pot while stirring constantly to prevent lumps from forming. Turn the pressure cooker back to “Sauté” or “Simmer” setting and bring the sauce to a rolling boil.
Continue stirring constantly as the sauce thickens and becomes glossy, which typically takes 2 to 3 minutes. The sauce should coat the back of a spoon when properly thickened.
Remove the pot from heat and stir in chopped green onions for a fresh flavor contrast and vibrant color. Serve the Mongolian beef immediately over steamed rice while hot for the best taste and texture experience.


Directions for Serving
 4")
We recommend serving our pressure cooker Mongolian beef immediately while it’s hot for the best taste and texture experience. The dish pairs perfectly with steamed white rice which absorbs the rich sauce beautifully and creates a satisfying complete meal.
Fresh green onions make an excellent garnish that adds both color and a mild onion flavor to complement the sweet and savory sauce. We suggest sprinkling sesame seeds on top for added texture and a subtle nutty taste that enhances the overall presentation.
Steamed vegetables create an ideal side dish that balances the richness of the beef. Broccoli, snap peas, or baby bok choy work particularly well and add nutritional value to your meal. We often prepare these vegetables while the beef is cooking to save time.
Our Mongolian beef also tastes delicious served over cauliflower rice for a lower carb option. The cauliflower absorbs the sauce just like traditional rice while providing a lighter alternative that doesn’t compete with the bold flavors.
We find that serving this dish family style works best since everyone can customize their portions. Place the Mongolian beef in a large serving bowl alongside individual bowls of rice so each person can create their perfect combination.
The glossy sauce should coat each piece of beef thoroughly when properly prepared. We recommend using a large spoon or ladle to ensure you get plenty of sauce with each serving since the rich flavor is what makes this dish so special.


Make-Ahead Tips
 5")
Planning ahead transforms this pressure cooker Mongolian beef into an even more convenient weeknight solution. We recommend preparing several components in advance to streamline your cooking process and reduce dinner prep time significantly.
Beef Preparation
Slice and coat the flank steak with cornstarch up to 24 hours before cooking. Store the cornstarch-coated beef strips in an airtight container in the refrigerator. This advance preparation allows the cornstarch to fully adhere to the meat while maintaining the velveting effect that creates tender results.
Sauce Components
Measure out all sauce ingredients and store them in separate containers or combine them in a bowl covered with plastic wrap. Having soy sauce, water, dark brown sugar, minced garlic, and ginger ready to go eliminates last-minute measuring and ensures accurate ratios every time.
Complete Dish Storage
The finished Mongolian beef maintains excellent quality when refrigerated for up to 3 days after cooking. Cool the dish completely before transferring to airtight containers. When reheating, warm gently over medium heat on the stovetop or use the microwave in 30-second intervals, stirring between heating cycles to prevent overcooking the beef.
Freezing Guidelines
Freeze the cooked dish for up to 2 months in freezer-safe containers, leaving about an inch of headspace for expansion. Thaw completely in the refrigerator overnight before reheating. Add fresh chopped green onions after reheating rather than before freezing to maintain their bright color and crisp texture.
Smart Reheating Strategy
Reheat refrigerated portions by adding a tablespoon of water to restore the sauce consistency. The cornstarch thickening may separate slightly during storage, but gentle stirring while warming will bring the glossy texture back perfectly.


Storage Instructions
 6")
Our pressure cooker Mongolian beef stores beautifully and maintains its tender texture when handled properly. We recommend cooling the dish completely before transferring it to storage containers to prevent condensation buildup.
Refrigerator Storage
We store leftover Mongolian beef in airtight containers in the refrigerator for 3 to 4 days. The sauce may thicken slightly during refrigeration but returns to its original consistency when reheated. Glass containers work particularly well as they prevent flavor absorption and make reheating easier.
Freezer Storage
For longer storage, we freeze portions in airtight freezer-safe containers or heavy-duty zipper bags for up to 3 to 4 months. We divide the beef into individual serving sizes before freezing to make thawing more convenient. This method allows us to defrost only what we need for future meals.
Reheating Guidelines
We thaw frozen Mongolian beef overnight in the refrigerator before reheating. For microwave reheating, we cover the dish with a damp paper towel and heat in 30-second intervals until warmed through. When using the stovetop method, we reheat over medium heat and add a splash of water or beef broth if the sauce appears too thick.
Make-Ahead Freezer Option
We can prepare freezer meal kits by combining the raw beef and sauce ingredients in freezer bags before cooking. These kits store for up to 90 days and cook directly from frozen with adjusted cooking times. This approach transforms our pressure cooker Mongolian beef into the ultimate meal prep solution.
| Storage Method | Duration | Container Type |
|---|---|---|
| Refrigerator | 3-4 days | Airtight containers |
| Freezer | 3-4 months | Freezer-safe containers or bags |
| Freezer meals (uncooked) | 90 days | Heavy-duty freezer bags |


Recipe Variations
 7")
We love how adaptable this pressure cooker Mongolian beef recipe becomes with simple ingredient swaps and additions. These variations help you customize the dish to match your family’s preferences and dietary needs.
Spice Level Adjustments
We can easily control the heat level in our Mongolian beef to suit different taste preferences. For those who enjoy mild flavors, we simply omit the red pepper flakes entirely and keep the garlic and ginger amounts moderate.
To increase the spice level, we add 1/2 to 1 teaspoon of red pepper flakes during the sautéing step with the garlic. Fresh sliced chili peppers work beautifully too – we add 1 to 2 thinly sliced jalapeños or serrano peppers directly to the pressure cooker with the sauce ingredients.
We can also adjust the garlic and ginger quantities to create a more pungent or mellow flavor profile. For extra heat without changing the overall flavor balance, we sometimes add a dash of sriracha or chili garlic sauce to the finished dish.
Vegetable Add-Ins
Adding vegetables transforms our Mongolian beef into a complete one-pot meal while boosting nutritional value. We have two main approaches for incorporating vegetables depending on the cooking time they require.
For quick-cooking vegetables like bell peppers, snap peas, or thinly sliced carrots, we add them after pressure cooking is complete. We simply turn on the sauté function and cook these vegetables for 2 to 3 minutes until crisp-tender before thickening the sauce with cornstarch.
Heartier vegetables like broccoli florets or thick carrot slices can go directly into the pressure cooker with the beef and sauce. When adding these vegetables, we increase the liquid by 2 to 3 tablespoons to ensure proper steam generation.
Mushrooms and water chestnuts provide excellent texture contrasts to the tender beef. We add sliced mushrooms with the garlic during the sautéing step, while water chestnuts go in during the final sauté phase to maintain their signature crunch.
Green onions remain our favorite garnish, but we sometimes sauté the white parts with the garlic and reserve the green tops for fresh finishing flavor.

Conclusion
This pressure cooker Mongolian beef recipe transforms busy weeknights into something special. We’ve shown you how simple ingredients and smart techniques create restaurant-quality results at home.
The beauty lies in its versatility – adjust spices to your taste or add vegetables for extra nutrition. With proper storage tips and make-ahead strategies we’ve covered you’ll always have a delicious meal ready.
Your pressure cooker just became your secret weapon for creating tender flavorful beef that rivals any takeout. We’re confident this recipe will become a regular in your dinner rotation.
Frequently Asked Questions
How long does it take to cook Mongolian beef in a pressure cooker?
The total cooking time is under 30 minutes. The pressure cooking itself takes 11-12 minutes, plus additional time for prep, browning the beef, and allowing the pressure to naturally release. This makes it significantly faster than traditional cooking methods.
What cut of beef works best for pressure cooker Mongolian beef?
Flank steak is the recommended cut, using 1.5 to 2 pounds. It should be sliced thin against the grain to break down muscle fibers for maximum tenderness. The pressure cooking process transforms this tougher cut into perfectly tender beef.
Can I make this recipe ahead of time?
Yes! You can slice and coat the beef with cornstarch up to 24 hours in advance. The finished dish stores in the refrigerator for 3-4 days or freezes for 3-4 months. You can even prepare freezer meal kits with raw ingredients for up to 90 days.
What equipment do I need to make pressure cooker Mongolian beef?
You’ll need a 6-quart or larger pressure cooker, sharp chef’s knife, cutting board, mixing bowls, measuring cups and spoons, wooden spoon, and a ladle. Most home cooks already have these basic kitchen tools, making this recipe very accessible.
How do I prevent the beef from becoming tough?
Cut the flank steak against the grain into thin strips and coat with cornstarch (velveting technique). Brown the beef in small batches to avoid overcrowding, and follow the exact pressure cooking time of 11-12 minutes for optimal tenderness.
What should I serve with Mongolian beef?
Steamed white rice is the classic pairing as it absorbs the rich sauce perfectly. For sides, try steamed broccoli, snap peas, or baby bok choy. For a low-carb option, serve over cauliflower rice instead of regular rice.
Can I adjust the spice level in this recipe?
Absolutely! Omit red pepper flakes for a milder version, or add fresh chili peppers for more heat. You can also adjust the amount of red pepper flakes to suit your taste preferences, making it as mild or spicy as desired.
How do I store and reheat leftover Mongolian beef?
Cool completely before storing in airtight containers. Refrigerate for 3-4 days or freeze for 3-4 months. When reheating, add a splash of water if the sauce has thickened too much. Reheat in microwave or on stovetop until heated through.
Why do I need to coat the beef in cornstarch?
Coating beef in cornstarch is called “velveting” – it protects the meat during cooking, keeping it tender, and helps create the signature glossy sauce. This technique is essential for achieving restaurant-quality results at home.
Can I add vegetables to this recipe?
Yes! Add quick-cooking vegetables like bell peppers or snap peas during the last few minutes of cooking. For heartier vegetables like carrots or broccoli, add them with the beef before pressure cooking. Mushrooms and water chestnuts add great texture variety.


