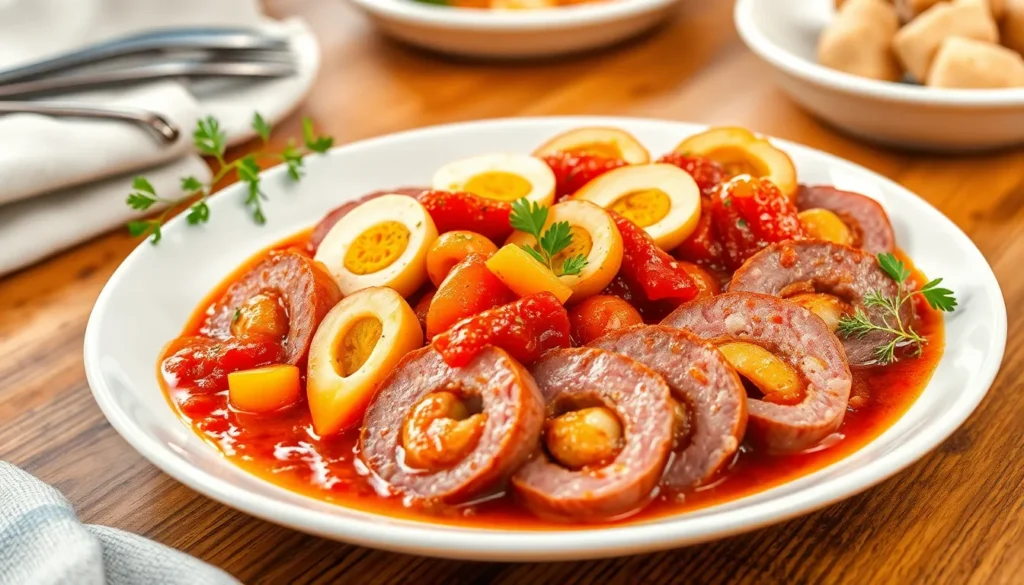
Morcon transforms ordinary beef into an extraordinary Filipino masterpiece that’ll make your kitchen smell like pure comfort. This traditional rolled beef dish stuffs tender flank steak with a savory medley of vegetables and hard-boiled eggs before braising it to perfection in a rich tomato-based sauce.
We’re obsessed with how this dish brings families together around the dinner table. Originally brought to the Philippines by Spanish colonizers the recipe has evolved into something uniquely Filipino with local ingredients and cooking techniques that create layers of incredible flavor.
What makes morcon truly special is its impressive presentation – when you slice through the rolled beef you’ll reveal beautiful spirals of colorful filling that look almost too gorgeous to eat. Don’t worry though because the taste is even better than the appearance and we’re here to show you exactly how to master this showstopping recipe.
What Is Morcon
Morcon stands as one of the Philippines’ most elegant beef dishes that transforms simple ingredients into an impressive culinary masterpiece. We define this traditional Filipino recipe as thinly sliced beef flank steak that gets stuffed with a colorful medley of vegetables and hard-boiled eggs before being rolled tightly and braised in a rich tomato-based sauce.
The dish showcases its Spanish colonial influence through its cooking technique and presentation style. Spanish settlers introduced the concept of stuffed rolled meats to the Philippines during the 16th century. Filipino cooks adapted this European method by incorporating local ingredients like carrots, green beans, and pickles into the filling mixture.
Our beloved Morcon creates stunning visual appeal when sliced, revealing beautiful spiral patterns of orange carrots, green vegetables, and golden egg yolks against the deep brown beef. Each cross-section displays these vibrant colors that make the dish perfect for special occasions and family gatherings.
The preparation involves carefully pounding the beef to create a thin, pliable sheet that can wrap around the filling without tearing. We secure the rolled meat with kitchen twine or toothpicks to maintain its shape during the slow braising process. The cooking method allows tough flank steak to become tender while the filling ingredients meld together to create complex flavors.
Traditional Filipino households often prepare Morcon during holidays, birthdays, and important celebrations because of its impressive appearance and rich taste. The dish requires patience and attention to detail, making it a labor of love that demonstrates care for family and guests.
Modern variations of Morcon include different vegetable combinations and sauce preparations, but the core concept remains unchanged. We continue to honor this time-tested recipe that bridges Spanish culinary traditions with distinctly Filipino flavors and ingredients.
Ingredients

We’ll organize our morcon ingredients into three essential categories to ensure perfect results. Each component plays a crucial role in creating this beloved Filipino beef roll with its signature colorful filling and rich tomato sauce.
For the Beef Roll
- 2 pounds beef (brisket, flank steak, bottom round, or sirloin), thinly sliced about ⅓-inch thick
- ½ cup soy sauce
- ¼ cup lemon or calamansi juice
- Ground black pepper, to taste
- ½ cup all-purpose flour for coating
- Cooking oil for searing
- Kitchen or butcher’s twine for tying the roll if needed
For the Filling
- 1 medium carrot, peeled and cut into sticks or batons approximately 1 cm thick
- 3 hard-boiled eggs, peeled and sliced lengthwise into quarters
- 2-4 pieces hotdogs or york ham, cut into sticks/batons
- 1-3 pieces whole sweet pickles, cut into long strips approximately 1 cm thick
- 80 grams cheese, cut into strips (optional for added flavor)
For the Sauce
- 2 cloves garlic, minced
- 1 medium onion, chopped
- 1 can diced tomatoes or fresh tomatoes, chopped
- 2 cups water or beef broth
- Salt and pepper, to taste
Equipment Needed

Creating perfect Morcon requires exact tools that ensure our beef rolls maintain their shape and cook evenly throughout the braising process. We recommend gathering these essential pieces of equipment before beginning our preparation.
Meat tenderizer serves as our most crucial tool for transforming tough beef cuts into workable thin sheets. This mallet-style tool allows us to pound the beef flank steak or bottom round into uniform thickness, creating the foundation for our rolls.
Kitchen twine or butcher’s twine becomes indispensable for securing our filled beef rolls during cooking. We need approximately 3-4 feet of twine to properly tie each roll, preventing the filling from escaping during the braising process.
Large skillet or heavy-bottomed pan accommodates the browning phase of our Morcon preparation. We require a pan large enough to hold multiple beef rolls without overcrowding, ensuring even browning on all surfaces.
Dutch oven or heavy pot with tight-fitting lid provides the ideal environment for slow braising our rolled beef. This equipment maintains consistent heat distribution and retains moisture throughout the 50-60 minute cooking process.
Sharp knife and sturdy cutting board help precise slicing of our filling ingredients and final presentation cuts. We need these tools for preparing carrots, pickles, eggs, and creating clean serving portions.
| Equipment | Purpose | Size Requirement |
|---|---|---|
| Meat tenderizer | Flattening beef | Standard mallet style |
| Kitchen twine | Securing rolls | 3-4 feet per roll |
| Heavy skillet | Browning beef | Large enough for multiple rolls |
| Dutch oven | Braising | 4-6 quart capacity |
| Sharp knife | Ingredient prep | 8-inch chef’s knife |
Measuring cups and spoons ensure accurate proportions for our marinade and sauce components. We rely on these tools to maintain consistency in flavor development across multiple preparations.
Small bowl for dredging flour streamlines our coating process before browning the beef rolls. This dedicated container prevents contamination of our main flour supply and provides easy access during cooking.
Having these tools properly organized and within reach transforms our Morcon preparation from challenging to manageable, allowing us to focus on technique rather than searching for equipment mid-recipe.
Instructions

We’ll guide you through each step to create this stunning Filipino dish that transforms simple beef into an elegant centerpiece. Follow our detailed process to achieve perfectly tender rolls with vibrant filling spirals.
Prep the Beef
We start by placing 2 pounds of beef bottom round or flank steak on a clean cutting board. Using a meat tenderizer, we pound each slice until it reaches about 6 x 5 inches and becomes uniformly thin. Next, we prepare our marinade by combining soy sauce, fresh lemon or calamansi juice, and ground black pepper in a shallow dish.
We submerge the flattened beef slices in this marinade for at least 10 minutes, allowing the flavors to penetrate the meat. After marinating, we drain the beef and set it aside on a clean plate, ready for assembly.
Prepare the Filling
We begin by peeling and cutting carrots into lengthwise batons, ensuring they’re uniform in size for even rolling. Our hard-boiled eggs get sliced into wedges, while we cut the bacon or ham into manageable strips. Sweet pickles are halved lengthwise, and hotdogs or sausages are sliced into thin batons.
We arrange all filling ingredients on separate plates or bowls for easy access during assembly. This organized approach ensures smooth rolling without fumbling for ingredients.
Assemble the Morcon
We lay each marinated beef slice flat on our work surface, positioning it with the grain running horizontally. Starting about an inch from the bottom edge, we place a strip of carrot, followed by bacon or ham, pickle pieces, egg wedges, and sausage batons. Each ingredient should run parallel to the bottom edge of the beef.
We begin rolling from the filled edge, keeping the roll tight and ensuring the filling stays centered. Once rolled completely, we secure each morcon with kitchen twine, tying it at both ends and once in the middle to maintain its cylindrical shape during cooking.
Sear the Beef Roll
We lightly dredge each tied beef roll with all-purpose flour, coating all surfaces evenly. In a large skillet, we heat cooking oil over medium-high heat until it shimmers. Carefully, we place the floured rolls in the hot oil, turning them every 2-3 minutes to achieve a light to medium brown color on all sides.
This searing process takes approximately 8-10 minutes total and creates a flavorful crust that seals in the juices. We transfer the browned rolls to a plate and set them aside while preparing the braising liquid.
Braise the Morcon
We clean our skillet and heat a small amount of oil over medium heat. Minced garlic and diced onion go into the pan first, cooking until fragrant and translucent. Diced tomatoes and tomato sauce follow, creating a rich base for our braising liquid.
We add water and beef broth cubes, stirring to dissolve completely. The seared morcon rolls return to the pan, and we bring the liquid to a gentle simmer. Covering the pan, we reduce heat to low and cook for 50-60 minutes, checking occasionally and adding water as needed to maintain proper sauce consistency.
Make the Sauce
We remove the tender morcon rolls from the braising liquid and set them aside to rest. The remaining liquid becomes our sauce base, which we continue simmering uncovered to concentrate the flavors. Salt and pepper season the sauce to taste, while we stir occasionally to prevent sticking.
Our finished sauce should coat the back of a spoon and have a rich, tomatoey flavor enhanced by the beef drippings. We strain the sauce if desired for a smoother consistency, then keep it warm until serving time.
Cooking Tips for Perfect Morcon
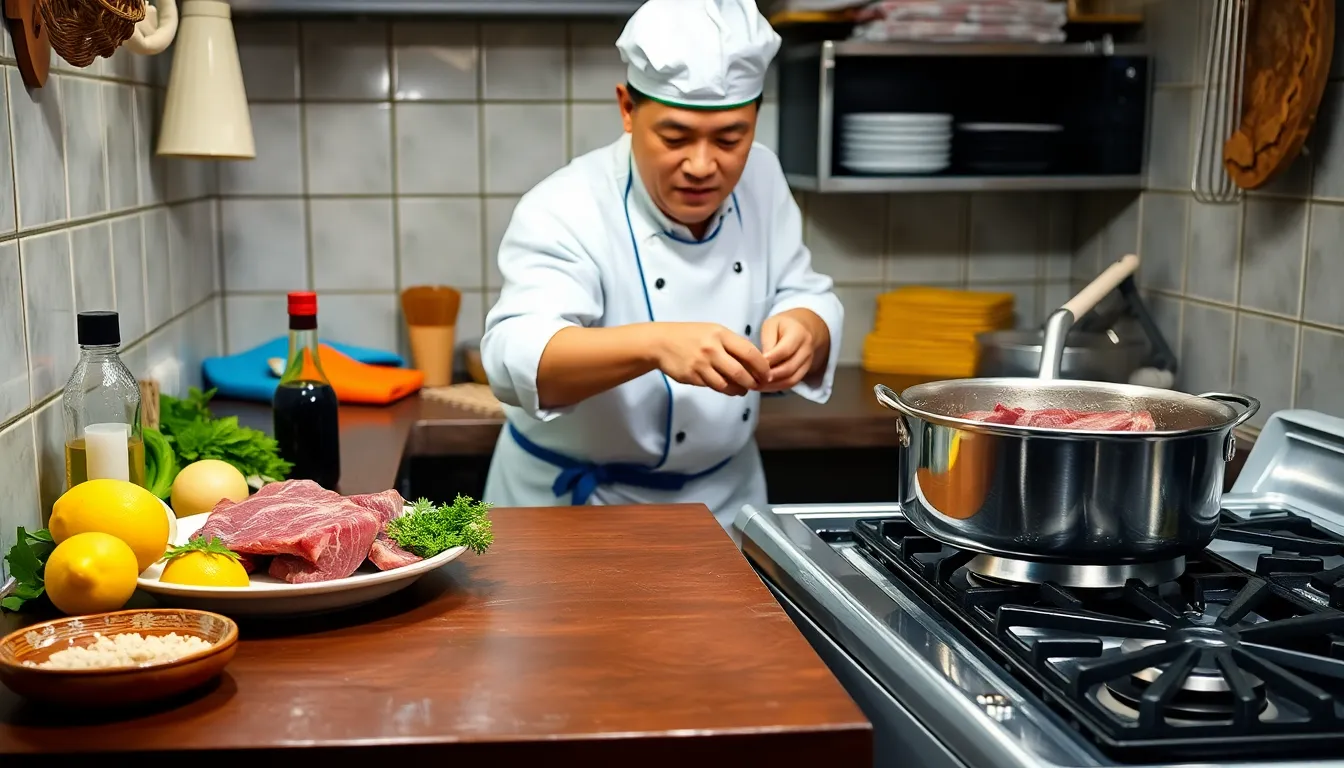
We’ve discovered several key techniques that transform good morcon into exceptional morcon through years of perfecting this beloved Filipino dish. These expert tips ensure your beef rolls achieve the tender texture and rich flavor that make this dish truly special.
Master the meat preparation by using a meat tenderizer to flatten your beef evenly. We pound the flank steak or bottom round to an even thickness throughout, which prevents uneven cooking and makes rolling much easier. This step creates the foundation for tender morcon that slices beautifully.
Allow proper marination time for maximum flavor penetration. We always marinate our beef for at least one hour in the soy sauce, calamansi juice, and pepper mixture. Longer marination periods of 2-4 hours yield even better results as the acids tenderize the meat while the seasonings infuse deep into every fiber.
Achieve perfect browning by dredging the rolled beef lightly in flour before searing. We heat our pan until it’s properly hot, then brown each roll on all sides to develop rich flavors through the Maillard reaction. This crucial step creates the deep, savory notes that distinguish restaurant-quality morcon from ordinary versions.
Secure your rolls tightly using kitchen twine to prevent filling spillage during cooking. We wrap the twine around each roll at regular intervals, ensuring the beef maintains its cylindrical shape throughout the entire braising process. Properly secured rolls cook evenly and present beautifully when sliced.
Control your braising environment by covering the pan and maintaining gentle simmering temperatures. We avoid vigorous boiling, which can make the beef tough and cause the sauce to reduce too quickly. Low, steady heat for 50-60 minutes produces fork-tender results every time.
Monitor sauce consistency throughout the cooking process by adding water as needed. We check our morcon every 15-20 minutes, adding small amounts of water when the sauce reduces too much. This prevents burning while ensuring the beef stays moist and develops its characteristic tender texture.
Test for doneness using a fork to gauge tenderness rather than relying solely on cooking time. We know our morcon is ready when the beef yields easily to gentle pressure and the internal temperature reaches safe levels. Properly cooked morcon should slice cleanly while remaining juicy inside.
Serving Suggestions

The presentation of our perfectly braised Morcon deserves as much attention as its preparation. We recommend slicing the beef rolls into 1 to 2-inch thick portions to showcase the beautiful spiral pattern of colorful fillings inside. Each slice reveals the vibrant mosaic of carrots, eggs, and pickles that makes this dish so visually striking.
Steamed white rice serves as the ideal foundation for our Morcon, allowing the rich tomato-based sauce to be fully appreciated. The neutral flavor of jasmine or long-grain rice balances the savory complexity of the braised beef without competing for attention. We suggest serving generous portions of rice alongside each helping to soak up every drop of the flavorful braising liquid.
Traditional Filipino family gatherings call for Morcon as a centerpiece dish during special occasions. The impressive presentation makes it perfect for Christmas celebrations, birthday parties, and wedding receptions where visual impact matters as much as taste. We often arrange the sliced Morcon on a large platter, drizzling the reduced sauce over the top and garnishing with fresh parsley for added color.
Complementary side dishes enhance the overall dining experience without overwhelming the star of the meal. Steamed vegetables like green beans or broccoli provide a fresh contrast to the rich beef, while a simple salad of mixed greens dressed with vinaigrette cuts through the richness. We also recommend serving warm dinner rolls or crusty bread for guests who want to savor every bit of the delicious sauce.
Temperature control ensures optimal enjoyment of our Morcon. We serve it hot, straight from the braising pot, when the beef is at its most tender and the sauce maintains its silky consistency. Warming the serving plates beforehand helps maintain the ideal temperature throughout the meal, especially important when entertaining larger groups during festive occasions.
Storage and Reheating Instructions

Proper storage of our leftover Morcon ensures we can enjoy this Filipino delicacy for days after preparation. We recommend storing the beef rolls and sauce separately in airtight containers to maintain optimal texture and flavor. This separation prevents the sauce from oversaturating the beef and keeps both components at their best quality.
Our refrigerated Morcon stays fresh for up to 3 days when stored correctly. For longer storage we can freeze the beef rolls for up to 2 months without important quality loss. We always label our containers with the preparation date to track freshness and ensure food safety.
When freezing Morcon we wrap each beef roll individually in plastic wrap before placing them in freezer-safe containers. This double protection prevents freezer burn and maintains the integrity of our carefully crafted dish. We store the sauce separately in freezer-safe bags or containers with minimal air exposure.
Thawing frozen Morcon requires patience for best results. We move the containers from freezer to refrigerator 24 hours before reheating to ensure even thawing. Room temperature thawing speeds up bacterial growth and compromises food safety.
Reheating our Morcon demands gentle heat to preserve the tender texture we worked so hard to achieve. We place the beef rolls in a pan with a small amount of the reserved sauce over medium-low heat. This method prevents the meat from drying out while warming it thoroughly.
We cover the pan during reheating to create steam that keeps the beef moist. The process takes approximately 10 to 15 minutes depending on the thickness of our rolls. We turn the rolls occasionally to ensure even heating throughout.
Testing the internal temperature helps us avoid overcooking during reheating. Our Morcon reaches the ideal serving temperature when it feels warm throughout and the sauce begins to simmer gently. We never rush this process with high heat as it toughens the carefully braised beef.
Microwave reheating works for quick portions but requires careful attention. We use 50% power and heat in 30-second intervals while checking frequently. Adding a tablespoon of sauce or broth prevents the beef from drying out during microwave reheating.
Conclusion
We’ve shared everything you need to master this stunning Filipino dish that brings families together around the dinner table. From understanding its Spanish-influenced origins to perfecting the rolling technique and braising process your Morcon will become a showstopping centerpiece for any celebration.
The key to success lies in patience and preparation. Take time to properly flatten your beef marinate for maximum flavor and secure those rolls tightly. Remember that great Morcon isn’t just about following the recipe—it’s about creating memories and honoring a tradition that’s been passed down through generations.
Whether you’re preparing this for a holiday feast or introducing friends to authentic Filipino cuisine you now have all the tools and knowledge to create restaurant-quality Morcon at home. Your guests will be impressed by those beautiful colorful spirals and rich savory flavors that make this dish truly special.
Frequently Asked Questions
What is Morcon and where does it originate from?
Morcon is a traditional Filipino dish featuring tender flank steak rolled with vegetables and hard-boiled eggs, then braised in a rich tomato-based sauce. It has Spanish colonial roots from the 16th century, when Spanish settlers introduced the cooking technique. Filipino cooks later adapted it using local ingredients like carrots, green beans, and pickles.
What ingredients do I need to make Morcon?
You’ll need three main components: beef (brisket or flank steak, soy sauce, lemon juice), filling ingredients (carrots, hard-boiled eggs, hotdogs or ham, sweet pickles, optional cheese), and sauce ingredients (garlic, onion, diced tomatoes, water or beef broth). These create the complete flavor profile of this traditional dish.
What equipment is essential for preparing Morcon?
Key tools include a meat tenderizer for flattening beef, kitchen twine for securing rolls, a large skillet for browning, and a Dutch oven for braising. You’ll also need a sharp knife, cutting board, measuring cups, and spoons. Having the right equipment ensures your beef rolls maintain their shape and cook evenly.
How do I properly assemble and roll the Morcon?
First, pound the beef to even thickness and marinate it. Arrange filling ingredients in a line across the beef, then roll tightly from one end. Secure with kitchen twine or toothpicks to prevent unrolling during cooking. Proper assembly ensures the filling stays intact and creates beautiful spiral patterns when sliced.
What are the key cooking tips for perfect Morcon?
Use a meat tenderizer for even flattening, marinate adequately for flavor, and dredge in flour before browning. Secure rolls tightly with twine, control braising temperature for tenderness, and monitor sauce consistency. Test doneness with a fork to ensure the beef is juicy and tender throughout the cooking process.
How should I serve Morcon for the best presentation?
Slice the beef rolls into 1-2 inch thick portions to showcase the colorful spiral fillings. Serve over steamed white rice to complement the rich sauce. Morcon makes an excellent centerpiece for special occasions and pairs well with steamed vegetables and fresh salads for a complete meal.
How do I store and reheat leftover Morcon?
Store beef rolls and sauce separately in airtight containers. Refrigerated Morcon stays fresh for up to 3 days, frozen for up to 2 months. Reheat gently using medium-low heat with a covered pan to create steam. For microwave reheating, use 50% power and check frequently to prevent drying out.
Can I make variations to the traditional Morcon recipe?
Yes, while the core concept remains unchanged, modern variations exist. You can substitute different vegetables, use various types of meat, or add cheese to the filling. The key is maintaining the rolling technique and braising method while incorporating your preferred ingredients to honor both tradition and personal taste.

