

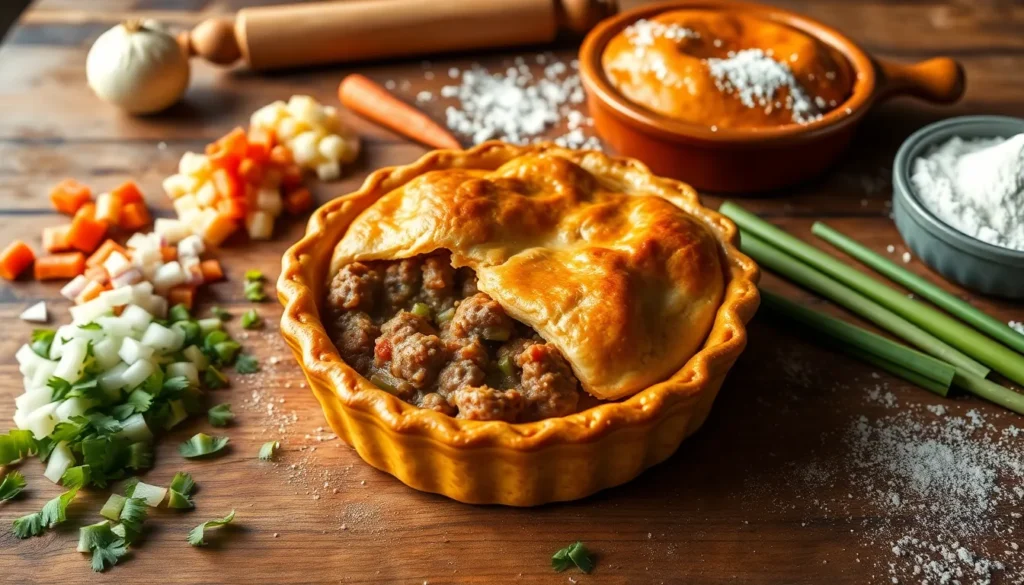
Nothing beats coming home to the aroma of a golden-crusted pot pie bubbling in the oven. Our ground beef pot pie transforms humble ingredients into pure comfort food magic that’ll have your family gathering around the dinner table in no time.
We’ve perfected this recipe to deliver maximum flavor with minimal fuss. The savory ground beef filling gets loaded with tender vegetables and enveloped in a rich gravy that’s absolutely irresistible. Whether you’re feeding a hungry crowd or meal prepping for the week ahead, this hearty dish checks all the boxes.
Ground beef pot pie isn’t just dinner – it’s a warm hug on a plate. We’ll show you how to create that perfect flaky crust and develop deep flavors that’ll make this recipe your new go-to comfort meal. Trust us, once you try this version, you’ll never go back to store-bought again.
Ingredients
We’ve carefully selected each ingredient to create the perfect balance of flavors and textures in our ground beef pot pie. These pantry staples and fresh ingredients combine to deliver restaurant-quality results in your own kitchen.
For the Filling
- 1 pound ground beef (80/20 lean-to-fat ratio)
- 1 medium yellow onion, diced (about 1 cup)
- 2 medium carrots, peeled and diced (about ¾ cup)
- 2 celery stalks, diced (about ½ cup)
- 3 cloves garlic, minced
- 2 tablespoons olive oil
- 3 tablespoons all-purpose flour
- 2 cups beef broth, low sodium
- 1 tablespoon Worcestershire sauce
- 1 teaspoon dried thyme
- 1 teaspoon dried rosemary
- ½ teaspoon smoked paprika
- 1 cup frozen peas
- 1 cup frozen corn kernels
- 2 tablespoons fresh parsley, chopped
- 1 teaspoon salt (or to taste)
- ½ teaspoon black pepper
- 2 tablespoons tomato paste
For the Crust
- 2½ cups all-purpose flour
- 1 teaspoon salt
- 1 cup unsalted butter, cold and cubed
- 6 to 8 tablespoons ice water
- 1 large egg, beaten (for egg wash)
- 1 tablespoon whole milk (for egg wash)
Equipment Needed

Creating our ground beef pot pie requires the right tools to achieve that perfect golden crust and well-cooked filling. We recommend gathering these essential items before starting your cooking process.
Essential Cookware:
- Large skillet (preferably cast iron for even heating distribution)
- 9-inch pie plate or 9″x11″ baking dish
- Rolling pin for crust preparation
- Multiple mixing bowls for ingredient organization
Preparation Tools:
- Sharp knife for scoring crust and chopping vegetables
- Pastry brush for applying egg wash
- Measuring spoons and cups for accurate portions
- Wooden spoon or spatula for stirring
Additional Equipment:
- Oven preheated to 400°F
- Microwave (optional for thawing frozen vegetables quickly)
| Equipment Type | Exact Items | Purpose |
|---|---|---|
| Cookware | Cast iron skillet, baking dish | Even cooking and proper baking |
| Prep Tools | Knife, rolling pin, mixing bowls | Ingredient preparation |
| Measuring | Spoons, cups, pastry brush | Accuracy and finishing |
Our cast iron skillet recommendation stems from its superior heat retention properties, which help achieve perfectly browned ground beef. The 9-inch pie plate works best for traditional servings, while the 9″x11″ baking dish accommodates larger family portions.
Having your pastry brush ready ensures we can apply that crucial egg wash for the golden, flaky crust that makes this pot pie irresistible. Each tool serves a exact purpose in transforming our simple ingredients into restaurant quality results.
Instructions

Now we’ll transform our carefully selected ingredients into a delicious ground beef pot pie. These step-by-step instructions will guide you through each phase to create a perfectly golden crust and savory filling.
Prep the Crust
We start by preparing our pie crust foundation. Roll out the bottom crust to fit your 9″x11″ baking dish or standard pie plate. Press the bottom crust into the baking dish ensuring it fits snugly against all sides and corners. Roll out the top crust and set it aside for later assembly. The crust should extend slightly over the edges to create a proper seal.
Prepare the Filling
Heat olive oil in our large cast iron skillet over medium heat. Add diced onions, celery, carrots, and sliced mushrooms to the heated oil. Season the vegetables with salt and pepper then sauté for 8-10 minutes until they become tender and fragrant. The vegetables should soften but maintain slight texture for the best filling consistency. Add minced garlic to the skillet and cook for another minute while stirring frequently to prevent burning.
Cook the Ground Beef Mixture
Season the ground beef with salt and pepper before adding it to our preheated skillet over medium heat. Cook the beef for about 5 minutes until no longer pink breaking it into small pieces with a wooden spoon. Remove the cooked beef from the skillet temporarily. Stir flour into the sautéed vegetables to coat them evenly. Gradually add beef broth to the flour-coated vegetables while stirring constantly. Bring the mixture to a simmer for 3-5 minutes to thicken the sauce. Add basil, oregano, Worcestershire sauce, and heavy cream to enhance the flavors. Return the ground beef to the skillet and stir in frozen peas. Taste and adjust salt and pepper as needed.
Assemble the Pot Pie
Pour the completed beef and vegetable filling into the prepared bottom pie crust in our baking dish. Spread the filling evenly to ensure consistent cooking. Cover the filling with the top crust and press the edges together to seal. Trim any excess crust leaving about 1 inch overhang. Crimp the edges with a fork or your fingers to create a decorative seal. Score the top crust with a sharp knife making several slits to allow steam to escape during baking. Whisk one egg with a tablespoon of water then brush this egg wash over the entire top crust for a golden finish.
Bake the Pot Pie
Preheat your oven to 400°F (200°C) before baking. Place the assembled pot pie on the center rack and bake uncovered for 30 to 40 minutes. The crust should turn golden brown and the filling should bubble around the edges when properly cooked. Remove from oven and let the pot pie cool for 20 minutes before serving. This cooling period allows the filling to thicken and makes slicing much easier.
Make-Ahead Instructions

We understand that busy schedules often demand flexible meal planning answers. Our ground beef pot pie recipe adapts perfectly to advance preparation methods that save precious time on hectic weeknights.
Preparing the Filling in Advance
Complete Filling Preparation: We recommend preparing the entire beef and vegetable filling up to 2 days before final assembly. After creating the filling following our recipe steps, allow it to cool completely at room temperature for approximately 30 minutes. Transfer the cooled mixture to an airtight container and refrigerate until ready to assemble your pot pie.
Proper Cooling Prevents Soggy Crusts: Never place warm filling directly into prepared pie crusts. The residual heat creates steam that softens the bottom crust and compromises the final texture we’re aiming to achieve.
Assembly and Storage Options
| Storage Method | Time Frame | Temperature | Instructions |
|---|---|---|---|
| Assembled Unbaked | 24 hours | Refrigerated | Cover tightly with plastic wrap |
| Filling Only | 2-3 days | Refrigerated | Store in airtight container |
| Complete Assembled Pie | 3 months | Frozen | Wrap in foil and freezer-safe bag |
| Filling Only | 3 months | Frozen | Freeze in freezer-safe containers |
Refrigerated Assembly: We can assemble the complete pot pie with both crusts up to 24 hours before baking. Cover the assembled pie tightly with plastic wrap to prevent the crust from drying out and absorbing refrigerator odors.
Freezing Complete Pies: For maximum convenience, we suggest assembling the entire pot pie and freezing it unbaked. Wrap the assembled pie first in plastic wrap, then aluminum foil, and place it inside a freezer-safe bag to prevent freezer burn.
Baking from Frozen
Direct from Freezer Method: Frozen pot pies require no thawing before baking. Remove all wrapping and place the frozen pie directly into a preheated 350°F oven. Extend the baking time to 45 minutes to 1 hour, covering the crust edges with foil if they brown too quickly.
Temperature Check: We always verify that the internal filling reaches 165°F using an instant-read thermometer inserted through the top crust vent holes.
Leftover Storage
Baked pot pie stores beautifully in the refrigerator for up to 4 days when covered with aluminum foil or transferred to airtight containers. We reheat individual portions in the microwave for 1-2 minutes or warm larger portions in a 350°F oven for 15-20 minutes until heated through.
Storage and Reheating Tips

Our ground beef pot pie stores beautifully for future meals, making it an excellent option for meal prep and leftovers. We recommend keeping leftover pot pie in an airtight container in the refrigerator for up to 3-4 days to maintain optimal freshness and food safety.
For longer storage periods, we suggest freezing the pot pie in a freezer-safe dish tightly covered with foil or plastic wrap. This method preserves the pot pie for up to three months while maintaining its delicious flavor and texture.
| Storage Method | Duration | Container Type |
|---|---|---|
| Refrigerated | 3-4 days | Airtight container |
| Frozen | Up to 3 months | Freezer-safe dish with foil/plastic wrap |
Reheating Refrigerated Pot Pie
We always reheat refrigerated pot pie in the oven to preserve the crispy crust texture that makes this dish so appealing. Preheat your oven to 350°F and place the pot pie inside for approximately 20-30 minutes until heated through and the crust regains its crispness.
Reheating Frozen Pot Pie
Frozen pot pie requires a slightly different approach for best results. We recommend thawing the pot pie overnight in the refrigerator before reheating to ensure even heating throughout. Once thawed, reheat in a 350°F oven for 30-40 minutes until the filling is hot and bubbly.
Microwave Considerations
While microwaving offers convenience, we advise against this method as it tends to make the flaky crust soggy. Oven reheating remains our preferred method to maintain the pot pie’s signature texture and prevent the disappointment of a limp crust that detracts from the overall dining experience.
Recipe Variations

Our classic ground beef pot pie serves as the perfect foundation for countless delicious variations. Let’s explore how simple ingredient swaps can transform this comfort food into something uniquely yours.
Different Meat Options
We recommend using lean ground beef like 90/10 for the best results since it produces less grease during cooking. Traditional pot pies often feature beef stew chunks but ground beef offers a convenient alternative that cooks faster and blends seamlessly with the gravy. Some home cooks prefer extra lean ground beef for a healthier version while others stick with regular ground beef to maintain maximum flavor. The choice between these options depends on your dietary preferences and desired richness level.
Vegetable Additions
Our standard vegetable mix includes onion, celery, carrots, mushrooms, peas, and garlic for a well-balanced flavor profile. We can easily expand this foundation by adding potatoes, green beans, corn, or asparagus depending on what’s available in your kitchen. Frozen mixed vegetables work wonderfully when fresh options aren’t on hand. Using finely diced vegetables ensures even cooking and creates a balanced texture throughout each bite. The key lies in maintaining proper proportions so no single vegetable overwhelms the others.
Crust Alternatives
Most traditional recipes call for two pie crusts to create the classic enclosed pot pie experience with both top and bottom layers. We can simplify the preparation by using just a top crust and baking the filling directly in a cast iron skillet. This variation reduces calories and makes cleanup easier while still delivering that satisfying flaky crust texture. Alternative options like puff pastry or biscuit dough can replace traditional pie crust for different flavors and textures. Each crust choice brings its own unique character to the final dish.
Serving Suggestions

Our ground beef pot pie stands perfectly as a complete meal that requires no additional sides. The rich filling combines hearty ground beef with tender vegetables in a creamy gravy, making it satisfying enough to serve on its own for dinner.
We recommend pairing this comfort food classic with warm, crusty bread to soak up any extra gravy. Soft dinner rolls or sliced sourdough work beautifully alongside each serving, adding a delightful contrast in texture.
A fresh garden salad with homemade vinaigrette provides the perfect light accompaniment to balance the richness of the pot pie. The crisp greens and tangy dressing cut through the creamy filling while adding essential nutrients to the meal.
For family gatherings, we suggest cutting the pot pie into generous squares and serving directly from the baking dish. This presentation style works especially well when using our recommended 9″x11″ baking dish, allowing for easy portioning and impressive visual appeal.
Leftover pot pie maintains its delicious flavor for several days when stored properly in the refrigerator. We store our leftovers in airtight containers for up to four days, making it an excellent option for meal planning and quick weeknight dinners.
The versatility of this dish extends to freezing as well. Our pot pie freezes beautifully for up to three months, providing a convenient homemade meal option for busy schedules. Simply thaw overnight in the refrigerator before reheating in the oven to restore the crispy crust texture.
We find that allowing the pot pie to cool for 15 to 20 minutes after baking creates the ideal serving consistency. This cooling period allows the filling to thicken properly, making it easier to slice and serve without the gravy running all over the plate.
Troubleshooting Tips

Even experienced home cooks encounter challenges when making ground beef pot pie. We’ve compiled these essential answers to help you achieve perfect results every time.
Preventing Watery Filling
Your filling becomes watery when hot ingredients meet the pastry dough too quickly. We recommend cooling the beef mixture completely before assembly or refrigerating it for 30 minutes. This simple step prevents soggy crusts and maintains the dough’s structural integrity during baking. Also, drain excess fat thoroughly after browning the ground beef to eliminate unnecessary moisture.
Fixing Crust Issues
Shrinking or tough crusts result from overworked dough or insufficient chilling time. We suggest keeping your pie dough properly chilled before rolling and handling it minimally during preparation. Roll the dough between sheets of parchment paper to prevent sticking without adding extra flour. For optimal texture, chill the assembled pot pie for 15 minutes before baking.
Improving Flavor Profile
Bland filling disappoints even when your technique is perfect. We always taste our beef mixture before assembly and adjust seasonings accordingly. Add Dijon mustard and fresh lemon juice to brighten the flavors, creating depth that transforms ordinary ingredients. Season generously with salt and pepper, remembering that the pastry will dilute some intensity.
Managing Grease Levels
Excessive grease creates an unpleasant eating experience and soggy bottom crusts. We recommend using 90/10 lean ground beef for minimal fat content while maintaining flavor. Drain the cooked beef thoroughly in a colander and pat with paper towels if necessary. This extra step ensures your pot pie remains appetizing rather than greasy.
Ensuring Proper Doneness
Underbaked filling creates food safety concerns and poor texture. We dice all vegetables uniformly to promote even cooking throughout the filling. Bake until the crust achieves golden brown color and the filling bubbles visibly around the edges. Internal temperature should reach 165°F for food safety, and the bottom crust should feel firm when gently pressed.
Preventing Overflow Issues
Overfilled pot pies create messy ovens and uneven cooking. We leave at least half an inch of space between the filling and the rim of your baking dish. Cut steam vents in the top crust to allow proper air circulation and prevent excessive pressure buildup during baking.
Conclusion
We’ve shared everything you need to create an outstanding ground beef pot pie that’ll become a staple in your recipe collection. From selecting the right ingredients to mastering the flaky crust this recipe delivers comfort food at its finest.
The beauty of this dish lies in its versatility and convenience. Whether you’re meal prepping for the week or feeding a hungry family you can customize it to your preferences and make it ahead when needed.
With our detailed instructions troubleshooting tips and storage guidance you’re equipped to create restaurant-quality results in your own kitchen. Your homemade pot pie will quickly become the go-to comfort meal that everyone requests again and again.
Frequently Asked Questions
What makes this ground beef pot pie better than store-bought versions?
This homemade pot pie features a savory filling made with seasoned ground beef, tender vegetables, and rich gravy, all wrapped in a perfectly flaky crust. The combination of fresh ingredients and careful preparation creates deeper flavors and better texture than pre-made alternatives, delivering restaurant-quality results at home.
What ingredients do I need for the filling and crust?
The filling requires ground beef, onions, carrots, celery, garlic, and seasonings. For the crust, you’ll need all-purpose flour, butter, and ice water. These simple pantry staples and fresh ingredients create a balanced, flavorful dish that’s both comforting and satisfying.
What equipment is essential for making pot pie?
Key equipment includes a large cast iron skillet for even heating, a 9-inch pie plate or 9″x11″ baking dish, sharp knife, rolling pin, mixing bowls, measuring spoons, and a pastry brush. Each tool plays a crucial role in achieving a perfectly golden crust and well-cooked filling.
Can I make this pot pie ahead of time?
Yes! You can prepare the filling up to two days in advance and refrigerate it. The entire pot pie can also be assembled and frozen unbaked for maximum convenience. This makes it perfect for meal prep and busy schedules.
How should I store and reheat leftover pot pie?
Store leftovers in an airtight container in the refrigerator for 3-4 days or freeze for up to three months. Reheat in the oven to maintain the crispy crust – avoid microwaving as it makes the crust soggy. Cover with foil if the top browns too quickly.
What variations can I make to customize the recipe?
You can use different ground meat options like lean or extra lean beef, add vegetables such as potatoes, green beans, or frozen mixed vegetables, and experiment with crust alternatives like puff pastry or biscuit dough for unique flavors and easier preparation.
What should I serve with ground beef pot pie?
The pot pie is a complete meal on its own but pairs wonderfully with warm, crusty bread or a fresh garden salad to balance its richness. Cut into generous squares for family gatherings and allow to cool 15-20 minutes for easier slicing.
How do I prevent common pot pie problems?
To prevent watery filling, cool the beef mixture before assembly. For crust issues, properly chill the dough. Adjust seasonings to improve flavor, manage grease levels during cooking, and score the top crust to prevent overflow during baking.


