

We’ve always believed that Beef Wellington shouldn’t be reserved just for special occasions or master chefs. This iconic British dish – tender beef wrapped in flaky pastry with savory mushroom duxelles – has intimidated home cooks for decades. But we’re here to change that narrative completely.
Our streamlined approach transforms this restaurant-quality masterpiece into an achievable weeknight dinner. We’ve eliminated the fussy techniques and unnecessary steps while keeping all the flavors that make Beef Wellington so irresistible. The result? A show-stopping meal that’ll have your family thinking you’ve been hiding culinary secrets.
What makes our version truly special isn’t just the simplified method – it’s how we’ve maintained that perfect balance of buttery pastry, earthy mushrooms, and perfectly cooked beef. You’ll discover that creating this elegant dish at home is far more manageable than you ever imagined. Let’s prove that impressive doesn’t have to mean impossible.
Ingredients
We’ve organized our ingredients into three essential components to make this impressive dish manageable. Each section builds upon the others to create the perfect balance of flavors and textures.
For the Beef
- 2 pounds center-cut beef tenderloin (trimmed and tied)
- 2 tablespoons olive oil
- 2 tablespoons Dijon mustard
- 1 teaspoon kosher salt
- 1/2 teaspoon freshly ground black pepper
- 2 tablespoons fresh thyme leaves
For the Mushroom Duxelles
- 1 pound mixed mushrooms (cremini and shiitake work best)
- 2 shallots (finely minced)
- 4 cloves garlic (minced)
- 1/2 cup dry white wine
- 2 tablespoons butter
- 2 tablespoons fresh parsley (chopped)
- 1 teaspoon fresh thyme
- 1/2 teaspoon salt
- 1/4 teaspoon black pepper
For the Assembly
- 1 sheet frozen puff pastry (thawed according to package directions)
- 8 thin slices prosciutto
- 2 egg yolks (beaten for egg wash)
- 1 tablespoon water
- Coarse sea salt for sprinkling
Equipment Needed

Success with our easy Beef Wellington recipe depends on having the right tools at hand. We recommend gathering these essential pieces of equipment before starting our cooking process to ensure smooth preparation and professional results.
Essential Cooking Tools:
- Large skillet or frying pan for searing the beef
- Rolling pin for working with puff pastry
- Baking sheet or sheet pan for oven cooking
- Pastry brush for applying egg wash
- Food processor for chopping mushrooms efficiently
Specialized Equipment:
- Oven preheated to proper temperature
- Optional lattice pastry cutter for decorative touches
Our food processor becomes particularly valuable when preparing the mushroom duxelles. This tool transforms what could be tedious hand chopping into quick work, ensuring uniform texture throughout our mushroom mixture. The large skillet serves double duty as we use it first for searing the beef tenderloin and later for cooking down our mushroom mixture until all moisture evaporates.
We find that a quality pastry brush makes all the difference when applying our egg wash. This tool ensures even coverage across the puff pastry surface, creating that beautiful golden finish we want in our final Wellington. The rolling pin helps us achieve the proper pastry thickness and dimensions needed to wrap our beef completely.
Having these tools ready before we begin keeps our workflow efficient and prevents any interruptions during critical cooking stages. Each piece of equipment plays a exact role in achieving the perfect balance of textures and flavors that make our Beef Wellington both impressive and delicious.
Prep Work

With our ingredients and equipment ready, we can tackle the three essential preparation steps that form the foundation of our Beef Wellington. This organized approach ensures each component is perfectly prepared before assembly.
Preparing the Beef Tenderloin
We start by selecting a 3-pound center-cut beef tenderloin and trimming away any silverskin for a clean presentation. Kitchen twine becomes our best friend here as we tie the tenderloin in several spots to maintain its shape during cooking.
Generous seasoning with kosher salt and pepper creates the flavor base we need. Our skillet heated with olive oil should reach nearly smoking temperature before we sear the beef on all sides for about 2 minutes per side, including the ends. The searing process locks in juices and develops a beautiful crust.
After the beef cools completely, we coat all surfaces generously with Dijon mustard. The mustard adds tangy flavor while creating a barrier that prevents the pastry from becoming soggy. Chilling the prepared beef in the refrigerator helps set the mustard coating.
Making the Mushroom Duxelles
Our mushroom mixture requires approximately 32 ounces of mushrooms, whether we choose white button, cremini, or wild varieties. A food processor gives us the fine texture we need by chopping the mushrooms efficiently.
Four minced shallots, 2 teaspoons of garlic, and fresh thyme leaves from about 5 sprigs complete our aromatics. We melt 4 tablespoons of unsalted butter in our skillet over medium heat before adding the mushroom mixture, shallots, garlic, and thyme.
Seasoning with kosher salt and black pepper enhances the natural flavors. The cooking process requires patience as we slowly cook the mixture until all moisture evaporates and it begins sticking slightly to the pan bottom. This step prevents sogginess in our final Wellington.
Adding 4 teaspoons of dry sherry provides an optional flavor boost. We transfer the finished duxelles to a bowl and chill it thoroughly before assembly.
Preparing the Puff Pastry
Two boxes of frozen puff pastry dough, totaling about 34 ounces, need complete thawing before we begin. Rolling out one sheet on our baking sheet creates the base that will wrap around our beef.
Fourteen thin slices of chilled prosciutto get layered in overlapping fashion, creating a protective wrap on the pastry. The prosciutto adds saltiness and helps contain the beef juices.
We spread our chilled mushroom duxelles evenly over the prosciutto layer, ensuring complete coverage. Placing the Dijon-coated beef tenderloin on top of the duxelles positions everything for wrapping.
The pastry wraps tightly around the beef, with edges sealed using beaten egg wash made from 3 eggs. Excess pastry gets trimmed away, though we can save decorative pieces for garnish. Glazing the entire pastry exterior with more beaten egg wash ensures our golden, crispy crust.
A final chill of at least 30 minutes, or up to 24 hours, allows the Wellington to set its shape before baking.
Instructions

With our ingredients prepped and equipment ready we can begin creating this impressive centerpiece dish. Each step builds upon the previous one to ensure our Beef Wellington achieves the perfect balance of textures and flavors.
Searing the Beef
We start by generously seasoning our beef tenderloin with kosher salt and black pepper on all sides. Heat olive oil in our large skillet over medium-high heat until it shimmers. Place the seasoned beef in the hot pan and sear for 2-3 minutes per side until we achieve a deep golden-brown crust on all surfaces. The searing process locks in the beef’s natural juices while creating the foundation flavors for our Wellington.
Remove the seared beef from heat and allow it to cool slightly before brushing all surfaces with Dijon mustard. This mustard coating adds tangy flavor while helping our prosciutto and mushroom layers adhere properly to the meat. Sprinkle fresh thyme leaves over the mustard-coated beef for an aromatic herb accent.
Cooling and Chilling
We must allow our beef to cool completely to room temperature before proceeding with assembly. During this cooling period we prepare our mushroom duxelles by heating butter in the same skillet over medium heat. Add our finely chopped mushrooms, shallots, and garlic to the pan.
Cook the mushroom mixture for 5-8 minutes, stirring frequently until all moisture evaporates and the mixture becomes deeply caramelized. The mushrooms should look dry and concentrated rather than wet or steamy. Stir in chopped parsley, fresh thyme, salt, and pepper before removing from heat to cool.
Once both components reach room temperature we wrap the mustard-coated beef with prosciutto slices, overlapping them slightly to create complete coverage. Spread our cooled mushroom duxelles evenly over the prosciutto layer. Chill this wrapped beef in the refrigerator for at least 20 minutes to firm up the layers and make handling easier during pastry assembly.
Assembling the Wellington
We roll out our thawed puff pastry on a lightly floured surface into a rectangle large enough to completely encase our beef. The pastry should extend about 2 inches beyond the beef on all sides to ensure proper sealing. Remove our chilled beef from the refrigerator and position it seam-side down in the center of the pastry.
Carefully fold the pastry around the beef, starting with the longer sides and then tucking in the shorter ends. We want to create a tight seal without stretching the pastry too thin. Press the seams together firmly and brush the edges with our beaten egg wash to help create a strong bond.
Wrapping in Puff Pastry
Position our assembled Wellington seam-side down on a parchment-lined baking sheet. Brush the entire pastry surface with egg wash to achieve that signature golden-brown finish during baking. We can score decorative patterns lightly into the pastry surface without cutting through to the filling beneath.
Place the Wellington in our preheated 425°F oven and bake for 35-45 minutes until the pastry turns deep golden brown. An instant-read thermometer inserted into the center should read 105-110°F for medium-rare beef. Allow the Wellington to rest uncovered for 20 minutes after baking, during which the internal temperature will rise to 130-135°F and the juices will redistribute throughout the meat.
Directions for Baking

Now that we’ve assembled our Wellington perfectly, we’re ready to transform it into the golden masterpiece that makes this dish so impressive. The baking process requires precise temperature control and timing to achieve that perfect balance of crispy pastry and tender beef.
Preheating and Setup
We start by preheating our oven to 400°F (200°C) to ensure even cooking throughout the pastry while properly roasting the beef inside. This temperature creates the ideal environment for achieving both a crispy exterior and juicy interior without overcooking either component.
We prepare our baking sheet by lining it with parchment paper to prevent sticking and ensure easy cleanup after baking. Position the rack in the center of the oven to allow proper air circulation around our Wellington during the cooking process.
Baking Temperature and Time
We bake our wrapped Beef Wellington at the consistent temperature of 400°F (200°C) for approximately 35 to 45 minutes. The exact timing depends on the size of our tenderloin and our desired level of doneness.
For medium-rare results, we typically find that 35 minutes provides the perfect balance of cooked pastry and tender beef. Larger tenderloins may require the full 45 minutes to reach the proper internal temperature while ensuring the puff pastry achieves that signature golden-brown color.
Checking for Doneness
We use a meat thermometer inserted into the center of our Wellington to accurately determine doneness before slicing. This step prevents overcooking and ensures we achieve the perfect texture every time.
| Doneness Level | Internal Temperature |
|---|---|
| Rare | 120-125°F |
| Medium-rare | 130-135°F |
| Medium | 140-145°F |
We allow our Wellington to rest for 10 to 15 minutes after removing it from the oven. This resting period lets the juices redistribute throughout the meat, preventing them from running out when we slice.
The combination of properly cooked mushroom duxelles and chilled components before baking ensures we achieve a crisp puff pastry exterior without any sogginess while maintaining that juicy, tender beef center that makes this dish so remarkable.
Resting and Serving

The final steps of our Beef Wellington journey require patience and proper technique to preserve all the work we’ve accomplished. These crucial moments ensure our dish delivers the perfect combination of textures and flavors.
Proper Resting Time
We must allow our Beef Wellington to rest for at least 20 minutes after removing it from the oven. This essential waiting period allows the juices to redistribute throughout the beef tenderloin, preventing them from running out when we slice into the pastry. The resting time also helps the internal temperature stabilize and gives the puff pastry a chance to set properly.
During this rest period, we can prepare our side dishes or simply admire our golden-brown creation. The Wellington will remain warm throughout this time, and the internal temperature may even rise slightly due to carryover cooking. We recommend placing the Wellington on a cutting board and loosely tenting it with foil if needed to maintain warmth.
Slicing Techniques
We achieve clean, professional-looking slices by using a sharp, serrated knife rather than a straight-edged blade. The serrated edge cuts through the flaky puff pastry without crushing or tearing it, while also maintaining the integrity of the delicate mushroom duxelles layer inside.
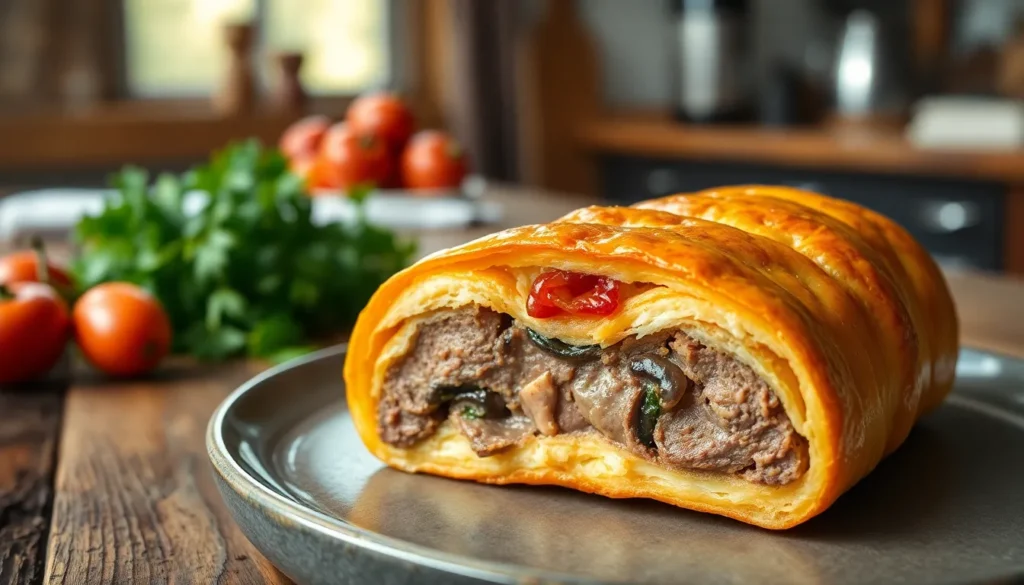
Our slicing technique begins with gentle, sawing motions rather than pressing down forcefully. We cut the Wellington into even slices, approximately 1 to 1.5 inches thick, which showcases the beautiful layers while providing substantial portions. Each slice should display the golden pastry exterior, the dark mushroom duxelles, the prosciutto wrapper, and the perfectly cooked pink beef center.
We serve immediately after slicing to maintain the best texture contrast between the crispy pastry and tender beef. The mushroom duxelles should appear concentrated and flavorful, not soggy, which indicates we properly removed all moisture during cooking and maintained proper chilling throughout assembly.
Make-Ahead Tips

Planning ahead transforms Beef Wellington from a stressful last-minute challenge into an elegant dinner party centerpiece. We recommend preparing the mushroom duxelles 1-2 days in advance to streamline your cooking process. Store the cooled duxelles in an airtight container in the refrigerator until ready to use.
The beef tenderloin benefits from advance preparation as well. Sear the seasoned beef and allow it to cool completely before wrapping. We suggest assembling the entire Wellington up to 24 hours before your planned baking time. Wrap the completed Wellington tightly in plastic wrap and refrigerate until ready to bake.
Remove the assembled Wellington from the refrigerator 20-30 minutes before baking to ensure even cooking throughout. This temperature adjustment prevents the center from remaining too cold while the pastry browns to perfection.
| Component | Advance Prep Time | Storage Method |
|---|---|---|
| Mushroom Duxelles | 1-2 days ahead | Refrigerated in airtight container |
| Assembled Wellington | Up to 24 hours | Wrapped and refrigerated |
| Seared Beef | Same day as assembly | Cooled to room temperature |
Individual mini Beef Wellingtons offer exceptional convenience for entertaining. Assemble these smaller portions at least 1 hour and up to 24 hours in advance. The individual servings bake more quickly and present beautifully for special occasions.
Avoid fully cooking and reheating Beef Wellington as this creates soggy pastry that compromises the dish’s signature texture contrast. Fresh baking delivers the optimal crispy exterior and tender interior that defines exceptional Beef Wellington.
Storage Instructions

We understand that Beef Wellington often yields generous portions, making proper storage essential for maintaining its quality and safety. Our testing shows that refrigerated leftovers maintain their best texture and flavor when stored correctly for up to 3 days.
Refrigerating Leftovers
Cool your Beef Wellington completely to room temperature before storage. We recommend placing leftover portions in an airtight container within 2 hours of cooking to prevent bacterial growth. Store in the refrigerator for 2 to 3 days maximum, ensuring the container seals tightly to preserve moisture and prevent the pastry from becoming soggy.
Freezing for Long-Term Storage
Freezing extends storage life significantly when done properly. Allow the Wellington to cool completely before wrapping individual portions tightly in aluminum foil. Place the wrapped portions in freezer-safe bags, removing as much air as possible to prevent freezer burn. Properly stored frozen Beef Wellington maintains quality for up to 3 months.
Reheating Refrigerated Portions
Restore the crispy pastry texture by reheating in a preheated 300°F (149°C) oven. Place portions on a baking sheet and heat for 15-20 minutes until the pastry becomes crisp and the meat warms through. Monitor closely to prevent overcooking, which can dry out the beef.
Reheating Frozen Wellington
Thaw frozen portions in the refrigerator for at least 12 hours before reheating. Never attempt to reheat from frozen, as this creates uneven heating and soggy pastry. Once thawed, reheat at 350°F for approximately 25 minutes until the pastry turns golden and the interior heats completely.
| Storage Method | Temperature | Duration | Reheating Instructions |
|---|---|---|---|
| Refrigerated | 32-40°F | 2-3 days | 300°F for 15-20 minutes |
| Frozen | 0°F or below | Up to 3 months | Thaw 12+ hours, then 350°F for 25 minutes |
Important Safety Guidelines
Never refreeze previously thawed Beef Wellington, as this compromises both quality and food safety. The repeated temperature changes break down the meat fibers and create potential for harmful bacterial growth. Always use a food thermometer to ensure reheated portions reach an internal temperature of 165°F before serving.
Conclusion
We’ve shown you that creating this restaurant-quality dish at home isn’t as intimidating as it seems. With our streamlined approach and detailed guidance you’ll confidently master the techniques that make Beef Wellington truly spectacular.
The key to success lies in proper preparation and timing. By organizing your ingredients ahead of time and following our step-by-step process you’ll achieve that perfect balance of crispy pastry and tender beef that makes this dish legendary.
Now it’s time to gather your ingredients and start cooking. Your dinner guests will be amazed when you present this elegant centerpiece and you’ll have the satisfaction of knowing you’ve conquered one of culinary’s most impressive challenges.
Frequently Asked Questions
Can I make Beef Wellington ahead of time?
Yes, you can prepare Beef Wellington in advance. Make the mushroom duxelles 1-2 days ahead and store it refrigerated. The entire Wellington can be assembled up to 24 hours before baking. Remove it from the refrigerator 20-30 minutes before cooking for even results. This makes it perfect for dinner parties.
What temperature should I cook Beef Wellington?
Bake Beef Wellington at 400°F (200°C) for 35-45 minutes, depending on the size of your tenderloin and desired doneness. Use a meat thermometer to check internal temperature: 125°F for rare, 135°F for medium-rare, and 145°F for medium. Always let it rest 10-15 minutes after baking.
How do I store leftover Beef Wellington?
Cool the Wellington to room temperature, then refrigerate in an airtight container for up to 3 days. For longer storage, wrap individual portions in aluminum foil and freeze for up to 3 months. Never refreeze previously thawed Wellington for food safety reasons.
What equipment do I need to make Beef Wellington?
Essential tools include a large skillet for searing, rolling pin for pastry, baking sheet, pastry brush for egg wash, and food processor for chopping mushrooms. A meat thermometer is crucial for checking doneness. Having the right equipment ensures professional results and smooth preparation.
How do I slice Beef Wellington properly?
Use a sharp, serrated knife and gentle sawing motions to maintain the pastry’s integrity. Let the Wellington rest for at least 20 minutes after baking to allow juices to redistribute. Slice with confidence to showcase the beautiful layers, and serve immediately for the best texture contrast.
Can I make individual Beef Wellingtons?
Yes, mini Beef Wellingtons are a great option for convenience and portion control. They’re perfect for dinner parties and cook faster than a full-sized Wellington. Follow the same preparation steps but adjust baking time accordingly, as smaller portions will cook more quickly.


