

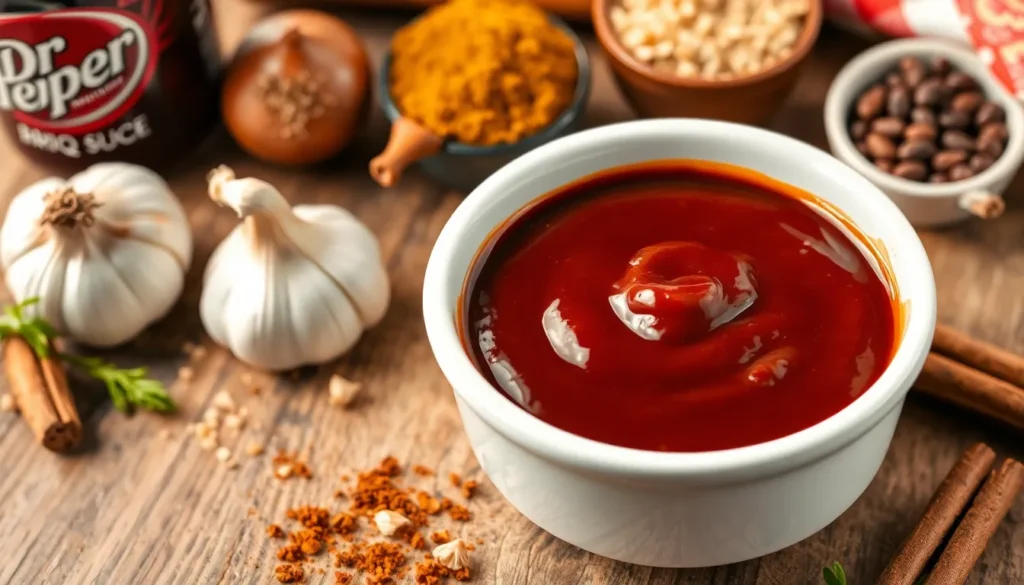
We’ve discovered the secret to transforming your backyard barbecue into something extraordinary: Dr Pepper BBQ sauce. This unique twist on traditional barbecue sauce combines the beloved soda’s signature blend of 23 flavors with tangy and smoky elements that’ll make your taste buds dance.
What started as a creative experiment in Southern kitchens has become a game-changing condiment that’s taking the grilling industry by storm. The caramel notes and subtle spice complexity of Dr Pepper create an incredibly rich base that caramelizes beautifully on grilled meats while adding depth you simply can’t achieve with store-bought sauces.
We’re about to show you how to create this liquid gold in your own kitchen using simple ingredients you probably already have. Whether you’re glazing ribs, basting chicken, or looking for the perfect dipping sauce for your next cookout, this Dr Pepper BBQ sauce recipe will become your new secret weapon for unforgettable flavors.
Ingredients
Creating our signature Dr Pepper BBQ sauce requires carefully selected ingredients that work together to deliver those distinctive 23 flavors we all crave. We’ve organized these ingredients in the order you’ll use them to streamline your cooking process.
Base Ingredients
- 1 cup Dr Pepper soda (regular, not diet)
- 1 cup ketchup
- 1/2 cup apple cider vinegar
- 1/4 cup brown sugar (packed)
- 2 tablespoons Worcestershire sauce
- 2 tablespoons molasses
Flavor Enhancers
- 1 tablespoon yellow mustard
- 1 tablespoon soy sauce
- 1 teaspoon liquid smoke
- 1 teaspoon garlic powder
- 1 teaspoon onion powder
- 1/2 teaspoon smoked paprika
Spice Blend
- 1/2 teaspoon black pepper (freshly ground)
- 1/2 teaspoon cayenne pepper
- 1/4 teaspoon ground cumin
- 1/4 teaspoon chili powder
- 1/8 teaspoon ground cloves
- Salt to taste
Our recipe relies heavily on the Dr Pepper’s unique flavor profile as the foundation. Make sure you’re using regular Dr Pepper rather than diet versions since the sugar content plays a crucial role in achieving the proper consistency and caramelization. Fresh spices will deliver more robust flavors than older seasonings that may have lost their potency over time.
The molasses adds depth and richness that complements the soda’s complexity perfectly. We recommend using unsulfured molasses for the cleanest flavor profile. Apple cider vinegar provides the necessary acidity to balance the sweetness while helping tenderize whatever proteins you’re planning to sauce.
Equipment Needed

Creating our signature Dr Pepper BBQ sauce requires minimal kitchen tools that most home cooks already have on hand. We recommend using a medium or large pot or deep pan for cooking the sauce to prevent overflow and ensure even heat distribution throughout the cooking process.
A wooden spoon or whisk becomes essential for stirring the mixture and preventing ingredients from sticking to the bottom of the pan. We prefer wooden spoons as they won’t conduct heat and provide better control when combining the various components.
Accurate measuring cups and spoons ensure our sauce achieves the perfect balance of flavors every time. Precision matters when working with the delicate interplay of Dr Pepper’s 23 flavors and our complementary ingredients.
For those who prefer a completely smooth sauce, an immersion blender or stand blender serves as optional equipment. We find that some recipes benefit from blending to create a silky texture that coats meats beautifully during grilling.
The beauty of this recipe lies in its simplicity about equipment requirements. Most kitchens already contain these basic tools, making this homemade BBQ sauce accessible to cooks of all experience levels. Our straightforward approach means you can focus on perfecting the flavor rather than worrying about specialized equipment.
Storage containers such as glass jars or bottles become necessary once the sauce cools. We recommend having these ready before you begin cooking to ensure proper storage of your finished product.
Instructions

Creating our signature Dr Pepper BBQ sauce involves four key stages that transform simple ingredients into a complex and flavorful condiment. We’ll walk through each step to ensure perfect results every time.
Prep the Base
We start by gathering all our measured ingredients and setting them within easy reach of our cooking area. Pour the entire cup of Dr Pepper into a small bowl and set aside for the reduction process. Combine our dry spices in a separate bowl: smoked paprika, garlic powder, onion powder, black pepper, cayenne pepper, cumin, chili powder, and ground cloves. Whisk these spices together thoroughly to create an even blend. Measure out our wet ingredients including ketchup, apple cider vinegar, Worcestershire sauce, molasses, mustard, and soy sauce into individual containers. Having everything prepared and organized streamlines the cooking process and prevents any missed ingredients.
Reduce the Dr Pepper
Pour our cup of Dr Pepper into the medium pot and place it over medium heat. Bring the soda to a gentle simmer without allowing it to boil vigorously. Stir occasionally with our wooden spoon to prevent sticking and monitor the reduction process. We need to reduce the Dr Pepper by approximately half its original volume, which typically takes 8 to 12 minutes. The liquid should appear darker and more syrupy when properly reduced. This concentration process intensifies the unique 23 flavors while removing excess water that would thin our final sauce.
Combine and Simmer
Add the ketchup to our reduced Dr Pepper and whisk until completely combined. Incorporate the brown sugar, stirring until it dissolves completely into the mixture. Pour in the apple cider vinegar, Worcestershire sauce, molasses, mustard, and soy sauce while whisking continuously. Add our prepared spice blend and the liquid smoke, ensuring no lumps remain in the mixture. Bring the entire mixture to a gentle simmer over medium low heat. Reduce heat to low and continue simmering for 15 to 20 minutes, stirring every few minutes to prevent scorching. The sauce should thicken noticeably and coat the back of our spoon when ready.
Season and Adjust
Remove the pot from heat and allow the sauce to cool for 2 to 3 minutes before tasting. Sample the sauce with a clean spoon to evaluate the flavor balance. Add more brown sugar if we prefer additional sweetness, or incorporate extra apple cider vinegar for increased tanginess. Adjust the heat level by adding small amounts of cayenne pepper or hot sauce to taste. We can thin the consistency with small amounts of water if the sauce appears too thick, or continue simmering if it needs further reduction. Taste and adjust seasonings until we achieve our desired flavor profile, remembering that flavors will continue to develop as the sauce cools completely.
Directions for Use

Now that we’ve created our flavorful Dr Pepper BBQ sauce, let’s explore the versatile ways to use this sweet and tangy creation. Our sauce transforms any barbecue experience with its unique blend of caramelized flavors and smoky spices.
For Grilling
We recommend using our Dr Pepper BBQ sauce as a finishing touch during the final stages of grilling. Apply the sauce during the last 10-15 minutes of cooking to prevent burning the natural sugars while creating that coveted caramelized glaze. Brush the sauce generously over ribs, chicken, or pork using a silicone basting brush for even coverage. The sauce works exceptionally well as a marinade when we have extra time to let meats absorb those complex flavors. For best results, we keep the grill temperature moderate and watch carefully as the sugars caramelize to achieve that perfect sticky coating.
For Glazing
Our Dr Pepper BBQ sauce creates a stunning glaze that enhances both flavor and visual appeal. Brush the sauce over barbecue meats during the final stages of cooking or broiling to develop a shiny, glossy finish. The natural sugars in the Dr Pepper and brown sugar work together to create an attractive coating that seals in moisture while adding depth. We find this glazing technique particularly effective with chicken thighs, pork tenderloin, and beef brisket. Apply multiple thin coats rather than one thick application to build up layers of flavor and achieve that professional barbecue appearance.
For Dipping
We serve our cooled Dr Pepper BBQ sauce as a versatile dipping condiment that complements many dishes beyond traditional barbecue. The sauce pairs excellently with chicken tenders, french fries, onion rings, and roasted vegetables. Its balanced sweetness and tangy vinegar notes create a rich flavor contrast that enhances rather than overpowers food. Store the dipping sauce in small bowls or squeeze bottles for easy serving at gatherings. The sauce maintains its consistency and flavor when served at room temperature, making it perfect for outdoor entertaining and casual dining experiences.
Storage Instructions

Proper storage ensures our homemade Dr Pepper BBQ sauce maintains its bold flavor and stays fresh for weeks or even months. We’ll guide you through the best methods to preserve this delicious sauce.
Refrigerator Storage
We recommend storing the cooled BBQ sauce in an airtight container or mason jar in the refrigerator. Our sauce will stay fresh for up to 2 weeks when properly refrigerated. The mixture may separate slightly during storage, so we suggest stirring it before each use to recombine the ingredients. Glass containers work exceptionally well for refrigerator storage since they don’t absorb flavors and maintain the sauce’s quality. Always use clean utensils when scooping out the sauce to prevent contamination and extend its shelf life.
Freezer Storage
For longer storage, we can freeze our Dr Pepper BBQ sauce for up to 3 months. Portion the sauce into freezer-safe containers or heavy-duty freezer bags, leaving some headspace for expansion during freezing. We find that smaller portions thaw more quickly and allow us to use only what we need. Label each container with the date to track freshness. When ready to use, thaw the sauce overnight in the refrigerator and reheat it gently on the stovetop before serving. The texture may change slightly after freezing, but a gentle stir will restore its smooth consistency.
Make-Ahead Tips

Planning ahead makes serving this delicious Dr Pepper BBQ sauce effortless during busy grilling sessions. We recommend preparing the sauce 24 hours before your cookout to allow the flavors to meld and intensify naturally.
The sauce stores beautifully in the refrigerator for up to 2 weeks when kept in a clean airtight container or mason jar. Flavors actually improve after sitting overnight as the spices blend together and the Dr Pepper’s caramelized notes deepen throughout the mixture.
Refrigerated sauce will thicken considerably once chilled due to the brown sugar and molasses content. We suggest reheating gently on the stovetop over low heat while stirring frequently to restore the proper consistency. Adding a tablespoon of water or fresh Dr Pepper during reheating helps achieve the ideal texture without diluting the bold flavors.
Freezing extends storage life up to 3 months when using freezer safe containers or heavy duty freezer bags. Leave about an inch of headspace in containers to accommodate expansion during freezing. Thaw frozen sauce completely in the refrigerator overnight before reheating.
Batch preparation saves time for multiple cookouts throughout the season. We often double or triple the recipe to have extra sauce ready for unexpected grilling opportunities. Dividing larger batches into smaller portions allows you to thaw only what you need while keeping the rest frozen.
Label containers with preparation dates to track freshness and rotate stock properly. Fresh herbs or additional spices can be stirred in just before serving to brighten flavors that may have mellowed during storage.
Serving Suggestions

Our Dr Pepper BBQ sauce transforms ordinary grilled meats into extraordinary barbecue experiences. We recommend brushing this flavorful sauce onto ribs during the final 10-15 minutes of cooking to create a beautiful caramelized glaze. Chicken pieces benefit tremendously from this treatment as the sauce’s caramel notes complement the meat’s natural flavors while adding visual appeal.
Pork shoulder and brisket become restaurant-quality dishes when finished with our homemade sauce. We suggest applying the sauce generously during the last stages of smoking or grilling to prevent burning while maximizing flavor penetration. The sauce’s consistency makes it perfect for creating that coveted sticky exterior that barbecue enthusiasts crave.
Beyond traditional barbecue applications, our Dr Pepper BBQ sauce serves as an exceptional dipping condiment. Chicken tenders gain remarkable depth when paired with this sweet and tangy sauce. French fries transform into gourmet sides with just a simple drizzle of our creation.
We love incorporating this sauce into pulled pork sandwiches where it adds moisture and complexity to the meat. Burger enthusiasts will appreciate how the sauce elevates basic patties into memorable meals. The balanced sweetness works particularly well with beef while the tangy notes cut through rich flavors.
Roasted vegetables take on new dimensions when finished with our Dr Pepper BBQ sauce. We recommend drizzling it over grilled corn on the cob or baked sweet potatoes for unexpected flavor combinations. Even baked regular potatoes become exciting side dishes with this versatile condiment.
Classic Southern sides pair beautifully with dishes featuring our sauce. Coleslaw provides cooling contrast to the sauce’s intensity while baked beans complement its sweet profile. Mac and cheese becomes even more indulgent when served alongside meats glazed with our homemade creation. These traditional pairings create well-rounded barbecue meals that satisfy every palate.
Conclusion
We’ve shown you how this unique Dr Pepper BBQ sauce can transform your grilling game with its perfect balance of sweet caramel notes and smoky spices. The beauty of this homemade version lies in its simplicity – using common pantry ingredients to create something truly special for your backyard cookouts.
Whether you’re glazing ribs for that perfect caramelized finish or serving it as a crowd-pleasing dip this sauce delivers every time. The make-ahead convenience and versatile storage options mean you’ll always have this flavor powerhouse ready for your next barbecue adventure.
Now it’s time to fire up that grill and let this Dr Pepper BBQ sauce work its magic on your favorite meats and sides!
Frequently Asked Questions
What makes Dr Pepper BBQ sauce different from regular barbecue sauce?
Dr Pepper BBQ sauce combines the unique blend of 23 flavors from Dr Pepper soda with traditional barbecue ingredients. This creates rich caramel notes and complex spices that you won’t find in regular BBQ sauce. The result is a more nuanced flavor profile with balanced sweetness, tanginess, and depth that transforms ordinary grilled meats into something special.
Can I use diet Dr Pepper instead of regular Dr Pepper?
No, it’s recommended to use regular Dr Pepper for the best results. Regular Dr Pepper provides the right consistency and authentic flavor needed for the sauce. Diet versions lack the natural sugars that help create the proper caramelization and thickness when the soda is reduced during cooking.
How long does homemade Dr Pepper BBQ sauce last?
When stored in an airtight container in the refrigerator, the sauce stays fresh for up to 2 weeks. For longer storage, you can freeze it for up to 3 months in freezer-safe containers. Always stir before use as ingredients may separate during storage.
When should I apply the sauce while grilling?
Apply Dr Pepper BBQ sauce during the last 10-15 minutes of grilling to prevent burning. The sugars in the sauce can char if exposed to high heat for too long. This timing allows the sauce to caramelize properly and create a beautiful glaze without becoming bitter or burnt.
What equipment do I need to make this sauce?
You’ll need basic kitchen equipment: a medium or large pot, wooden spoon or whisk, and accurate measuring cups and spoons. Optional tools include an immersion blender for smoother texture and storage containers for the finished sauce. Most home cooks already have these items in their kitchen.
Can I make the sauce ahead of time?
Yes, making the sauce 24 hours before your cookout actually improves the flavor as ingredients have time to meld together. The sauce thickens when chilled, so you may need to gently reheat it with a splash of water or Dr Pepper to restore the desired consistency.
What foods pair well with Dr Pepper BBQ sauce?
This versatile sauce works great on ribs, chicken, pork tenderloin, and beef brisket. It’s also excellent as a dipping sauce for chicken tenders, french fries, and pulled pork sandwiches. You can even use it to enhance roasted vegetables and classic sides like coleslaw and baked beans.
How do I know when the Dr Pepper is properly reduced?
The Dr Pepper should be reduced by about half its original volume, which typically takes 10-15 minutes of simmering. You’ll know it’s ready when the liquid becomes syrupy and coats the back of a spoon. This concentrated reduction intensifies the flavors for a richer sauce.


