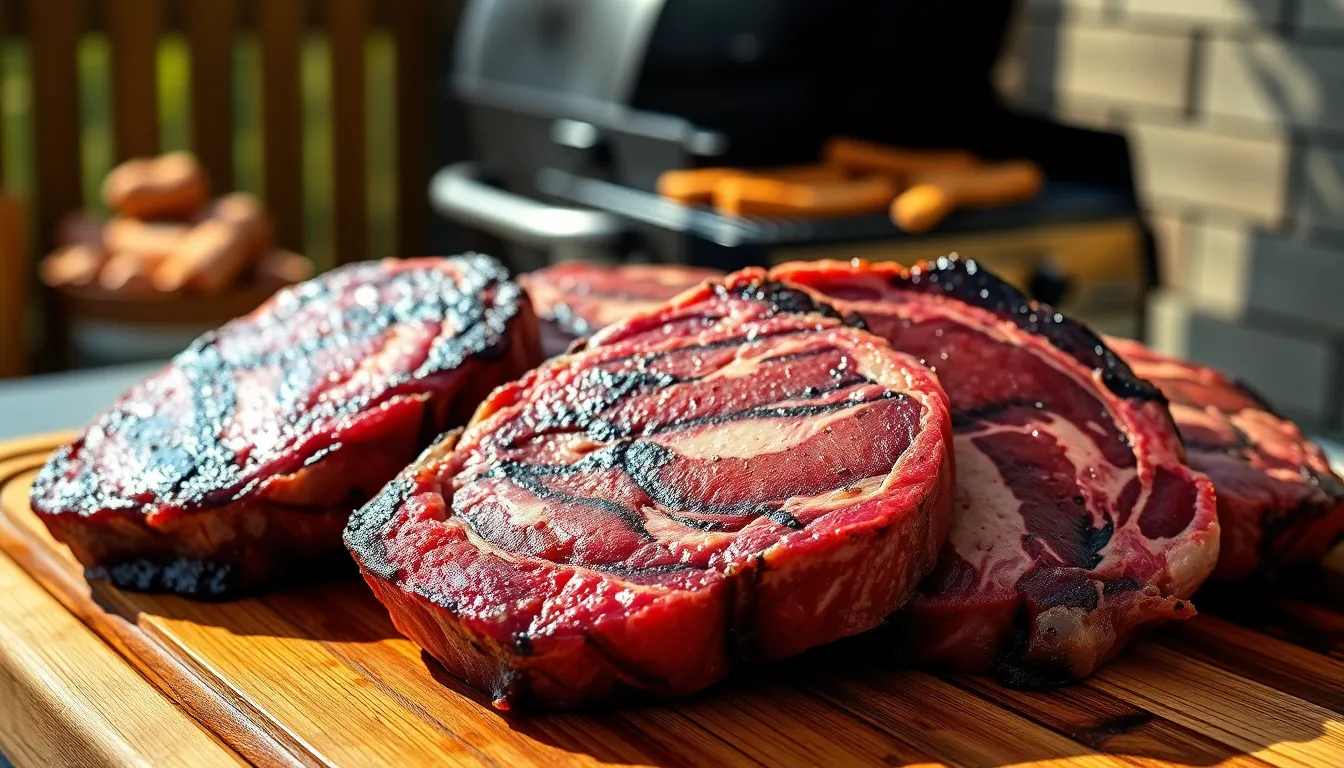
We’ve all been there – standing at the grill wondering how to transform that beautiful ribeye into steakhouse perfection. The ribeye’s rich marbling and tender texture make it the ultimate cut for grilling, but mastering the technique separates good from absolutely incredible.
There’s something magical about the sizzle of a well-marbled ribeye hitting hot grill grates. The fat renders slowly while the exterior develops that coveted crust we all crave. When done right, you’ll achieve that perfect balance of charred exterior and juicy pink interior that makes restaurant steaks so memorable.
We’ve perfected this ribeye grilling method through countless backyard experiments and kitchen disasters. Our approach focuses on simple seasoning, proper temperature control, and timing that delivers consistent results every time. Get ready to impress your family and friends with ribeye steaks that rival the best steakhouses in town.
What Makes the Perfect Grilled Ribeye Steak
Several key factors distinguish an exceptional grilled ribeye from an average one. Prime or choice grade ribeye cuts provide the foundation for success with their abundant marbling and consistent thickness. We recommend selecting steaks that measure 1 to 1.5 inches thick for optimal heat distribution and cooking control.
Temperature precision forms the backbone of ribeye perfection. Our grilling method relies on establishing distinct heat zones across your grill surface. Direct high heat sears the exterior while indirect medium heat finishes the interior to your desired doneness.
Marbling density directly impacts flavor and tenderness outcomes. Those white streaks of fat throughout the meat render slowly during cooking and create the signature buttery texture ribeye enthusiasts crave. We look for steaks with evenly distributed marbling rather than large fat pockets concentrated in one area.
Seasoning timing affects how flavors penetrate the meat fibers. Salt draws moisture from the surface initially but then dissolves and penetrates deeper into the steak when applied 30 to 45 minutes before grilling. This process enhances the natural beef flavors without overpowering the meat’s inherent richness.
Resting duration after cooking allows juices to redistribute throughout the steak. We remove ribeyes from the grill when they reach 5 degrees below target temperature since carryover cooking continues during the resting period. This technique prevents overcooking while ensuring optimal juice retention.
Grill surface preparation prevents sticking and promotes even searing. Clean grates heated to proper temperature create those coveted crosshatch marks while sealing in flavors. We brush the cooking surface with high smoke point oil just before placing the steaks to achieve consistent browning patterns.
Choosing the Right Ribeye Cut
Selecting the perfect ribeye cut sets the foundation for grilling success. We’ll explore the key factors that make the difference between good and exceptional results.
Prime vs Choice Grade
Prime grade ribeye delivers superior tenderness and flavor through abundant marbling throughout the meat. This higher fat content creates the rich taste and buttery texture that makes ribeye steaks exceptional when grilled properly.
Choice grade offers excellent value while maintaining quality flavor profiles. We find that choice grade ribeye contains less marbling than prime but still provides satisfying results for most grilling occasions.
| Grade | Marbling Level | Best For | Cost Comparison |
|---|---|---|---|
| Prime | High | Special occasions, maximum flavor | Higher cost |
| Choice | Moderate | Regular grilling, good value | More affordable |
The increased marbling in prime grade means more fat renders during cooking, creating enhanced flavor and juiciness. Choice grade requires slightly more attention to prevent overcooking but delivers reliable results when handled properly.
Thickness Considerations
Ribeye steaks measuring at least 1 inch thick provide the control needed for perfect grilling results. Thinner cuts cook too quickly and often result in overcooked meat before achieving proper crust development.
We recommend selecting ribeye cuts between 1 to 1.5 inches thick for optimal heat distribution and cooking control. This thickness allows the exterior to develop a beautiful crust while the interior reaches the desired doneness level.
Thicker cuts offer several advantages during grilling. The extra thickness provides a buffer against overcooking and allows more time to achieve the perfect balance between exterior searing and interior temperature. Steaks over 1.5 inches thick may require indirect heat finishing to ensure even cooking throughout.
The thickness directly impacts cooking time and technique selection. Standard 1-inch ribeyes cook quickly over direct heat, while thicker cuts benefit from a combination of direct searing followed by indirect heat finishing.
Essential Equipment for Grilling Ribeye
Having the right equipment transforms our grilling experience from mediocre to magnificent. We’ve learned that investing in quality tools and understanding proper setup creates the foundation for consistently perfect ribeye steaks.
Grill Setup and Temperature Control
Charcoal grills deliver exceptional flavor through direct high heat cooking. We arrange coals to create zones reaching 450-500°F for optimal searing. This temperature range produces the coveted crust while maintaining juicy interiors.
Gas grills offer convenience and precise temperature management. We set all burners to high and allow adequate preheating time to reach the target 450-500°F range. Using a reliable grill thermometer ensures we achieve consistent results every session.
Temperature zones become crucial for ribeye perfection. We establish direct high heat areas for initial searing and medium heat zones around 375°F for finishing thicker cuts. This dual-zone approach prevents overcooking while developing proper crust formation.
Managing flare-ups protects our investment in premium ribeye cuts. We position steaks away from direct flames when fat renders excessively. Clean grill grates prevent sticking and promote even heat distribution across the steak surface.
| Temperature Zone | Heat Level | Cooking Time per Side |
|---|---|---|
| Direct High Heat | 450-500°F | 3-4 minutes |
| Medium Heat | 375°F | 5-6 minutes |
Must-Have Grilling Tools
Long-handled stainless steel tongs rank as our most essential tool. We flip steaks without piercing the meat surface, preserving precious juices that contribute to flavor and tenderness.
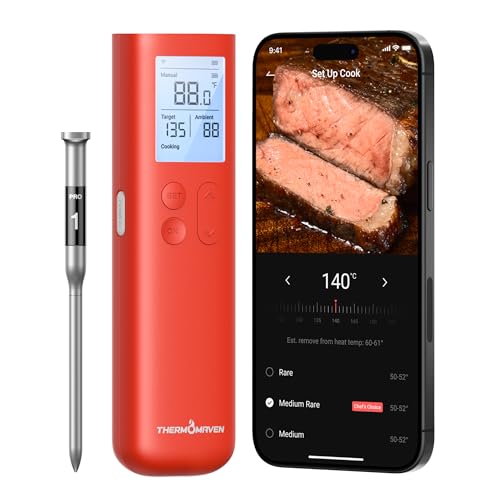
Digital meat thermometers eliminate guesswork from doneness assessment. We target 130°F internal temperature for medium-rare ribeye, ensuring consistent results regardless of thickness variations.
Grill brushes or scrapers maintain clean cooking surfaces. We remove residue before each grilling session to prevent sticking and ensure proper heat transfer to the steak.
Heat-resistant gloves provide safety and confidence when working near high temperatures. We handle hot grates and equipment without hesitation, maintaining focus on cooking technique.
Butter knives or small spatulas apply compound butter effectively. We spread herbed butter evenly across the steak surface just before removal, creating an additional flavor layer that enhances the dining experience.
Aluminum foil serves multiple purposes in our grilling arsenal. We tent rested steaks to retain warmth while juices redistribute throughout the meat fibers.
Ingredients
With our equipment ready and technique mastered, we need the right ingredients to transform our ribeye into a masterpiece. Our ingredient list focuses on quality components that enhance rather than mask the natural beef flavors.
For the Ribeye Steaks
- 2 lbs ribeye steak (about 1-inch thick)
- 2 tablespoons olive oil or vegetable oil (optional, for brushing)
- Kosher salt and freshly ground black pepper (or steak seasoning)
For the Seasoning Rub
- 2 teaspoons Montreal steak seasoning (or a mix of kosher salt, black pepper, garlic powder, and dried herbs)
For Optional Compound Butter
- 2 tablespoons unsalted butter, softened
- 1 teaspoon fresh thyme (or 1/2 tsp dried)
- 1 teaspoon fresh rosemary (or 1/2 tsp dried)
- 1/2 teaspoon garlic powder or 1 clove garlic, minced
- Salt to taste
Preparation Instructions
With our ingredients and equipment ready, we now move to the crucial preparation steps that determine the quality of our final result. These foundational techniques ensure our ribeye develops the perfect crust while maintaining a tender interior.
Bringing Steaks to Room Temperature
We remove our ribeye steaks from the refrigerator 20 to 45 minutes before grilling begins. This essential step allows the meat to reach room temperature throughout, preventing the common problem of a cold center with an overcooked exterior. Room temperature steaks cook more evenly across their entire thickness, resulting in consistent doneness from edge to edge. During this time, we place the steaks on a clean plate and cover them loosely to protect from airborne contaminants while they warm.
Seasoning the Ribeye
We start by patting each steak completely dry with paper towels to remove surface moisture that could interfere with proper searing. Next, we apply our chosen seasoning generously to both sides of each ribeye, whether using Montreal seasoning or our simple combination of kosher salt and freshly ground black pepper. The seasoning gets gently massaged into the meat fibers, creating what we call a “dry marinade” that enhances both flavor development and crust formation. We allow the seasoned steaks to rest at room temperature for at least 20 minutes, giving the salt time to penetrate the surface and begin drawing out moisture. Just before placing the steaks on the grill, we optionally brush them lightly with olive oil to aid in searing and prevent sticking to the grates.
Preparing the Grill
We preheat our grill to achieve the optimal temperature range of 450°F to 500°F for creating an exceptional sear on our ribeye steaks. This high heat zone becomes our primary cooking area, while we maintain a secondary medium heat zone around 375°F for more controlled cooking if needed. Before the steaks go on, we thoroughly clean the grill grates with our grill brush to remove any residue from previous cooking sessions. Finally, we oil the grates using a paper towel dipped in vegetable oil and held with tongs, creating a non-stick surface that promotes even searing and easy steak release.
Grilling Directions
Now we execute the grilling process that transforms our prepared ribeye into a perfectly cooked steak. These precise steps ensure we achieve that coveted steakhouse quality crust while maintaining optimal interior doneness.
Initial Searing
We place our ribeye steaks directly over the high heat zone where temperatures reach 450°F to 500°F for maximum searing power. The intense heat creates the Maillard reaction that develops deep flavors and that beautiful caramelized crust we’re after. Our steaks sear for 3 to 4 minutes on the first side without moving them to allow proper crust formation.
We flip the steaks using our long-handled tongs and sear the second side for another 3 to 4 minutes. The oil coating helps conduct heat evenly while our seasoning blend creates aromatic compounds that enhance the overall flavor profile. During this initial searing phase we avoid pressing down on the steaks as this releases valuable juices that contribute to tenderness and taste.
Cooking to Desired Doneness
After achieving our initial sear we move the steaks to the medium heat zone where temperatures hover around 375°F for controlled finishing. This two-zone cooking method prevents overcooking the exterior while allowing the interior to reach our target temperature gradually.
We continue cooking based on our preferred doneness level using these total cooking times per side:
| Doneness Level | Total Cooking Time Per Side |
|---|---|
| Medium-rare | 5-6 minutes |
| Medium | 6-7 minutes |
| Medium-well | 7-8 minutes |
Alternatively we can transfer our seared steaks to a preheated 400°F oven for 11 to 14 minutes to achieve precise temperature control. This oven finishing method works particularly well for thicker cuts where we want to ensure even cooking throughout the interior.
Checking Internal Temperature
We insert our digital meat thermometer into the thickest part of the steak to verify doneness accurately. The thermometer probe should reach the center without touching bone or fat for the most reliable reading.
Our target internal temperatures guide us to perfect results:
| Doneness Level | Internal Temperature |
|---|---|
| Rare | 120-130°F |
| Medium-rare | 130-135°F |
| Medium | 135-145°F |
| Medium-well | 145-155°F |
| Well done | 155°F and above |
We remove our steaks from the grill when they reach about 5°F below our target temperature since carryover cooking continues to raise the internal temperature during the resting period. This technique prevents overcooking and ensures we hit our desired doneness precisely. The moment we remove the steaks we top them with a pat of compound butter that melts beautifully over the hot surface.
Resting and Serving
Once our ribeye reaches perfect doneness, the critical final steps of resting and serving determine whether we achieve restaurant-quality results or lose precious juices through improper handling. These techniques ensure our carefully grilled steak delivers maximum flavor and tenderness.
Proper Resting Technique
We must allow our grilled ribeye to rest properly after removing it from the heat. Place the steak on a clean plate and tent it loosely with aluminum foil to maintain warmth while preventing steam buildup. The resting period should last 5 to 10 minutes, giving the meat fibers time to relax and redistribute juices evenly throughout the steak.
During this crucial window, we prevent the juices from spilling out when we make our first cut. The muscle fibers contract during cooking, and resting allows them to return to their natural state. This process ensures every bite delivers the full flavor and moisture we worked to develop during grilling.
Adding a pat of butter immediately after removing the steak from the grill enhances both flavor and juiciness. The butter melts slowly across the surface while the steak rests, creating an additional layer of richness that complements the beef’s natural flavors.
Slicing and Plating
We achieve maximum tenderness by slicing against the grain when serving our ribeye. Identify the direction of the muscle fibers running through the meat, then cut perpendicular to these lines. This technique breaks down the muscle structure and creates more tender bites.
Sharp knife work makes clean cuts that preserve the steak’s appearance and prevent tearing the meat. We slice the ribeye into portions that showcase the beautiful contrast between the caramelized exterior and pink interior.
Attractive plating elevates our grilled ribeye from backyard cooking to fine dining presentation. Arrange the sliced steak on warmed plates to maintain serving temperature. We can add an extra dollop of compound butter or herb butter on top of the slices for a glossy finish and enhanced flavor profile.
Serve immediately after slicing to ensure our guests experience the steak at optimal temperature and texture. The combination of proper resting, careful slicing, and thoughtful plating transforms our grilled ribeye into a memorable dining experience.
Make-Ahead Tips
Planning ahead transforms ribeye grilling from rushed cooking into a relaxed culinary experience. We recommend implementing these strategic preparation techniques to maximize flavor development and ensure consistent results every time.
Season Steaks 30 to 45 Minutes in Advance
Proper timing for seasoning creates the foundation for exceptional flavor. Apply Montreal seasoning or your preferred steak blend generously to both sides of the ribeye. This dry marinade technique allows the salt to penetrate the meat fibers while drawing out surface moisture for better browning. Room temperature resting during this period ensures even cooking throughout the entire steak.
Prepare Compound Butter Hours Ahead
Creating herbed butter in advance elevates the final dish with minimal effort during cooking. Mix softened unsalted butter with minced garlic, fresh thyme, and rosemary until well combined. Form the mixture into a log using plastic wrap and refrigerate until firm. Pre-sliced pats of this compound butter can be stored for up to three days and applied directly to hot steaks for instant flavor enhancement.
| Make-Ahead Component | Preparation Time | Storage Duration |
|---|---|---|
| Dry seasoning application | 30-45 minutes before grilling | Same day only |
| Compound butter preparation | 2-3 hours ahead | Up to 3 days refrigerated |
| Room temperature resting | 45 minutes before cooking | Same day only |
Remove Steaks from Refrigeration Early
Temperature equalization prevents uneven cooking that results in overcooked edges and undercooked centers. Take ribeyes out of the refrigerator exactly 45 minutes before grilling begins. This timing allows the internal temperature to rise gradually while maintaining food safety standards. Cold steaks placed directly on hot grates create temperature shock that compromises the final texture.
Pre-Clean and Oil Grill Grates
Grill maintenance completed beforehand eliminates last-minute scrambling during cooking. Clean grates thoroughly with a wire brush and apply a light coating of high-heat cooking oil. This preparation prevents sticking while promoting even heat distribution across the cooking surface. We find that well-maintained grates produce superior sear marks and easier steak removal.
Expert Grilling Tips for Perfect Results
Mastering the art of grilling ribeye requires attention to crucial details that separate good steaks from exceptional ones. We’ve discovered that implementing exact techniques consistently produces restaurant-quality results every time.
Create the Perfect Dry Marinade
Applying our dry rub technique transforms the steak’s exterior into a flavorful crust. We recommend using Montreal seasoning or a simple combination of kosher salt and pepper for optimal flavor development. The key lies in allowing the seasoned steak to rest at room temperature for at least 20 minutes before grilling. This dry marination process enhances crust formation without drawing out precious moisture from the meat.
Master Temperature Control
Temperature precision determines your success with ribeye grilling. We maintain our grill between 450°F and 500°F for that essential high-heat sear that creates the perfect caramelized exterior. For those preferring more controlled cooking, a medium heat around 375°F works exceptionally well for even doneness throughout the steak.
| Heat Level | Temperature | Cooking Time per Side | Best For |
|---|---|---|---|
| High Heat | 450°F-500°F | 3-4 minutes | Perfect sear and crust |
| Medium Heat | 375°F | 5-6 minutes | Even cooking and control |
Perfect Your Butter Technique
Room temperature compound butter makes all the difference in flavor enhancement. We remove our herbed butter from refrigeration early and slice it into half-inch pieces for easy application. Placing these butter slices directly onto the hot grilled steak allows immediate melting that adds richness and amplifies the beef’s natural flavors.
Essential Resting Protocol
Never skip the resting period after grilling your ribeye. We tent our steaks loosely with aluminum foil and allow them to rest for 5 to 10 minutes before serving. This crucial step redistributes the juices throughout the meat, ensuring every bite delivers maximum juiciness and tenderness.
Optimize Fat Management
Proper fat handling enhances both flavor and cooking performance. We suggest trimming excess outer fat while preserving the internal marbling that gives ribeye its signature taste and texture. The marbled fat renders during cooking, creating natural basting that keeps the steak moist and flavorful.
Alternative Finishing Method
For those without outdoor grilling access, we recommend our cast iron finishing technique. Sear the seasoned ribeye in a hot cast iron pan for 2 minutes per side, then transfer to a preheated 400°F oven for 11 to 14 minutes until reaching desired doneness. This method delivers comparable results to outdoor grilling while maintaining complete temperature control.
These expert techniques combine to create a beautifully seared, tender, and juicy ribeye steak with a flavorful buttery finish, all achievable in under 30 minutes of active cooking time.
Temperature Guide for Doneness Levels
Achieving the perfect doneness level requires precise temperature monitoring to deliver consistent results every time. We rely on internal temperatures rather than guesswork to ensure our ribeye reaches exactly the level of doneness we desire.
| Doneness Level | Internal Temperature | Description |
|---|---|---|
| Rare | 120-125°F | Cool red center with soft texture |
| Medium Rare | 130-135°F | Warm red center with perfect tenderness |
| Medium | 140-145°F | Pink center with firm yet juicy texture |
| Medium Well | 150-155°F | Slightly pink center with firmer texture |
| Well Done | 160°F and above | No pink throughout with firm texture |
We recommend targeting medium rare for ribeye steaks since this temperature range maximizes the cut’s natural marbling and delivers optimal flavor. The fat within the ribeye begins rendering beautifully at these temperatures while maintaining the meat’s signature tenderness.
Insert your digital meat thermometer into the thickest part of the steak to get an accurate reading. We always remove our steaks from the grill when they reach about 5°F below our target temperature since carryover cooking continues raising the internal temperature during the resting period.
For 1-inch thick ribeye steaks we typically see these cooking times on high heat (450-500°F): rare takes 6-8 minutes total cooking time while medium rare requires 8-10 minutes total. Medium doneness needs 10-12 minutes and medium well extends to 12-14 minutes of total grilling time.
Remember that every grill performs differently and steak thickness varies. We always trust our meat thermometer over timing estimates to guarantee perfect results. The thermometer eliminates guesswork and ensures our ribeye reaches the exact doneness level we want every single time.
Conclusion
We’ve covered everything you need to transform your backyard grilling into a steakhouse experience. With the right cut selection proper seasoning techniques and precise temperature control you’ll consistently deliver restaurant-quality ribeye steaks that’ll have everyone asking for seconds.
The beauty of this method lies in its simplicity – no complicated marinades or exotic ingredients required. Just quality ribeye steaks proper preparation and attention to detail during the grilling process. Whether you’re hosting a weekend barbecue or treating yourself to a special dinner these techniques will never let you down.
Remember that practice makes perfect and each grill behaves differently. Start with these fundamentals and adjust based on your equipment and preferences. Soon you’ll be grilling ribeye steaks with the confidence of a seasoned pitmaster creating memorable meals that bring people together around great food.
Frequently Asked Questions
What grade of ribeye steak should I buy for grilling?
Choose prime or choice grade ribeye steaks for best results. Prime grade offers superior tenderness and flavor due to abundant marbling, while choice grade provides excellent value with slightly less marbling. Both grades deliver delicious results when grilled properly.
How thick should my ribeye steak be for grilling?
Select ribeye steaks that are 1 to 1.5 inches thick for optimal heat distribution and cooking control. This thickness allows you to develop a beautiful crust while ensuring the interior reaches your desired doneness without overcooking.
What temperature should I grill ribeye steaks at?
Grill ribeye steaks at 450-500°F for searing, then move to a medium heat zone around 375°F for finishing. This dual-zone approach prevents overcooking while creating the perfect caramelized crust and tender interior.
How long should I season ribeye steaks before grilling?
Season your ribeye steaks with salt and pepper 30-45 minutes before grilling. This timing allows the flavors to penetrate the meat without overpowering it, creating a flavorful “dry marinade” that enhances the natural beef taste.
What internal temperature should ribeye steaks reach?
For medium-rare ribeye (recommended for best flavor), aim for 130-135°F internal temperature. Remove steaks from the grill about 5°F below target temperature to account for carryover cooking during the resting period.
How long should I rest ribeye steaks after grilling?
Rest your grilled ribeye steaks for 5-10 minutes after cooking, tented with aluminum foil. This resting period allows juices to redistribute throughout the meat, ensuring maximum tenderness and flavor in every bite.
What essential tools do I need for grilling ribeye steaks?
Essential grilling tools include long-handled tongs, a digital meat thermometer, grill brush, heat-resistant gloves, and aluminum foil. These tools ensure safe handling, accurate temperature monitoring, and proper steak preparation for consistent results.
Can I grill ribeye steaks indoors?
Yes, you can achieve similar results using a cast iron pan. Sear the steaks on high heat, then finish in a preheated oven. This method works well when outdoor grilling isn’t available while maintaining quality results.
