We’ve all experienced that moment at Cracker Barrel when the perfectly tender roast beef arrives at our table, practically falling apart with each forkful. That signature homestyle flavor has kept us coming back for decades, but what if we told you that recreating this restaurant favorite at home is easier than you think?
Our copycat Cracker Barrel roast beef recipe captures every bit of that comforting, slow-cooked goodness that makes this dish so irresistible. We’ve cracked the code on their secret blend of seasonings and cooking technique that transforms an ordinary roast into something extraordinary.
This foolproof recipe delivers the same melt-in-your-mouth texture and rich, savory flavors you’d expect from the restaurant. With just a few simple ingredients and our step-by-step method, you’ll have your family asking for seconds before they’ve finished their first helping.
Ingredients
We’ve carefully selected these ingredients to recreate the authentic Cracker Barrel roast beef experience. Each component plays a crucial role in achieving that signature tender texture and rich flavor.

One boneless beef chuck center roast weighing between 1.79 and 4 pounds

One Boneless Angus Beef Chuck Center Roast weighing between 1.25 and 3.3 pounds

One package of Boneless Beef Bottom Round Roast weighing between 2.25 and 3.75 pounds.
For the Roast Beef
- 3-4 pound beef chuck roast or bottom round roast
- 2 tablespoons olive oil
- 1 large yellow onion, sliced
- 3 cloves garlic, minced
- 2 cups beef broth
- 1 cup water
- 2 bay leaves
- 3 sprigs fresh thyme (or 1 teaspoon dried thyme)
For the Seasoning Blend
- 2 teaspoons salt
- 1 teaspoon black pepper
- 1 teaspoon garlic powder
- 1 teaspoon onion powder
- 1 teaspoon paprika
- 1/2 teaspoon dried oregano
- 1/2 teaspoon dried rosemary
- 1/4 teaspoon cayenne pepper
For the Gravy
- 3 tablespoons all-purpose flour
- 3 tablespoons butter
- 2 cups reserved cooking liquid from roast
- 1/2 teaspoon salt (or to taste)
- 1/4 teaspoon black pepper
- 1 tablespoon Worcestershire sauce
Equipment Needed

Getting the right equipment makes all the difference when recreating that signature Cracker Barrel roast beef texture and flavor at home. We’ve found that having the proper tools ensures your roast turns out tender and juicy every time.
Primary Cooking Equipment:
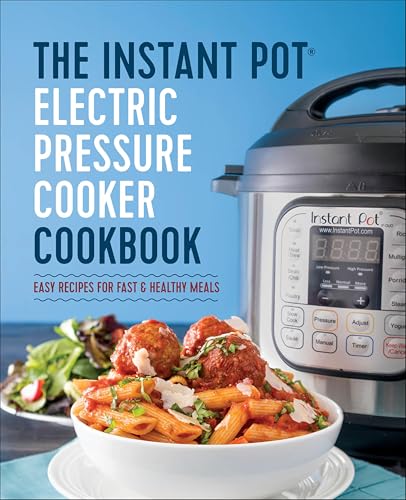
- Instant Pot or Slow Cooker – These appliances are ideal for making tender Cracker Barrel roast beef with gravy conveniently at home
- Dutch Oven or Heavy Pot – Essential for searing the beef before slow cooking to caramelize the meat and lock in juices
- Cooking Thermometer – Ensures the beef reaches the proper internal temperature for optimal tenderness
Essential Handling Tools:
- Tongs – Perfect for safely handling the roast during the searing process
- Large Spoon or Ladle – Necessary for making and serving the rich gravy
- Sharp Knife and Cutting Board – Required for trimming and prepping the beef and any vegetables
Additional Cooking Essentials:
We recommend having vegetable oil or butter on hand for searing the roast properly. Beef broth or stock becomes crucial for both cooking the meat and creating that signature gravy. Keep seasonings like salt, pepper, Worcestershire sauce, red wine, or red pepper flakes nearby to customize the flavor profile to your taste.
Optional additions such as mushrooms and onions work wonderfully if you’re planning a mushroom braised version of this classic dish. Having these tools and ingredients ready ensures we can achieve that authentic Cracker Barrel experience right in our own kitchen.

Value Pack of 12; each pouch makes approx. 8 servings

Convenient, family-friendly seasoning mix for the Instant Pot
Prep Work

Before we begin cooking our Cracker Barrel roast beef, we need to properly prepare our chuck roast and create the perfect seasoning blend. These initial steps will ensure our roast develops the signature flavor and texture that makes this recipe so special.

No artificial flavors.
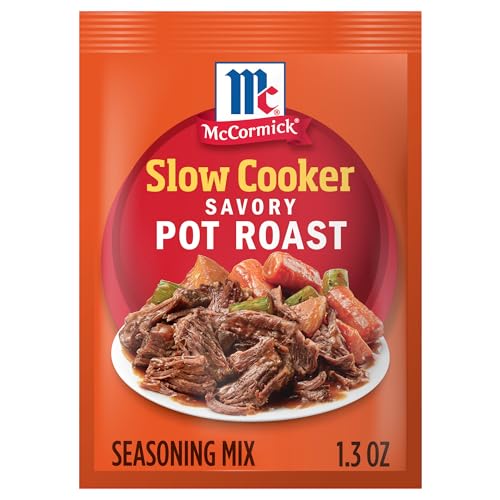
HOMEMADE FLAVOR: Make homestyle pot roast with McCormick Slow Cooker Savory Pot Roast Seasoning Mix in your slow cooker or electric pressure cooker.

Includes one 15 ounce tray of hearty, wholesome beef roast smothered in au jus and savory sauce.
Preparing the Roast
We start by rinsing our chuck roast under cold water to remove any residual packaging juices. Pat the roast completely dry with paper towels since this helps our seasonings adhere better to the meat surface.
Once our roast is dry, we liberally season it with salt, pepper, and garlic powder on all sides. For an enhanced crust and deeper flavor, we lightly coat the entire roast with flour after seasoning.
Next, we heat olive oil in our skillet over medium-high heat until it shimmers. We sear the roast for 4-5 minutes per side until each surface develops a rich brown color. This caramelization process locks in the meat’s natural juices and creates the foundation for our tender, flavorful result.
After searing, we transfer our beautifully browned roast to the slow cooker where it will transform into the melt-in-your-mouth texture we’re seeking.
Making the Seasoning Mix
Our seasoning blend keeps things simple yet effective, focusing on classic flavors that complement the beef’s natural taste. We combine salt, black pepper, and approximately 1/2 teaspoon of garlic powder for our base seasoning mix.
The optional flour coating serves as both a seasoning vehicle and crust creator during the searing process. We apply this coating after our initial seasoning to ensure maximum flavor penetration.
For our finishing gravy, we prepare a cornstarch slurry using 2 tablespoons of cornstarch mixed with 2 tablespoons of water. This mixture will thicken our cooking juices into a rich, restaurant-quality gravy that perfectly coats our shredded beef.
Instructions

Now we’ll walk through the step-by-step process to create this restaurant-quality roast beef at home. Each stage builds flavor and ensures the tender texture that makes this dish so memorable.

McCormick Salt Free Roasted Garlic & Bell Pepper has no salt or MSG added

Made with real McCormick herbs and spices

Made with real McCormick herbs and spices
Seasoning the Roast
We begin by patting our chuck roast completely dry with paper towels to help the seasonings adhere properly. Generously coat the entire surface with salt, pepper, and garlic powder, ensuring every inch receives coverage. After seasoning, we lightly dust the roast with flour, which serves a dual purpose of creating a better searing surface and thickening our gravy later. Press the flour gently into the meat to create an even coating that will develop into a beautiful crust.
Searing the Meat
Heat oil in a large skillet over medium-high heat until it shimmers and begins to smoke slightly. Carefully place our seasoned roast in the hot oil and sear each side for 4-5 minutes without moving it. We want to achieve a deep golden-brown color on all surfaces, which locks in the natural juices and creates the caramelized flavor base. Turn the roast systematically to ensure even browning, checking that no raw meat shows through the crust. This critical step enhances both taste and texture in our final dish.
Slow Roasting Process
Transfer our beautifully seared roast to the slow cooker and surround it with sliced onions and minced garlic. Add bay leaves for aromatic depth, then pour in the condensed beef mushroom soup or beef broth until the liquid reaches about halfway up the roast. Set the slow cooker to low and cook for 8-10 hours, allowing the low temperature to break down the collagen into gelatin for maximum tenderness. For those preferring a complete meal, add carrots and potatoes directly to the slow cooker during the last 3-4 hours of cooking.
Checking for Doneness
We know our roast is perfectly done when it shreds easily with two forks and falls apart at the slightest touch. Remove the tender meat from the slow cooker and tent it with aluminum foil to keep warm while we prepare the gravy. Strain the cooking liquid into a saucepan and whisk in our prepared cornstarch slurry, cooking on high heat until the mixture thickens to a rich, glossy consistency. Return the shredded meat to the gravy, tossing gently to coat every piece before serving.
Making the Pan Gravy

The rich cooking liquid from our slow-cooked roast transforms into the perfect pan gravy that captures the authentic Cracker Barrel flavor. We’ll turn those flavorful drippings into a silky smooth gravy that complements our tender roast beef beautifully.

【Dual Safe Probes for Multi-Use】Vuwwey meat thermometer probe is great for meat, liquids, oil frying, baking, candy making, kitchen & outdoors. The wired probe is ideal for monitoring air fryers, ovens, grills, BBQ, smokers. It's your hands-free assistant: set the alarm, stick it on, and step away from the heat

Temperature Range: 140° to 190°F / 60° to 87°C. Probe Length: 4.75-inches Dial Diameter: 2.375-inches

No More Guesswork During Your Chill Cooking Time - professional digital thermometer devotes every beginner to becoming a prof! A good helper both in outdoor BBQ and Home party, It is the best gift for cooking enthusiasm and the useful kitchen gadget for festival meals
Preparing the Drippings
Once we remove our perfectly cooked roast from the slow cooker and tent it with foil, we pour the remaining juices and solids into a saucepan. The concentrated flavors from the 8-10 hour cooking process create an incredibly rich base for our gravy. We strain the liquid if we prefer a smoother consistency, though keeping some of the cooked onion pieces adds rustic texture that matches the Cracker Barrel style.
The drippings should have a deep, savory aroma and rich color from the seared roast and aromatics. We measure approximately 2-3 cups of liquid, adding beef broth if needed to reach our desired gravy quantity.
Creating the Roux
For a traditional thickened gravy, we melt 2-3 tablespoons of butter in our skillet over medium heat. We whisk in an equal amount of all-purpose flour, creating a smooth paste that cooks for 1-2 minutes until lightly golden. This brief cooking time removes the raw flour taste while developing a nutty flavor that enhances our gravy.
We slowly pour our prepared drippings into the roux while whisking constantly to prevent lumps from forming. The gradual incorporation ensures our gravy achieves that signature smooth texture.
Finishing the Gravy
Alternatively, we can skip the roux method and use a cornstarch slurry for quicker thickening. We mix 2-3 tablespoons of cornstarch with equal parts cold water until completely smooth. While our drippings simmer in the saucepan, we gradually whisk in the slurry and cook for 2-3 minutes until the gravy reaches our desired consistency.
We season our finished gravy with salt and pepper to taste, adjusting the flavor to complement our roast beef. The gravy should coat the back of a spoon and have a rich, glossy appearance that mirrors the restaurant quality we’re recreating at home.
Serving Suggestions

Now that we have our tender roast beef and rich gravy ready, let’s explore how to present this comfort food classic with the perfect accompaniments. The right sides and presentation will transform our homemade version into an authentic Cracker Barrel dining experience.

Meets standards for animal welfare, feed, and more, so you can know about what you're buying (and eating)
Savory seasoning mix for homestyle pot roast

One boneless beef eye of round roast weighing between 0.5 and 1.5 pounds
Traditional Sides
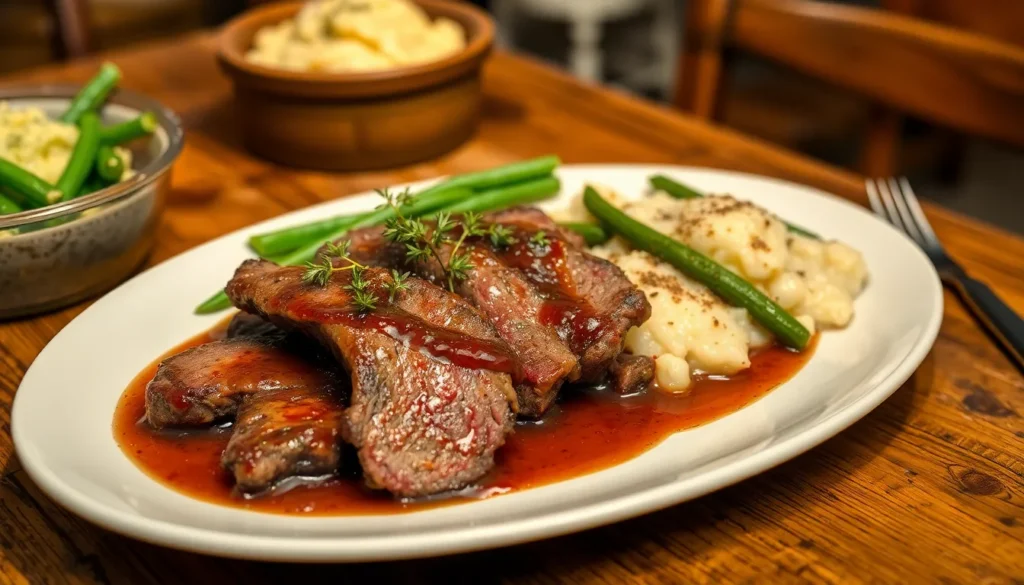
We recommend starting with creamy mashed potatoes as the foundation of our plate since they perfectly absorb the rich gravy we’ve prepared. Steamed or roasted green beans add vibrant color and a fresh contrast to the hearty meat.
Classic Cracker Barrel accompaniments include corn on the cob, their famous fried apples, and creamy macaroni and cheese. These sides complement the savory roast beef while maintaining that signature comfort food appeal.
Fresh biscuits or warm bread complete the meal by providing a vehicle for soaking up every drop of that flavorful gravy. We find that buttermilk biscuits work particularly well with this dish.
| Side Dish | Purpose | Preparation Time |
|---|---|---|
| Mashed Potatoes | Gravy absorption | 20 minutes |
| Green Beans | Color contrast | 15 minutes |
| Corn | Traditional pairing | 10 minutes |
| Biscuits | Gravy soaking | 25 minutes |
Plating and Presentation
We serve our roast beef either sliced thick or shredded, depending on preference, then smother it generously with the thickened gravy over a generous portion of mashed potatoes. This creates the classic comfort food presentation that Cracker Barrel is known for.
Arrange vegetables alongside the meat rather than underneath to maintain their vibrant colors and textures. Bright green beans and golden roasted carrots create an appealing visual contrast against the rich brown gravy.
We garnish each plate with fresh parsley or thyme sprigs for a refined rustic touch that elevates the presentation. Using warm plates ensures our meal stays piping hot throughout the dining experience.
For family style serving, we present the shredded roast beef with gravy in a large serving dish, surrounded by individual bowls of sides. This approach allows everyone to customize their portions while maintaining that homestyle atmosphere.
Storage and Reheating Instructions

Proper storage techniques ensure your Cracker Barrel style roast beef maintains its tender texture and rich flavor long after cooking. Following these guidelines allows you to enjoy this comforting meal for days or even months to come.

Easy pot roast seasoning mix

Campbell's Chunky Soup: One (1) 18.8 oz can of Campbell’s Chunky Savory Pot Roast Soup
Refrigerator Storage
Store your leftover roast beef in an airtight container to preserve freshness and prevent flavors from transferring to other foods. The beef will maintain its quality in the refrigerator for up to 3 to 5 days when properly stored at 40°F or below.
We recommend separating the meat from the gravy before refrigerating to maintain optimal texture for both components. Place the shredded roast beef in one container and the gravy in another sealed container. This separation prevents the meat from becoming overly saturated and helps both elements retain their distinct characteristics.
Label your containers with the storage date to track freshness accurately. Always use clean utensils when portioning leftovers to prevent contamination and extend shelf life.
Freezing Options
Extend the life of your roast beef by freezing portions in freezer-safe containers for up to 3 months. Divide the meat into meal-sized portions before freezing to make thawing and reheating more convenient.
We strongly recommend freezing the gravy separately from the meat to maintain texture and flavor integrity when reheated. The gravy’s consistency can change during the freezing process, and separate storage allows for better control during reheating.
Wrap the containers tightly with plastic wrap or aluminum foil before placing them in freezer bags for extra protection against freezer burn. Remove as much air as possible from freezer bags to preserve quality and prevent ice crystal formation.
Best Reheating Methods
Oven reheating produces the most consistent results for maintaining the roast beef’s original texture and moisture. Place the meat in a baking dish, cover tightly with foil, and reheat at 300°F until warmed through.
Add splashes of water or beef stock to the meat before reheating to prevent drying out and restore moisture. This technique keeps the beef tender and prevents it from becoming tough or chewy during the reheating process.
Stovetop reheating works exceptionally well when combining the beef with its gravy. Heat the components together in a saucepan over medium-low heat, stirring occasionally until heated through. The microwave offers quick reheating but may affect texture slightly, so use short intervals and stir frequently for even heating.
| Reheating Method | Temperature | Time | Best For |
|---|---|---|---|
| Oven | 300°F | 15-20 minutes | Large portions |
| Stovetop | Medium-low | 5-10 minutes | Beef with gravy |
| Microwave | Medium power | 2-3 minutes | Single servings |
Tips for Perfect Results

Achieving restaurant-quality roast beef at home requires attention to key details that make all the difference. We’ll share the most important techniques to ensure your Cracker Barrel copycat roast turns out perfectly tender and flavorful every time.


Includes one 15 ounce tray of hearty, wholesome beef tips smothered in thick gravy.

Crockery Gourmet Seasoning Mix for Beef, 2.5 oz Packet
Selecting the Right Cut
Chuck roast stands as our top choice for this recipe due to its exceptional marbling and connective tissue content. This cut weighs between 3 to 4 pounds and contains the perfect fat distribution that breaks down during slow cooking. The marbling creates incredibly juicy and tender results that mirror the original Cracker Barrel experience.
We strongly recommend avoiding lean cuts like sirloin for this particular preparation. These cuts lack the necessary fat content and connective tissue that transforms into gelatin during the long cooking process. Without this natural tenderizing element, your roast may end up dry and less flavorful than desired.
Temperature Guidelines
Low and slow cooking produces the most tender results for this dish. We cook our roast on the low setting for 8 to 10 hours to achieve maximum tenderness. This extended cooking time allows the tough connective tissues to completely break down into silky gelatin.
When time constraints become a factor, we can use the high setting for 4 to 5 hours as an alternative. But, the low temperature method consistently delivers superior texture and flavor development.
Searing the meat beforehand at medium-high heat creates a crucial flavor foundation. This step locks in the natural juices while developing a beautiful crust that enhances both texture and taste throughout the cooking process.
| Cooking Method | Temperature | Time | Result |
|---|---|---|---|
| Slow Cooker Low | Low | 8-10 hours | Most tender |
| Slow Cooker High | High | 4-5 hours | Good texture |
| Searing | Medium-High | 3-4 minutes per side | Flavor enhancement |
Resting the Meat
Proper resting ensures our roast beef maintains its moisture and develops the perfect texture. We remove the cooked roast from the slow cooker and tent it loosely with aluminum foil for at least 10 to 15 minutes. This resting period allows the juices to redistribute evenly throughout the meat.
During this crucial waiting time, we prepare the gravy using the flavorful cooking liquid. The foil tent keeps the meat warm while preventing moisture loss during the gravy preparation process. This technique guarantees that every bite remains succulent whether we choose to slice or shred the finished roast.
The resting step becomes even more important when serving immediately after cooking. Without this pause, the juices would run out when cutting, resulting in drier meat and less flavorful presentation.
Conclusion
We’ve shared everything you need to recreate that beloved Cracker Barrel roast beef experience right in your own kitchen. This recipe delivers the same tender melt-in-your-mouth texture and rich savory flavors that make the restaurant version so irresistible.
The beauty of this dish lies in its simplicity – with just basic ingredients and straightforward techniques you can achieve restaurant-quality results. Whether you’re cooking for Sunday dinner or want to impress guests this recipe never fails to satisfy.
Don’t forget to serve it alongside those classic comfort food sides we mentioned. Your family will be asking for seconds and wondering how you managed to bring their favorite restaurant meal home. Give it a try and taste the difference homemade makes!

All-Purpose Seasoning: Enhance your meals with Badia Complete Seasoning, a versatile spice blend perfect for meats, vegetables, soups, and more
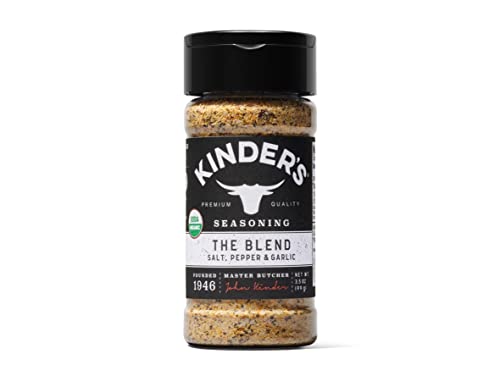
Elevate your everyday cuisine with perfect combination of seasonings we tastefully call The Blend. Whether making meals on the grill, stovetop or oven, The Blend combines salt, cracked pepper, and crunchy garlic in flawless harmony of flavors to easily make your meals come alive.

Simple, yet flavorful ingredients of cracked black pepper, garlic & sea salt
Frequently Asked Questions

【SAFE LEAVE-IN DESIGN】 Cook with confidence. Crafted from heat-resistant 304 stainless steel and reinforced glass, this mechanical meat thermometer is designed to stay inside the oven or grill (up to 220°F) throughout the entire cooking process for real-time monitoring


IMPROVES QUALITY AND CONSISTENCY: By accurately gauging and indicating when a food item has reached its optimum internal temperature, any cook can be assured that their meal has been cooked properly each and every time
What cut of beef is best for Cracker Barrel-style roast beef?
Chuck roast is the ideal cut for this recipe due to its marbling and connective tissue, which break down during slow cooking to create tender, flavorful meat. Avoid lean cuts like sirloin as they will result in a drier roast that doesn’t match the restaurant’s signature texture.
How long does it take to cook the roast beef?
The roast beef requires 8-10 hours of cooking time in a slow cooker on low heat. This extended cooking time allows the tough connective tissues to break down completely, resulting in the melt-in-your-mouth texture that Cracker Barrel is known for.
Do I need to sear the roast before slow cooking?
Yes, searing the seasoned and flour-dusted roast in a hot skillet is essential. This step creates a deep golden-brown crust that locks in natural juices and enhances the overall flavor and texture of the finished dish.
Can I make this recipe without a slow cooker?
Absolutely! You can use an Instant Pot for faster cooking or a Dutch oven in the oven at low temperature. The key is maintaining low, steady heat for several hours to achieve the proper tenderness regardless of your cooking method.
How do I make the gravy from the cooking liquid?
Create gravy by using the flavorful drippings from the slow cooker. You can either make a traditional roux with flour and butter, or use a cornstarch slurry for quicker thickening. Season the gravy to taste for authentic restaurant flavor.
What are the best side dishes to serve with this roast beef?
Traditional Cracker Barrel sides include creamy mashed potatoes, steamed green beans, corn on the cob, fried apples, and macaroni and cheese. Serve the roast beef sliced or shredded over mashed potatoes with plenty of gravy for an authentic experience.
How should I store and reheat leftovers?
Store leftover roast beef in the refrigerator for up to 3-4 days in an airtight container with some gravy to prevent drying out. Reheat gently in the microwave or on the stovetop, adding a splash of beef broth if needed to maintain moisture.
What ingredients do I need for this recipe?
You’ll need a 3-4 pound chuck roast, olive oil, onions, garlic, beef broth, fresh herbs, salt, pepper, garlic powder, and flour for dusting. Optional ingredients include mushrooms for a braised variation and cornstarch for thickening the gravy.