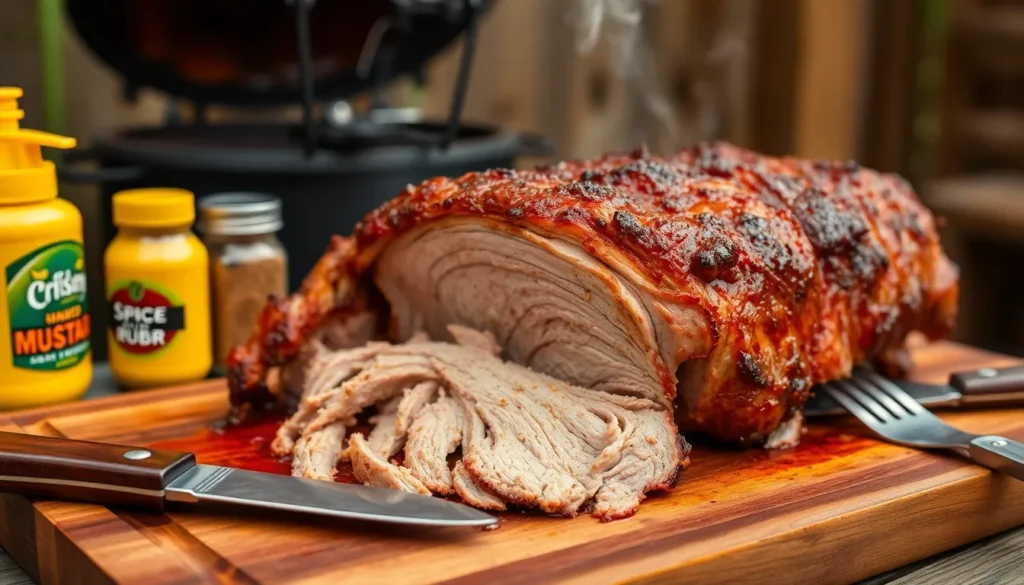
There’s nothing quite like the smoky aroma of perfectly cooked pulled pork wafting through your backyard. We’ve spent years perfecting this smoked pulled pork recipe that delivers tender, juicy meat with a beautiful bark that’ll have your neighbors peeking over the fence.
This isn’t just another barbecue recipe – it’s our go-to method for creating restaurant-quality pulled pork right in your own smoker. The secret lies in our carefully crafted dry rub and low-and-slow smoking technique that transforms a simple pork shoulder into melt-in-your-mouth perfection.
Whether you’re planning a weekend cookout or meal prepping for the week ahead, this smoked pulled pork freezes beautifully and tastes even better the next day. We’ll walk you through every step of the process, from selecting the perfect cut to achieving that coveted internal temperature that guarantees tender results every single time.
Equipment Needed
Smoking pulled pork requires exact equipment to achieve that perfect tender texture and smoky flavor we all crave. We recommend using a dedicated smoker for the best results, though several alternatives can work effectively.
Primary Smoking Equipment:
- Offset smoker or pellet smoker (preferred)
- Charcoal kettle grill with smoking capabilities
- Electric smoker for beginners
- Gas grill with smoking box attachment
Essential Tools:
- Digital meat thermometer with probe
- Instant-read thermometer for quick checks
- Heavy-duty aluminum foil
- Butcher paper (optional for wrapping)
- Large disposable aluminum pans
- Heat-resistant gloves
- Long-handled tongs
- Sharp carving knife
Wood and Fuel Requirements:
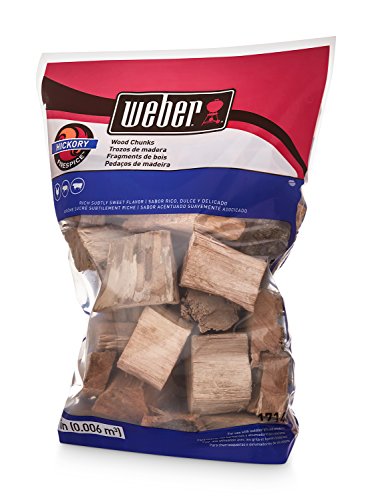
- Wood chunks or chips (hickory, apple, or cherry work best)
- Charcoal briquettes or lump charcoal
- Fire starter cubes or chimney starter
- Spray bottle for moisture control
We strongly emphasize the importance of a reliable digital thermometer with a probe. This tool ensures our pork shoulder reaches the optimal internal temperature without constantly opening the smoker and losing precious heat. The probe allows us to monitor temperature remotely while maintaining consistent cooking conditions.
Heat-resistant gloves become essential when handling hot grates and moving the pork during the cooking process. We prefer thick silicone gloves that provide excellent grip and protection during the long smoking session.
A spray bottle filled with apple juice or water helps maintain moisture levels throughout the smoking process. This technique prevents the meat from drying out during the extended cooking time.
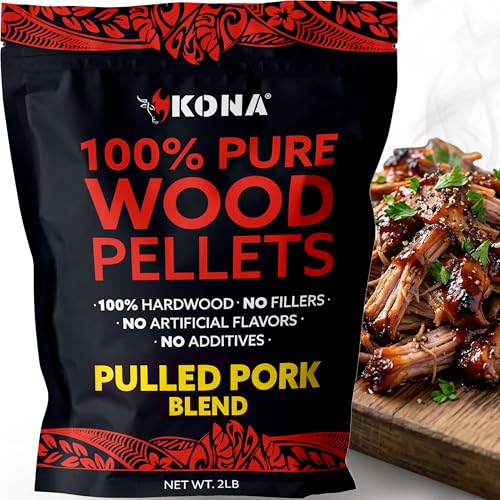
Perfect Wood-Fired Flavor: Kona Pulled Pork Blend bbq pellets for smoker grill offer a rich, smoky taste ideal for pork. Compatible with Ninja Woodfire Outdoor Pellet Grill. Use only 1/3 to 1/2 cup of smoke pellets per session for up to 80 uses.

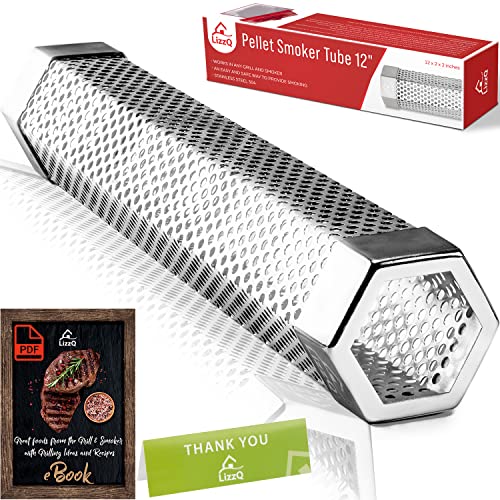
✅ This accessory is designed to WORK IN ANY GRILL (gas, electric or charcoal) and with any smokers. It ADDS GREAT FLAVOR for your meat or fish and exposes them to a tasteful smoke of smoldering wood. Perfect for smoke cheese.
Choosing the Right Pork Shoulder

We need to start with the foundation of our smoked pulled pork: selecting the perfect cut. The Boston butt emerges as our top choice for this recipe because it delivers the ideal balance of meat and fat required for tender, juicy results.

【Dual Safe Probes for Multi-Use】Vuwwey meat thermometer probe is great for meat, liquids, oil frying, baking, candy making, kitchen & outdoors. The wired probe is ideal for monitoring air fryers, ovens, grills, BBQ, smokers. It's your hands-free assistant: set the alarm, stick it on, and step away from the heat

【Easier to Use】Equipped with 2 meat probes, this BBQ thermometer for grill allows you to monitor separate meats or the grill temperature simultaneously, a real comfort in grilling several pork loins for large groups with different tastes

SMART APP & REAL-TIME ALLERTS: Download the CHEFBBQ App (iOS/Android) following system language of your phone and customizable recipes (no registration or WIFI required). Get real-time alerts when food reaches the perfect doneness
Boston Butt: Our Preferred Cut
Boston butt comes from the upper portion of the pork shoulder and provides everything we need for exceptional pulled pork. This cut contains more connective tissue and less bone compared to other shoulder sections, which breaks down beautifully during our low and slow smoking process. We can typically find Boston butt pre-packaged in most grocery stores labeled simply as “pork butt.”
Bone-In vs. Boneless Options
Many experienced pitmasters swear by bone-in pork shoulder, believing the bone helps retain moisture throughout the smoking process. But, we’ve achieved excellent results with boneless pork shoulder found in supermarkets as well. Both options work effectively for our recipe, so we can choose based on availability and personal preference.
What to Look for When Shopping
We recommend selecting pork shoulder that weighs between 8-10 pounds for optimal cooking results. Fresh meat quality makes a important difference in our final product, so we avoid cuts that have been frozen for extended periods. Look for pork with good marbling throughout the meat, as this fat will render during smoking to keep our pulled pork moist and flavorful.
The fat-to-meat ratio plays a crucial role in our success. We want to see adequate fat distribution across the surface and marbled throughout the meat itself. This fat becomes our natural basting system during the long smoking process, continuously moistening the meat from within.
Quality and Sourcing Considerations
We always prioritize freshness when selecting our pork shoulder. Choose reputable sources and inspect the meat for proper color and texture. The pork should have a pinkish-red color without any gray areas or strong odors. Fresh pork shoulder will feel firm to the touch and spring back when pressed gently.
Ingredients

Our smoked pulled pork recipe requires three distinct ingredient groups that work together to create the perfect balance of flavor and moisture. Each component plays a crucial role in achieving that coveted bark and tender interior.

Heat Resistant: Our BBQ gloves are designed to provide protection for your hands while cooking, grilling, baking, or handling hot pots. With an instant heat resistance of up to 1472°F, these gloves are perfect for high-temperature cooking and baking.

【Extreme Heat Resistance】Our barbecue gloves & oven mitts, are designed to withstand temperatures up to 1472°F(Test max temperature tolerance), providing perfect protection for your hands from high temperatures whether you're grilling, baking, or cooking.

Reusable, Food-grade, FDA compliant silicone
For the Dry Rub
- 2 teaspoons kosher salt
- 2 teaspoons ground black pepper (coarse grind preferred)
- 1 tablespoon paprika (mild for color and slight smoky flavor)
- 1 teaspoon granulated garlic
- 1 teaspoon granulated onion
- 1 teaspoon mustard powder
- 2-3 tablespoons brown sugar (blend of white and brown sugar can be used)
- ¼ to ½ teaspoon cayenne pepper (optional, for heat)
This dry rub combination creates the flavorful crust that makes our pulled pork irresistible. We recommend adjusting the cayenne pepper based on your heat preference.
For the Pork
- 8 to 10-pound bone-in pork shoulder or Boston butt
- 2-3 tablespoons yellow mustard (used to help the rub adhere to the pork)
- Apple cider or apple juice for brining or mopping during cooking (about 3 cups)
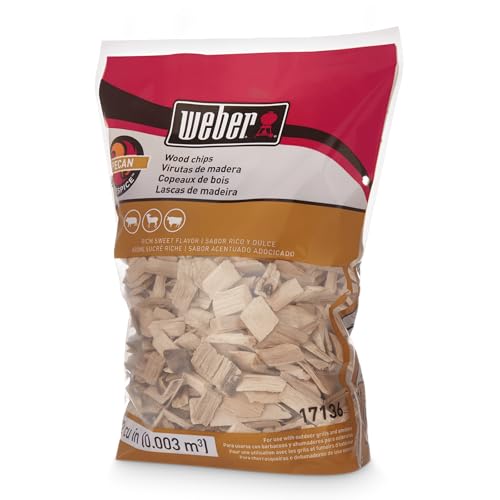
- Wood chips for smoking (hickory or pecan recommended for medium smoke)
The yellow mustard acts as a binding agent that helps our dry rub stick to the meat surface. Hickory and pecan wood chips provide the ideal smoke flavor profile without overwhelming the pork’s natural taste.
For the Mop Sauce
- Apple cider or apple juice (3 cups)
- 2 tablespoons apple cider vinegar
- 1 tablespoon Worcestershire sauce
- 1 tablespoon brown sugar
- 1 teaspoon kosher salt
- Pepper to taste
Our mop sauce keeps the pork moist throughout the long smoking process while adding layers of complementary flavors. The apple cider base enhances the meat’s natural sweetness while the vinegar provides a subtle tang that balances the richness.
Prep Work

Before we begin smoking our pork shoulder, proper preparation sets the foundation for exceptional pulled pork. We’ll focus on trimming the meat correctly and applying our dry rub for maximum flavor penetration.

Designed specifically for the culinary enthusiast, our 18 paper roll dispenser is optimally crafted to handle barbecue butcher paper, thereby ensuring the authentic taste of your smoked meats is maintained. This is your ideal bbq wrapping paper for smoking

【PREMIUM NATURAL QUALITY】Made from premium virgin pulp, our butcher paper is unwaxed, uncoated, and unbleached for a natural and pure product. Ideal for grill masters seeking top-notch, food-safe paper to enhance their culinary creations.

【PREMIUM NATURAL QUALITY】Made from premium virgin pulp, our butcher paper is unwaxed, uncoated, and unbleached for a natural and pure product. Ideal for grill masters seeking top-notch, food-safe paper to enhance their culinary creations.
Trimming the Pork Shoulder
We start by removing our 8-10 pound bone-in pork shoulder from its packaging and patting it completely dry with paper towels. This step removes any excess liquid or small bone fragments that may have accumulated during packaging.
Next we examine the fat cap on our pork shoulder. While we want to trim away any unwanted excess fat, we never remove the thin fat cap entirely. This layer of fat serves as natural protection, keeping our meat moist throughout the long smoking process.
After trimming, we let the pork shoulder sit at room temperature for about 30 minutes. This resting period allows the meat to come closer to room temperature, which helps ensure even cooking and better seasoning absorption.
Applying the Dry Rub
We begin the seasoning process by slathering our pork shoulder with yellow or Dijon mustard, coating every surface thoroughly. The mustard acts as a perfect binder, helping our dry rub stick to the meat without affecting the final flavor.
Now we apply our dry rub generously over the entire pork shoulder, making sure to coat all sides evenly. We don’t need to massage the seasoning deeply into the meat. Instead, we focus on creating a thick, uniform coating across the surface that will develop into a beautiful bark during smoking.
We ensure every inch of the pork shoulder receives adequate seasoning coverage, paying special attention to any crevices or uneven areas. This thorough application guarantees consistent flavor throughout our finished pulled pork.
Smoking Instructions

With our pork shoulder properly prepped and seasoned, we’re ready to begin the smoking process that transforms this tough cut into tender, juicy pulled pork. The next several hours require patience and attention to temperature control for perfect results.


PREMIUM WOOD CHIPS: Made from all-natural wood that burns cleanly and evenly, these wood chips can be used on top of charcoal and in smoker boxes to deliver professional-level, mouth-watering results.
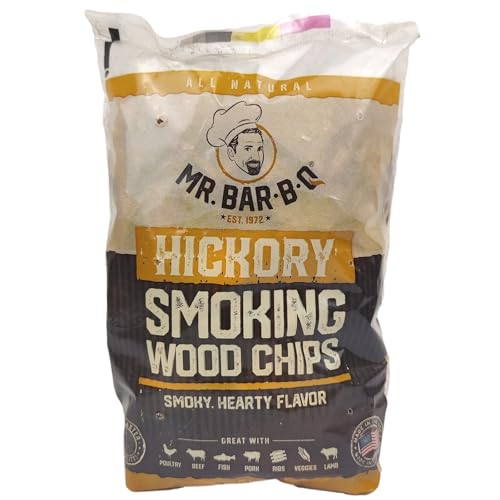
1.6 LB HICKORY SMOKING CHIPS FOR RICH, BOLD FLAVOR - Mr. Bar-B-Q Hickory Smoking Chips, expertly crafted to deliver deep, smoky flavor to your favorite foods. This 1.6-pound bag provides an ample supply of high-quality hickory wood chips, perfect for enhancing the taste of meats, poultry, seafood, and vegetables with an authentic, mouthwatering aroma. Designed for use in charcoal grills, gas grills, electric grills, and smokers.
Setting Up Your Smoker
We start by preheating our smoker to a steady 225°F for indirect smoking. Hickory and apple wood provide excellent smoke flavor, though we can experiment with cherry, maple, or oak for different flavor profiles. The key is arranging our smoker so the heat source remains indirect to prevent cooking the meat too quickly or unevenly.
We invest in a reliable meat thermometer, preferably wireless, to monitor internal pork temperature accurately from multiple spots. This helps us avoid hot and cold zones that can affect cooking consistency. Our wood chunks should be soaked for at least 30 minutes before adding them to create steady, clean smoke throughout the cooking process.
Temperature Control
We maintain our smoker temperature between 225°F and 250°F throughout the entire cooking process. Consistency is crucial for achieving that perfect bark and tender interior texture. We avoid opening the smoker frequently to keep heat and smoke steady, only opening to spritz or check internal temperature.
Our pork shoulder goes fat side up in the middle of the grate, allowing the fat to baste the meat naturally as it cooks. We spritz the pork every 45 to 60 minutes using apple juice or a mixture of apple cider vinegar and water to keep the surface moist and prevent the bark from becoming too dark.
Smoking Time and Process
We smoke our pork for approximately 1.5 to 2 hours per pound, totaling 15 to 20 hours depending on the size and smoker consistency. The internal temperature is our true guide, not the clock. We cook until the pork reaches between 195°F to 201°F for that tender, pull apart texture we’re after.
| Smoking Phase | Time Frame | Internal Temperature | Action Required |
|---|---|---|---|
| Initial Phase | First 6-8 hours | Up to 160°F | Maintain steady smoke |
| Stall Phase | Hours 8-12 | 160°F-170°F | Optional wrap in foil |
| Final Phase | Last 4-6 hours | 170°F-201°F | Monitor closely |
We have the option to wrap our pork tightly in foil or butcher paper once it hits around 160°F to 170°F. This technique retains moisture and speeds up cooking time while still allowing the meat to reach our target temperature. Once we hit that perfect 195°F to 201°F range, we remove the pork from the smoker and let it rest for at least one hour before shredding.
The Stall and Wrapping

Two critical phases will test your patience during the smoking process but understanding them makes all the difference. We’ll guide you through handling the stall and using wrapping techniques to achieve perfect results.

✅ This accessory is designed to WORK IN ANY GRILL (gas, electric or charcoal) and with any smokers. It ADDS GREAT FLAVOR for your meat or fish and exposes them to a tasteful smoke of smoldering wood. Perfect for smoke cheese.

🍃 RAPID SHREDDING MEAT CLAWS — Our meat shredder claws shred pork, chicken, turkey & brisket in seconds; comfortable grip even with greasy hands; pulled pork claws also lift and hold hot roasts; dishwasher-safe.

Includes 1 pound bag of each flavor Apple, Hickory, Mesquite, Cherry, Pecan and Sugar Maple
Understanding the Stall
The stall represents one of smoking’s most challenging phenomena that occurs around 160-165°F internal temperature. Your pork shoulder’s temperature appears to stop rising even though continuous heat application from your smoker. This temperature plateau happens due to evaporative cooling as moisture evaporates from the meat’s surface.
Moisture evaporation counteracts your smoker’s heat and dramatically slows the cooking process. The stall can extend your cooking time by several hours beyond normal expectations. Many beginners panic during this phase thinking something has gone wrong with their smoker or technique.
| Stall Temperature Range | Duration | Cause |
|---|---|---|
| 160-165°F | 2-4 hours | Evaporative cooling |
| Peak moisture loss | Extended period | Surface moisture evaporation |
We recommend patience during this critical phase as your pork develops deeper flavors and continues breaking down tough connective tissues. The stall occurs naturally in all large cuts of meat and signals that your smoking process is progressing correctly.
Texas Crutch Method
The Texas Crutch offers a proven solution to combat the stall and maintain cooking momentum. This technique involves wrapping your pork shoulder tightly in foil or pink butcher paper once it reaches stall temperature around 160-165°F. Wrapping reduces moisture evaporation significantly and traps heat around the meat.
Aluminum foil creates the tightest seal possible and locks in all juices and moisture during continued cooking. But foil wrapping can soften your carefully developed bark by creating a steaming effect. The bark becomes less crispy but remains flavorful throughout the process.
Butcher paper provides our preferred wrapping method as it allows some airflow while reducing evaporative loss. Your bark maintains better texture and firmness compared to foil wrapping. Pink butcher paper lets the meat breathe while still providing adequate moisture retention.
| Wrapping Material | Bark Texture | Moisture Retention | Cooking Speed |
|---|---|---|---|
| Aluminum Foil | Softer | Maximum | Fastest |
| Butcher Paper | Firmer | High | Fast |
| No Wrap | Crispiest | Lowest | Slowest |
After wrapping your pork shoulder continue cooking until internal temperature reaches 195-205°F for optimal tenderness. The meat becomes probe tender like warm butter when properly finished. We recommend resting your wrapped pork for 30 minutes to 1 hour before unwrapping and shredding.
Consider placing a pan beneath your wrapped meat to catch any juices that may leak during continued cooking. These collected juices serve as excellent braising liquid and can be mixed back into your finished pulled pork for enhanced flavor.
Checking for Doneness

Determining when our smoked pulled pork reaches perfect doneness requires more than simply watching the clock. We rely on internal temperature as our primary indicator, using a reliable digital meat thermometer to check the thickest part of the pork shoulder. The USDA minimum safe internal temperature for pork stands at 145°F, but pulled pork demands much higher temperatures to achieve the tender, shreddable texture we’re after.
Our target internal temperature range falls between 195°F and 205°F, where the magic truly happens. At this temperature range, the tough collagen within the meat breaks down completely, transforming into gelatin that creates the signature tender, juicy texture of perfect pulled pork. We’ve found that pork reaches optimal tenderness around 200-205°F, though some pitmasters prefer stopping at 190°F for meat that remains tender and juicy while maintaining slightly more structure.
| Temperature Range | Texture Result | Best Use |
|---|---|---|
| 190°F | Tender and juicy, less soft | Slicing or chunky pulled pork |
| 195-201°F | Ideal pulling consistency | Traditional pulled pork |
| 202-205°F | Very soft, easy shredding | Extra tender pulled pork |
We insert our thermometer probe into the thickest portion of the meat, avoiding contact with bone or fat deposits that could give false readings. The meat should offer little resistance when the probe slides in easily, almost like inserting it into warm butter. This “probe tender” test confirms that our pork has reached the proper doneness level beyond just temperature alone.
Once our pork shoulder hits that sweet spot between 195°F and 201°F, we remove it from the smoker immediately. We then wrap the finished pork tightly in aluminum foil, creating a sealed environment that allows the meat to continue cooking gently from residual heat. This crucial resting period lasts at least one hour, though we often extend it to two hours for larger shoulders.
During the resting phase, the internal juices redistribute throughout the meat fibers, ensuring every bite delivers maximum moisture and flavor. We resist the temptation to unwrap and check the pork during this time, as opening the foil releases valuable steam and juices. After the resting period completes, we unwrap the pork and begin shredding, discarding any excess fat or gristle we encounter while adding a light sprinkle of our dry rub to enhance the final flavor profile.

Fast and Accurate: 1 second response time! Meat thermometer digital features 3.9 inches food grade stainless steel probe and a high precision sensor which receives internal temp within seconds, accurate to ±0.9 degree Fahrenheit; Don’t spend any extra time leaning over a hot surface

Bluetooth Monitor Remotely: Govee Bluetooth meat thermometer lets you check the temperature of your grill, smoker, or oven from your phone. With this smart BBQ thermometer, you can multitask while grilling.

More Stable Than Bluetooth: Our advanced RF technology ensures a stronger, more reliable connection than Bluetooth. This smoker thermometer provides the freedom to move around without losing connection! Monitor your BBQ from up to 1,000 feet away!
Resting the Pork

Once our pork shoulder reaches that perfect internal temperature of 195°F to 205°F, we need to resist the urge to immediately shred it. Resting represents the most critical step that many home cooks overlook yet makes the difference between good and exceptional pulled pork.
We remove the pork shoulder from our smoker and immediately wrap it tightly in aluminum foil or butcher paper. This wrapping traps the steam and natural juices that would otherwise escape into the air. The pork continues cooking during this phase from residual heat while the internal temperature may rise another 5-10 degrees.
Our resting period should last at least 30 minutes but we achieve optimal results when we rest for a full hour. During this time the muscle fibers relax and the juices redistribute throughout the meat instead of running out when we start shredding. We can extend this resting period up to 2 hours if needed by placing the wrapped pork in a cooler lined with towels.
The wrapped pork shoulder stays incredibly hot during this resting phase. We avoid unwrapping or checking the meat during this time because opening the foil releases valuable steam and moisture that keeps our pork tender and juicy.
When we finally unwrap our rested pork shoulder, we notice how the meat has become even more tender and the juices have created a natural au jus. We save these collected juices in a small bowl because they add incredible flavor when mixed back into our shredded pork.
| Resting Phase Benefits | Time Required | Result |
|---|---|---|
| Juice redistribution | 30-60 minutes minimum | Moist, tender meat |
| Continued cooking | 10-15 minutes | Even doneness |
| Muscle fiber relaxation | 30+ minutes | Easy shredding |
| Steam retention | Throughout rest period | Maximum moisture |
The bone should slide out effortlessly from properly rested pork shoulder. We discard any large pieces of fat or connective tissue that didn’t break down during the smoking process. Our patience during this resting phase pays off with pulled pork that shreds beautifully and retains maximum moisture in every bite.

The Ultimate Gloves For You Barbecue Lovers – Don’t burn yourself, for your protection use Kitchen Perfection 11-inches grill gloves heat proof for men, high-graded, up to 500 degrees durable, thick cotton and waterproof silicone double layer, outstanding insulation that fit large and small hands alike, use for your traeger, big green egg, turkey fryer, oklahoma joe smoker, camp chef, weber, rec tec, blackstone, pit boss, heavy-duty pit and barbecue gas grills and smokers.

Our grilling gloves are lightweight, flexible, and provide higher . The tight aramid fiber distributes heat effectively. No matter what you grab, you won’t feel it, and the fabric fits snugly around the wrist. Which can keep your hands safe in hot conditions.

HEAT RESISTANT UP TO 446°F: Dual-layer design features a food-grade silicone outer shell and soft cotton lining. These bbq gloves withstand temperatures up to 446°F (230°C), providing reliable protection for handling hot cast iron skillets, oven racks, and meat trays without burning your hands. Note: Do not expose directly to open flames.
Pulling the Pork

Now that our pork shoulder has rested properly we can begin the satisfying process of transforming it into tender pulled pork. The meat should be so tender that it practically falls apart at the touch of a fork.

Designed specifically for the culinary enthusiast, our 24 paper roll dispenser is optimally crafted to handle barbecue butcher paper, thereby ensuring the authentic taste of your smoked meats is maintained. This is your ideal bbq wrapping paper for smoking
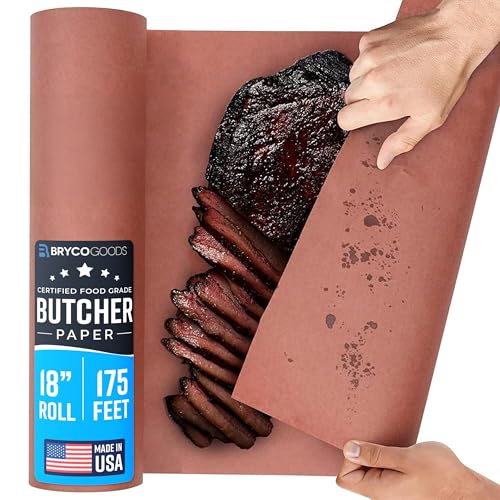
Butchers Paper is ultra durable and strong; does a superior job trapping smoke while releasing steam

Untreated: Our Brown Butcher Paper is unbleached, unwaxed, uncoated, and made from the finest virgin pulp. Butcher paper is more durable and resistant to tearing compared to aluminum foil
Shredding Technique
We start by carefully unwrapping our rested pork shoulder and removing any large chunks of fat and the bone. The bone should slide out effortlessly from properly cooked pork. We use forks, tongs, or our hands to shred the meat into bite-sized pieces. The connective tissues should have broken down completely during the long smoking process making the pork easy to pull apart.
We work systematically through the shoulder discarding any tough gristle or excessively fatty pieces that didn’t render properly. Our hands often work best for this task as we can feel the natural grain of the meat and separate it accordingly. Clean hands allow us to control the size of each piece ensuring consistent texture throughout our pulled pork.
The ideal shred size resembles thick pasta strands rather than fine threads. We aim for pieces that hold together well on sandwiches while remaining tender enough to chew easily. Any particularly stubborn sections that resist shredding likely need more time to rest or weren’t cooked to the proper internal temperature.
Adding Sauce
We reserve the precious juices that collected during the resting period as these concentrated flavors will enhance our final dish significantly. These natural drippings contain rendered fat and meat essences that add moisture and depth to our pulled pork.
Before adding any sauce we sprinkle our shredded pork with additional dry rub to boost the flavor profile. This extra seasoning layer ensures every bite delivers the complex taste we worked so hard to develop during smoking.
The approach to sauce application depends entirely on personal preference and serving style. Some of us prefer mixing sauce directly into the shredded pork for consistent flavor distribution and added juiciness. Others choose to serve sauce alongside allowing guests to customize their portions according to taste preferences.
We recommend starting with a light hand when incorporating sauce directly into the meat. The goal is to enhance rather than mask the beautiful smoke flavor we spent hours developing. Additional sauce can always be provided on the side for those who want extra moisture or tanginess on their sandwiches or plates.
Serving Suggestions

Our perfectly smoked pulled pork shines brightest when paired with complementary sides that enhance its rich, smoky flavors. Classic coleslaw remains a staple for good reason – its crisp texture and tangy dressing provide the perfect contrast to the tender, juicy meat. We recommend trying both traditional mayo-based slaws and lighter vinegar-based versions to find your preferred balance.
Baked beans deserve a spot on every pulled pork plate. Their sweet, molasses-rich flavor complements the savory smoke beautifully while adding hearty substance to the meal. We suggest preparing them with a touch of bacon or our leftover pork drippings for extra depth.
Homemade crispy seasoned French fries elevate any pulled pork sandwich to restaurant quality. The golden, crunchy exterior provides textural contrast while the fluffy interior soaks up those delicious pork juices. Season them with our same dry rub ingredients for flavor cohesion across the entire meal.
Mac and cheese transforms pulled pork into pure comfort food perfection. The creamy, rich cheese sauce pairs wonderfully with the smoky meat, creating an indulgent combination that satisfies every craving. We often mix pulled pork directly into the mac and cheese for a complete one-dish meal.
Potato salad offers another classic pairing that never disappoints. Whether you prefer creamy or vinegar-based versions, the cool, refreshing potatoes balance the warm, intensely flavored pork. We recommend adding a hint of our dry rub seasoning to the potato salad for seamless flavor integration.
Creative slaw variations open up exciting possibilities beyond traditional recipes. Apple slaw brings natural sweetness that complements the smoky pork, while Asian-inspired versions with sesame oil and rice vinegar add international flair. These unique preparations keep familiar flavors fresh and interesting.
Pulled pork taquitos represent an innovative way to repurpose leftovers. Roll our tender pork in tortillas with fresh avocado, cilantro, and lime for a Mexican-inspired twist. The bright, fresh flavors cut through the rich pork while the crispy tortilla adds satisfying crunch.
Pulled pork nachos create the ultimate party food experience. Layer our smoky meat over crispy tortilla chips with melted cheese, jalapeños, and your favorite toppings. The combination of textures and flavors makes these nachos irresistible for game day or casual entertaining.
These serving suggestions transform our smoked pulled pork into complete, memorable meals that showcase the meat’s incredible flavor while providing variety and excitement for every palate.

Storage and Reheating

Properly storing our smoked pulled pork ensures we can enjoy this delicious barbecue for days or even months after cooking. We need to allow the meat to cool completely to room temperature before placing it in storage containers to prevent moisture buildup that leads to soggy texture.
Proper Storage Techniques
We recommend shredding the pork before storing it to save valuable freezer space and enable faster freezing times. This approach helps retain better flavor and texture when we reheat the meat later. Our preferred storage method uses freezer-safe gallon-sized zip-top bags or vacuum-sealed packages with as much air removed as possible to prevent freezer burn.
Labeling each container with the date and contents helps us track freshness and rotation. We can store pulled pork in the refrigerator for up to 4 days in airtight containers. For longer storage we freeze the meat for up to 6 weeks in a regular freezer or 3 months in a deep freezer.
| Storage Method | Duration | Container Type |
|---|---|---|
| Refrigerator | Up to 4 days | Airtight containers |
| Regular freezer | 6 weeks | Zip-top bags |
| Deep freezer | 3 months | Vacuum-sealed bags |
| Deep freezer (vacuum-sealed) | Up to 1 year | Professional vacuum bags |
Reheating Methods for Best Results
Thawing frozen pulled pork overnight in the refrigerator maintains both safety and texture quality. We avoid thawing at room temperature which can promote bacterial growth and compromise food safety.
Our preferred reheating method involves using a covered skillet on the stovetop with a small amount of water or broth. This technique keeps the meat moist and prevents the pork from drying out during the reheating process. Microwave reheating works well for smaller portions using the same moisture-adding principle.
For larger quantities we reheat slowly in the oven or smoker at low temperatures between 140°F and 170°F. This gentle approach preserves the tender texture we worked so hard to achieve during the initial smoking process.
Critical Storage and Reheating Tips
Never place hot pulled pork directly into the freezer as this creates excess moisture and leads to mushy texture. We also avoid reheating frozen pork without proper thawing as this results in uneven heating and potential food safety issues.
Adding a splash of our reserved cooking juices during reheating helps restore moisture and enhances the original smoky flavors. We heat the pork just until warmed through to maintain the perfect texture and prevent overcooking that toughens the meat.
Make-Ahead Tips

Planning ahead transforms your smoked pulled pork experience from stressful to seamless. We recommend cooking your pork shoulder a full day before your event to maximize flavor development and reduce day-of preparation stress.
Cook the Day Before
Smoking your pork shoulder 24 hours in advance actually improves the final product. The flavors meld beautifully overnight as the meat rests in its own juices. After completing the smoking process and resting period, wrap the pulled pork tightly in foil or store it in airtight containers while still warm to lock in moisture.
Refrigeration Strategy
Store your cooked pork shoulder whole in the refrigerator before pulling if you have space. This method retains more moisture than pre-shredded meat. When you’re ready to serve, reheat the whole shoulder gently before pulling. Save all the cooking juices separately in containers to add back during reheating.
Gentle Reheating Methods
We achieve best results reheating pulled pork slowly in a 250°F oven covered with foil. Add apple cider or the reserved cooking juices to maintain moisture during the reheating process. Alternatively, place the wrapped pork back on your smoker at low temperature for 30-45 minutes to refresh the smoke flavor.
Freezing for Long-Term Storage
Pulled pork freezes exceptionally well for up to six months when properly stored. Portion the meat into meal-sized freezer bags and add a splash of apple cider or cooking juices before sealing. Remove excess air to prevent freezer burn and label with cooking date.
Thawing and Final Preparation
Thaw frozen pulled pork slowly in the refrigerator for 24 hours before reheating. Never thaw at room temperature as this compromises food safety. Once thawed, reheat gently with additional moisture from apple cider or broth to restore the original juicy texture. The meat often tastes even better after this make-ahead process as the flavors have had time to fully develop.
Conclusion
Now you’ve got everything you need to create restaurant-quality smoked pulled pork right at home. We’ve walked you through each critical step from selecting the perfect Boston butt to mastering the low-and-slow smoking process that delivers that coveted bark and tender interior.
Remember that great pulled pork isn’t rushed – patience during the stall and proper resting time make all the difference. With your smoker dialed in at 225°F and our proven dry rub recipe you’ll be pulling fork-tender pork that’ll have everyone asking for seconds.
The beauty of this recipe lies in its versatility. Whether you’re feeding a crowd at your next cookout or meal prepping for the week ahead this pulled pork delivers every time. Plus with our storage and reheating tips you can enjoy these amazing flavors whenever the craving hits.
Fire up that smoker and get ready to impress – your perfect pulled pork adventure starts now!
Frequently Asked Questions
What is the ideal internal temperature for smoked pulled pork?
The target internal temperature for perfectly tender pulled pork is between 195°F and 205°F. At this temperature range, the collagen breaks down into gelatin, creating that signature fall-apart texture. Use the “probe tender” test to confirm doneness – your thermometer should slide in and out like butter.
How long does it take to smoke a pork shoulder?
Plan for approximately 1.5 to 2 hours per pound when smoking at 225°F. An 8-10 pound pork shoulder typically takes 12-20 hours. The key is maintaining consistent temperature rather than rushing the process, as low and slow cooking ensures maximum tenderness.
What cut of pork is best for pulled pork?
Boston butt (pork shoulder) is the ideal choice for pulled pork. This cut has the perfect balance of meat and fat, with excellent marbling that keeps the meat moist during long cooking times. Choose a piece weighing 8-10 pounds for best results.
Should I wrap my pork shoulder during smoking?
Wrapping is optional but recommended during the stall phase (around 160-165°F). Use foil for faster cooking or butcher paper to maintain better bark texture while retaining moisture. This technique, called the Texas Crutch, helps push through the temperature plateau.
How long should pulled pork rest after smoking?
Rest your smoked pork shoulder for at least 30 minutes, with optimal results after one hour. Keep it wrapped in foil or butcher paper to trap steam and juices. This resting period allows muscle fibers to relax and ensures maximum moisture retention.
Can I make pulled pork ahead of time?
Yes, pulled pork actually improves when made ahead. Smoke it a day before your event and store it whole in the refrigerator to retain moisture. Reheat gently before pulling, or freeze portions for up to 6 months in vacuum-sealed bags.
What wood is best for smoking pulled pork?
Hickory and apple wood create the ideal flavor profile for pulled pork. Hickory provides a strong, smoky taste while apple adds subtle sweetness. This combination delivers restaurant-quality results without overpowering the meat’s natural flavors.
How do I know when my pork shoulder is done?
Beyond reaching 195-205°F internal temperature, properly cooked pork shoulder will be “probe tender” – your thermometer should slide in effortlessly. The bone should also slide out easily, and the meat should shred without resistance when pulled apart.
What equipment do I need for smoking pulled pork?
Essential equipment includes a smoker or grill capable of maintaining 225°F, a digital meat thermometer, heat-resistant gloves, and a spray bottle for spritzing. While a dedicated smoker is ideal, charcoal grills and electric smokers also work well.
How should I store leftover pulled pork?
Cool completely before storing in airtight containers. Refrigerate for up to 4 days or freeze for up to 6 months. For best results, add reserved cooking juices before storing and reheat gently in a covered skillet or low oven to maintain moisture.