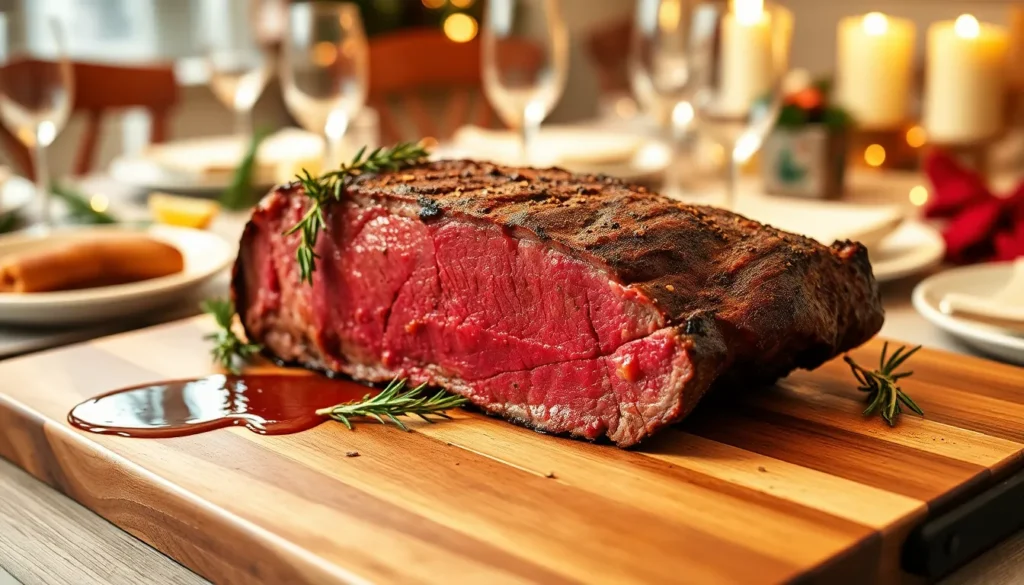
Nothing says special occasion quite like a perfectly roasted prime rib. This show-stopping centerpiece transforms any dinner into an unforgettable feast that’ll have your guests talking for weeks. We’ve mastered the art of creating a prime rib that’s beautifully caramelized on the outside while remaining tender and juicy throughout.
Prime rib roast comes from the primal rib section of beef and it’s considered one of the most luxurious cuts available. What makes our recipe foolproof is the simple yet effective technique that ensures consistent results every time. We’ll guide you through selecting the perfect roast and share our secret for achieving that coveted pink interior with a gorgeous herb crust.
Whether you’re planning a holiday celebration or wanting to impress at your next dinner party this prime rib recipe delivers restaurant-quality results in your own kitchen. The best part? It’s surprisingly straightforward once you know the key steps.
Equipment Needed
Success with prime rib roasting depends on having the right equipment at your disposal. We recommend gathering these essential tools before you begin preparing your roast.
A roasting pan with a rack forms the foundation of your prime rib setup. The rack elevates the meat above the pan bottom, allowing hot air to circulate evenly around the entire roast. This circulation creates that coveted caramelized crust while preventing the bottom from becoming soggy.
Your meat thermometer serves as your most reliable guide for achieving perfect doneness. We prefer instant-read digital thermometers for their accuracy and quick response time. Probe thermometers that remain in the meat throughout cooking also work exceptionally well.
A sharp carving knife makes all the difference when serving your prime rib. The blade should be long enough to slice through the entire width of the roast in smooth, even strokes. We recommend having a carving fork on hand to steady the meat while you slice.
Kitchen twine helps secure any loose portions of the roast and ensures even cooking. This simple tool prevents the meat from spreading during the roasting process and maintains an attractive presentation.
Heavy-duty aluminum foil proves invaluable for tenting the roast during resting periods. This covering retains heat while allowing the juices to redistribute throughout the meat.
A large cutting board with a juice groove catches any drippings and provides ample space for carving. Choose one that can accommodate your roast size comfortably.
Oven mitts or heat-resistant gloves protect your hands when handling the hot roasting pan. Prime rib requires several temperature checks and adjustments throughout the cooking process.
Having these tools ready ensures smooth execution of your prime rib roasting technique and helps you achieve professional-quality results.
Ingredients

Our beef prime rib roast recipe requires carefully selected ingredients that work together to create exceptional flavor and texture. We’ve organized these ingredients into three categories to help you prepare this impressive roast with confidence.
For the Prime Rib Roast
- 5 pound bone-in beef prime rib roast
- 3 tablespoons kosher salt or sea salt
- 2 teaspoons black pepper
- 1 teaspoon onion powder (optional)
For the Herb Crust
- ½ cup olive oil
- 8 cloves garlic, mashed or minced
- 3 tablespoons fresh rosemary, finely chopped
- 3 tablespoons fresh thyme, finely chopped
We combine these aromatic ingredients to create a flavorful rub that forms a savory crust on the exterior of our roast. The fresh herbs infuse the meat with robust flavor while the olive oil helps achieve that perfect golden brown finish.
For the Au Jus
- Pan drippings from the roasted prime rib
- 1 cup beef broth (optional, for enhancement)
- ¼ cup red wine (optional, for deglazing)
Our au jus relies primarily on the rich pan drippings that develop during roasting. These natural juices capture all the concentrated flavors from the meat and herbs, creating an authentic sauce that perfectly complements each slice of prime rib.
Preparation

Now that we have our equipment ready and ingredients assembled, we’ll focus on the crucial preparation steps that set the foundation for our perfect prime rib roast. These techniques ensure even cooking and maximum flavor development throughout the entire roast.
Selecting the Perfect Prime Rib
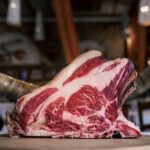
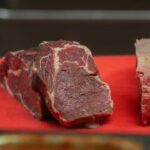
We recommend choosing a standing rib roast or bone-in prime rib weighing around 5 pounds for optimal serving size and cooking results. The bone-in option delivers superior flavor and helps retain moisture during the roasting process, though boneless cuts work well too if preferred.
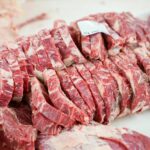
When examining potential roasts, we look for excellent marbling throughout the meat. This fat distribution within the muscle creates the tenderness and rich flavor that makes prime rib so exceptional. The marbled fat renders during cooking, naturally basting the meat from within.
Bringing to Room Temperature
We remove our prime rib from the refrigerator 1 to 2 hours before cooking begins. This step allows the roast to reach room temperature, which promotes even cooking throughout the entire cut of meat.
During this resting period, we cover the roast lightly with plastic wrap to prevent surface drying. Room temperature meat cooks more uniformly, preventing the common problem of overcooked edges and undercooked centers.
Seasoning the Roast
We prepare our herb rub by combining salt, black pepper, minced garlic, fresh rosemary, fresh thyme, and olive oil or softened butter. For those preferring garlic herb butter, we mix softened butter with minced garlic, chopped rosemary, thyme, salt, and pepper until well combined.
The seasoning mixture gets rubbed thoroughly over the entire surface of our roast, ensuring maximum flavor penetration into every inch of the meat. We press the herbs and spices firmly into the surface, creating an aromatic coating that will develop into a beautiful crust during roasting.
Some recipes benefit from placing onion and garlic heads directly in the roasting pan alongside our seasoned prime rib. These aromatics infuse additional flavor into both the meat and the pan drippings we’ll use later for au jus.
Instructions

Now that we have our prime rib seasoned and ready, we’ll guide you through the step-by-step process that transforms this magnificent cut into a restaurant-quality masterpiece. These techniques ensure perfect results every time.
Prep the Herb Crust
We begin by removing the prime rib roast from the refrigerator about 1 hour before cooking to let it come to room temperature. This step ensures even cooking throughout the roast.
Next, we prepare our herb rub by combining the salt, black pepper, minced garlic, fresh thyme, and rosemary with olive oil in a small bowl. The mixture should form a paste-like consistency that will adhere beautifully to the meat.
We then rub this herb mixture evenly over the entire surface of the roast, paying special attention to the fat cap and all sides. Our hands work best for this task, ensuring every inch is covered with the flavorful crust that will caramelize during cooking.
Searing the Roast
We preheat our oven to 500°F for the initial high-heat searing phase. This dramatic temperature creates the perfect environment for developing a golden brown crust.
Our bone-in roast goes into the roasting pan bone side down, while a boneless roast should rest on the rack inside the pan. The bones act as a natural roasting rack, elevating the meat and promoting even heat circulation.
We insert the seasoned roast into the hot oven and sear it at 500°F for exactly 15 minutes. This high-temperature blast develops the coveted crust while sealing in the natural juices.
Roasting in the Oven
After the initial searing, we reduce the oven temperature to 325°F for the gentle roasting phase. This lower temperature ensures the interior cooks evenly without overcooking the exterior.
We continue roasting until the internal temperature reaches about 5-10°F below our desired doneness level. The meat will continue cooking during the resting period, reaching the perfect final temperature.
During this roasting phase, we may add a small amount of water to the pan to prevent the drippings from burning. This technique also helps any vegetables in the pan caramelize beautifully while creating the foundation for our au jus.
| Roast Weight | Total Cooking Time |
|---|---|
| 4-5 pounds | 75-90 minutes |
| 6-7 pounds | 90-110 minutes |
| 8-10 pounds | 110-130 minutes |
Checking for Doneness
We use an instant-read meat thermometer inserted into the thickest part of the roast, avoiding contact with the bone for an accurate reading. The bone conducts heat differently and can give false temperature readings.
Our target temperatures guide us to perfect doneness every time:
| Doneness Level | Internal Temperature |
|---|---|
| Rare | 120-125°F |
| Medium-Rare | 130°F |
| Medium | 135°F |
We remove the roast from the oven when it reaches 5-10°F below our target temperature. The residual heat will continue cooking the meat during the essential resting period, bringing it to the perfect final temperature.
Resting and Carving

Once our prime rib reaches the perfect internal temperature we must resist the urge to carve immediately. These final steps ensure every slice delivers maximum tenderness and flavor.
Proper Resting Technique
We remove the roast from the oven and tent it loosely with heavy-duty aluminum foil for at least 30 minutes. During this crucial resting period the internal temperature continues to rise by approximately 5-10 degrees which brings our roast to the exact doneness we desire.
| Resting Benefits | Temperature Change | Time Required |
|---|---|---|
| Juice redistribution | 5-10°F increase | 30 minutes minimum |
| Enhanced tenderness | Stabilized heat | Extended serving window |
| Improved texture | Even moisture | Prevents dryness |
The juices that moved toward the center during cooking now redistribute throughout the entire roast. We avoid cutting too early because this causes these precious juices to escape onto the cutting board rather than staying in the meat. Our patience during resting transforms what could be a dry disappointing roast into a succulent masterpiece.
For those planning larger gatherings we can extend this technique by cooking at a lower temperature first then resting the roast covered in foil for up to two hours. A brief return to a 500°F oven for 5-10 minutes creates a perfect crust just before serving while keeping the interior perfectly cooked.
Carving the Prime Rib
We begin carving by removing any kitchen twine that secured the roast to the bones during cooking. The bones separate easily from the meat when we run our sharp carving knife along the natural seam. Setting the bones aside gives us a clean boneless roast that slices beautifully.
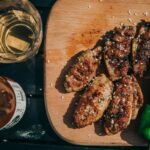
We position our roast on the large cutting board and carve against the grain into slices between ½ to 1 inch thick. Our sharp carving knife glides through the tender meat creating smooth clean cuts that preserve the roast’s juiciness. Each slice should showcase the perfect pink interior surrounded by that coveted herb-crusted exterior.
The pan drippings from our roasting pan make an excellent au jus that we spoon over each serving. These concentrated flavors from the roasting process complement every bite and add an extra layer of richness to our prime rib presentation. Our carved prime rib now stands ready to impress guests with restaurant-quality results from our home kitchen.
Making Au Jus

We transform the flavorful pan drippings from our roasted prime rib into a rich, savory au jus that perfectly complements each slice. This process begins immediately after removing the roast from the oven while the meat rests.
Pour off the excess fat from the roasting pan while carefully preserving those precious drippings that contain concentrated beef flavors. We add minced garlic or garlic halves directly to these pan juices for aromatic depth. The garlic infuses the drippings with additional savory notes that enhance the overall flavor profile.
Next, we deglaze the pan with red wine, using 1-2 tablespoons to lift any caramelized bits stuck to the bottom. Worcestershire sauce follows, with about 1 tablespoon adding umami richness to our developing au jus. These ingredients work together to create a complex flavor foundation.
Beef broth forms the base of our au jus, requiring 2-4 cups depending on desired yield and consistency. We pour the broth into the roasting pan and incorporate any roasted vegetables that cooked alongside our prime rib. These vegetables contribute additional layers of flavor to the finished sauce.
Simmering the mixture reduces the liquid by approximately one quarter to half its original volume, concentrating the flavors significantly. We maintain a gentle simmer to avoid over-reduction while allowing the ingredients to meld harmoniously. For enhanced depth, soy sauce or tamari can be added in 1 tablespoon increments.
Skimming excess fat from the surface ensures our au jus maintains a clean, refined taste without greasiness. We use a ladle or spoon to remove any fat that rises to the top during the simmering process.
Some preparations benefit from slight thickening achieved by whisking cornstarch dissolved in cold broth into the simmering au jus. This technique creates a more substantial consistency while maintaining the sauce’s essential character. We simmer until the desired thickness develops, typically just a few minutes.
Straining the finished au jus through a fine mesh removes any solid particles, resulting in a smooth, restaurant quality sauce. We serve this accompaniment warm alongside our carved prime rib, providing guests with the perfect dipping sauce that captures the essence of our roasted beef.
Serving Suggestions

We recommend pairing this magnificent prime rib roast with carefully selected sides that enhance rather than compete with its rich flavors. Classic accompaniments create a balanced meal that showcases the roast as the star while providing complementary textures and tastes.
Garlic butter mushrooms make an exceptional side dish that echoes the herb-forward profile of our prime rib seasoning. The earthy mushrooms absorb the savory garlic flavors while their meaty texture provides a delightful contrast to the tender beef. We suggest sautéing fresh button or cremini mushrooms in butter with minced garlic and fresh thyme.
Garlic herb roasted potatoes serve as the perfect starchy foundation for this elegant meal. These golden potatoes develop crispy exteriors while maintaining fluffy interiors. We prepare them by tossing quartered potatoes with olive oil, minced garlic, fresh rosemary, and oregano before roasting alongside the prime rib during the final cooking stage.
Simple roasted vegetables seasoned with rosemary and oregano create colorful additions that brighten the plate. Root vegetables like carrots, parsnips, and Brussels sprouts caramelize beautifully in the oven and absorb the aromatic herb flavors. We recommend cutting vegetables into uniform pieces to ensure even cooking.
Fresh salads provide essential contrast to the richness of prime rib. A garlic herb wedge salad offers crisp lettuce, tangy dressing, and cooling elements that cleanse the palate between bites of the savory roast. The fresh herbs in the salad tie together the overall flavor profile of the meal.
Bacon-enhanced vegetables transform simple sides into show-stopping accompaniments. Even humble frozen or canned corn becomes extraordinary when prepared with bacon drippings, creating depth and smokiness that complements the beef’s robust flavors. We use this technique to elevate any vegetable into a memorable side dish.
Leftover prime rib extends the enjoyment of this special roast through creative repurposing. Transform remaining beef into beef stroganoff by slicing it thin and combining with mushrooms and cream sauce. Shepherd’s pie becomes a luxurious comfort food when topped with leftover prime rib instead of ground meat. Hearty soups and stews benefit from the rich flavor and tender texture of the cooked roast, creating entirely new meals from the original investment.
Storage and Reheating

Proper storage and reheating techniques help you enjoy your prime rib for days after the initial feast. We’ll show you how to maintain that restaurant-quality flavor and texture in your leftovers.
Storing Leftovers
We recommend allowing your leftover prime rib to cool completely to room temperature before storing. This prevents condensation from forming inside storage containers and helps maintain the meat’s texture.
Wrap the prime rib tightly in aluminum foil or place it in airtight containers to prevent the meat from drying out in the refrigerator. Air exposure can quickly rob your beautiful roast of its moisture and flavor.
Store your wrapped prime rib in the refrigerator and consume it within 3 to 4 days for optimal quality and food safety. Beyond this timeframe, the meat begins to lose its tender texture and rich flavor.
Reheating Instructions
We suggest reheating your prime rib gently to preserve its juiciness and prevent overcooking the perfectly cooked interior. Low and slow heating methods work best for maintaining that tender, pink center you worked so hard to achieve.
Preheat your oven to a low temperature of 250°F before beginning the reheating process. This gentle heat ensures even warming without creating tough, overcooked edges.
Place the prime rib in a roasting pan and add a splash of beef broth or water to create steam and keep the meat moist during reheating. Cover the pan completely with aluminum foil to trap the moisture and heat.
Heat the prime rib until the internal temperature reaches approximately 130°F to 140°F, which typically takes 20 to 30 minutes depending on the portion size. Use your meat thermometer to monitor the temperature and avoid overheating.
For an extra touch of perfection, we recommend briefly searing the reheated prime rib in a very hot oven at 450°F to 500°F for just a few minutes. This final step re-crisps the exterior and restores that beautiful crust you created during the original roasting process.
| Reheating Temperature | Time Required | Internal Target |
|---|---|---|
| 250°F | 20-30 minutes | 130-140°F |
| 450-500°F (final sear) | 2-3 minutes | Crispy exterior |
This careful reheating method ensures your prime rib remains juicy and flavorful, closely resembling the freshly cooked roast your guests originally enjoyed.
Tips for Success

We cannot overstate the importance of bringing your prime rib to room temperature before cooking. Remove the roast from the refrigerator at least one hour before cooking and lightly salt it during this rest period. This simple step ensures even cooking throughout the roast and prevents the edges from overcooking while the center remains underdone.
Temperature control becomes your greatest ally when mastering prime rib roasting. Start with high heat at 500°F for exactly 15 minutes to create that coveted golden crust. We then reduce the temperature to 325°F for the remainder of the cooking time. This two-stage approach delivers the perfect balance of exterior caramelization and interior tenderness.
Accurate temperature monitoring eliminates guesswork from the cooking process. Insert your meat thermometer into the thickest part of the roast and remove it when the internal temperature reaches 5-10 degrees below your target doneness. The meat continues cooking during the resting period, reaching the perfect final temperature.
| Doneness Level | Cooking Time | Internal Temperature |
|---|---|---|
| Rare | 10-12 minutes per pound | 115-120°F |
| Medium Rare | 13-14 minutes per pound | 125-130°F |
| Medium Well | 14-15 minutes per pound | 135-140°F |
Elevating your roast during cooking prevents it from sitting in rendered fat and promotes even browning. Place the prime rib on a bed of onions inside your roasting pan or use a roasting rack positioned over onions. This technique adds flavor while ensuring proper air circulation around the meat.
Overnight marination transforms good prime rib into exceptional prime rib. Cover your seasoned roast and refrigerate it for at least 8 hours after applying the herb rub. This extended marination period allows the seasonings to penetrate deeply, especially into the fatty collar that surrounds the meat.
We recommend the reverse searing method for those seeking maximum control over doneness. Roast the meat at 200°F until it nearly reaches your target temperature, then rest it covered in foil. Just before serving, blast it in a 500-550°F oven for about 8 minutes to create the perfect crust without overcooking the interior.
Resting time cannot be rushed or skipped. Tent your cooked roast with aluminum foil and allow it to rest for a full 30 minutes. This crucial step redistributes the juices throughout the meat, ensuring every slice delivers maximum tenderness and flavor. Larger roasts can rest for up to two hours when properly covered.
Sharp knives make all the difference during carving. Remove any kitchen twine first, then separate the bones from the meat if using a bone-in roast. Carve against the grain in slices between ½ and 1 inch thick to preserve the juices and create clean, restaurant-quality presentation.
Conclusion
Mastering the perfect prime rib roast doesn’t have to be intimidating when you follow these proven techniques. We’ve walked you through every step from selecting your roast to creating that coveted herb crust and rich au jus that makes this dish truly special.
The key lies in understanding the fundamentals: proper temperature control, adequate resting time and precise carving technique. These elements work together to transform a premium cut of beef into an unforgettable centerpiece that rivals any steakhouse.
Whether you’re hosting your first holiday dinner or you’re a seasoned cook looking to refine your skills, this recipe delivers consistent restaurant-quality results. Your guests will be impressed by the tender pink interior and perfectly seasoned exterior that makes prime rib the ultimate celebration meal.
Frequently Asked Questions
What cut of beef should I use for prime rib?
Use a bone-in standing rib roast, typically 5-7 pounds for best results. The bone-in cut provides superior flavor and helps retain moisture during cooking. Look for well-marbled meat with good fat distribution. A standing rib roast from the chuck end offers excellent value while maintaining quality.
How long should I cook prime rib?
Cook at 500°F for 15 minutes, then reduce to 325°F. Allow approximately 15-20 minutes per pound for medium-rare. Use a meat thermometer for accuracy: 120-125°F for rare, 130-135°F for medium-rare, and 140-145°F for medium. Always remove 5-10°F before target temperature.
Do I need to let prime rib rest after cooking?
Yes, resting is crucial for perfect prime rib. Tent with aluminum foil and rest for at least 30 minutes after cooking. This allows juices to redistribute throughout the meat, ensuring maximum tenderness and preventing dryness when carved. The internal temperature will rise 5-10°F during resting.
What equipment do I need to roast prime rib?
Essential equipment includes a roasting pan with rack, reliable meat thermometer, sharp carving knife and fork, kitchen twine, heavy-duty aluminum foil, large cutting board, and oven mitts. These tools ensure proper cooking technique and safe handling of the hot roast for professional-quality results.
How do I make au jus from pan drippings?
Pour off excess fat while preserving drippings. Add minced garlic, deglaze with red wine and Worcestershire sauce, then add beef broth. Simmer to concentrate flavors, skim fat, and strain for smoothness. The resulting au jus provides a rich, savory sauce that perfectly complements each slice.
What sides pair well with prime rib?
Classic pairings include garlic butter mushrooms, herb roasted potatoes, and roasted vegetables. Fresh salads like wedge salad provide refreshing contrast to the rich beef. Yorkshire pudding, creamed spinach, and asparagus are traditional accompaniments that complement the prime rib’s luxurious flavors beautifully.
How should I store and reheat leftover prime rib?
Cool completely before wrapping tightly in aluminum foil or storing in airtight containers. Refrigerate for up to 4 days. Reheat at 250°F with added beef broth for moisture, then briefly sear at high temperature to restore the crust. This maintains the meat’s juiciness and flavor.
Should I bring prime rib to room temperature before cooking?
Yes, always bring prime rib to room temperature before cooking, typically 1-2 hours depending on size. This ensures even cooking throughout and prevents overcooked edges with undercooked centers. Lightly salt during this period to enhance flavor penetration and seasoning distribution.