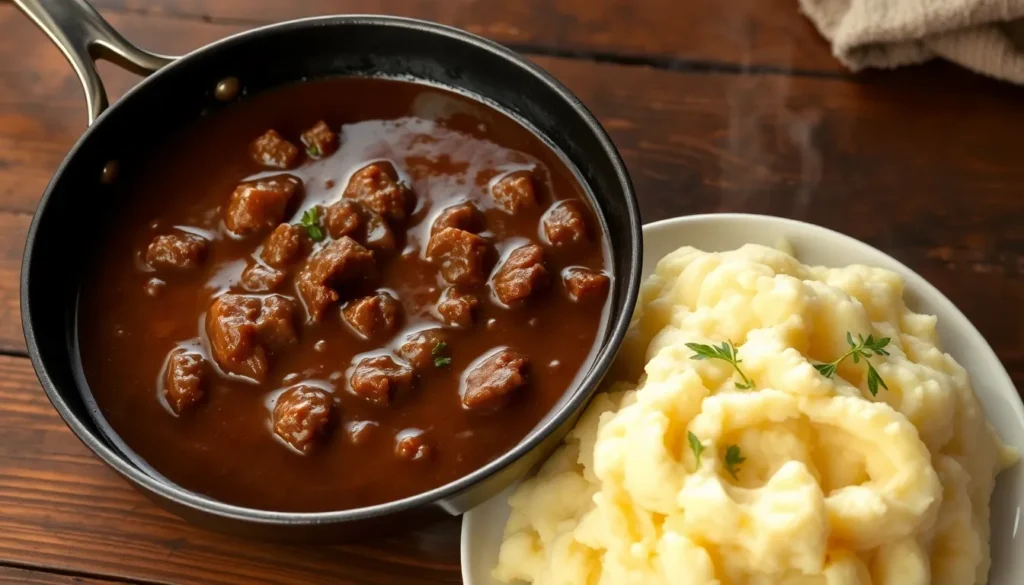
Nothing transforms a simple meal into a feast quite like rich, velvety beef gravy. We’ve perfected this classic recipe through years of testing and tasting, creating a gravy that’ll have your family asking for seconds (and thirds). This isn’t just any ordinary gravy – it’s the kind that turns leftover roast beef into a gourmet experience and makes mashed potatoes absolutely irresistible.
The secret lies in building layers of flavor from the ground up. We start with proper beef drippings and create a roux that’s golden perfection, then slowly whisk in beef stock that’s been simmered to concentrate those deep, savory notes. No more lumpy disappointments or bland disappointments that taste like flour water.
Whether you’re serving Sunday dinner or elevating weeknight leftovers, this foolproof recipe delivers restaurant-quality results every single time. We’ll walk you through each step so you can master the technique and create gravy that’s so good, it becomes the star of the plate.
Equipment Needed
Making restaurant-quality beef gravy requires the right tools to achieve that perfectly smooth and velvety texture we’re after. We’ve found that having proper equipment makes the difference between lumpy disappointing gravy and the silky masterpiece that complements your roast beef dinner.
Essential Equipment:
- Heavy-bottomed saucepan or skillet – Prevents scorching while building your roux base
- Wire whisk – Creates smooth texture and eliminates lumps when incorporating stock
- Fine-mesh strainer – Removes any remaining lumps for restaurant-quality finish
- Measuring cups and spoons – Ensures accurate ratios for consistent results
- Wooden spoon – Perfect for stirring without scratching your cookware
- Small ladle – Helps control liquid addition when whisking in stock
Helpful Additional Tools:
- Fat separator – Cleanly separates drippings from fat for cleaner flavor
- Instant-read thermometer – Monitors temperature for optimal thickening
- Small bowl – Holds slurry mixture if needed for final thickening adjustments
The heavy-bottomed pan stands as our most critical tool since it distributes heat evenly and prevents the flour from burning during roux preparation. We recommend stainless steel or enameled cast iron for best heat control and easy cleanup.
Your whisk becomes essential when gradually incorporating the beef stock into the roux. We prefer balloon whisks with multiple wires that break up any potential flour clumps before they form. This technique ensures our gravy maintains that luxurious smooth consistency that makes all the difference in the final dish.
Ingredients

Creating exceptional beef gravy requires carefully selected ingredients that build layers of rich, savory flavor. Our recipe combines traditional beef drippings with aromatic vegetables and perfectly balanced seasonings for restaurant-quality results.
For the Beef Drippings
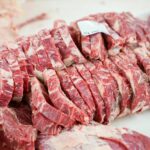
- 1 cup beef trimmings or scraps (optional but adds incredible depth)
- 2-3 tablespoons unsalted butter
- 1 medium shallot, finely diced
- 1 medium carrot, finely diced
- 1 celery stalk, finely diced
- 3 garlic cloves, minced
- 3-4 fresh thyme sprigs
- 2-3 fresh parsley sprigs
- 1 fresh rosemary sprig
- ½ cup dry red wine
For the Gravy Base
- 2-4 cups beef broth (high-quality store-bought or homemade)
- 3-4 tablespoons cornstarch
- ¼ to ⅓ cup cold water
- 2 tablespoons unsalted butter (for finishing)
| Thickening Method | Amount | Technique |
|---|---|---|
| Cornstarch slurry | 3-4 tbsp + ¼-⅓ cup water | Mix until smooth, whisk into hot gravy |
| All-purpose flour | 3-4 tbsp | Create roux or beurre manié |
| Beurre manié | 2 tbsp flour + 2 tbsp butter | Knead together, whisk into gravy |
Seasonings and Flavor Enhancers
- 1-3 teaspoons onion powder
- 1-2 teaspoons garlic powder
- Salt and freshly ground black pepper to taste
- 1 tablespoon Worcestershire sauce (optional)
- 1 teaspoon beef bouillon powder (optional, use instead of additional salt)
- Kitchen Bouquet browning sauce (optional, for enhanced color)
Instructions

We’ll guide you through each step to create a perfectly smooth and flavorful beef gravy that transforms any meal into a memorable experience. Follow these detailed instructions to achieve restaurant-quality results every time.
Preparing the Beef Drippings
Start by collecting the pan drippings from your roast beef in a measuring cup or bowl. Allow the drippings to settle for 2-3 minutes so the fat separates from the concentrated meat juices. If you don’t have fresh drippings available, we recommend using high-quality beef broth as your base liquid. Pour the separated drippings through a fine-mesh strainer to remove any burnt bits or impurities. Reserve both the fat and the liquid portions, as we’ll use the fat for our roux and the liquid for added flavor depth.
Making the Roux
Heat 3 tablespoons of reserved beef fat or unsalted butter in your heavy-bottomed saucepan over medium heat. Add 3 tablespoons of all-purpose flour to the melted fat and whisk continuously for 2-3 minutes until the mixture turns golden brown. This creates a smooth roux that will thicken our gravy beautifully. For those preferring a thickening alternative, mix 2 tablespoons of cornstarch with 1/4 cup of cold water in a small bowl until completely smooth. Whisk this cornstarch slurry until no lumps remain before setting aside for later use.
Adding the Liquid
Gradually pour 2 cups of warm beef broth into the roux while whisking constantly to prevent lumps from forming. Add the reserved drippings along with the broth for maximum flavor impact. Continue whisking as the mixture comes to a gentle simmer and begins to thicken. If using the cornstarch method instead, bring your beef broth to a simmer in the saucepan, then slowly whisk in the prepared cornstarch slurry. Reduce heat to low and let the gravy simmer for 3-5 minutes until it reaches your desired consistency.
Seasoning and Finishing
Season the gravy with 1/2 teaspoon each of garlic powder and onion powder for aromatic depth. Add 1 tablespoon of Worcestershire sauce for complex umami notes, though this addition remains optional based on your taste preferences. Taste and adjust seasoning with salt and freshly ground black pepper as needed. For enhanced flavor complexity, substitute 1 teaspoon of beef bouillon granules in place of additional salt. Bring the mixture to a final boil, then reduce heat and simmer until the gravy coats the back of a spoon. Serve immediately while hot over your favorite dishes for the best texture and temperature.
Directions for Perfect Consistency

Creating consistently perfect beef gravy requires mastering three critical elements that separate restaurant-quality results from disappointing attempts. We’ll guide you through each technique to ensure your gravy achieves the ideal texture and flavor balance every time.
Achieving the Right Thickness
Building the perfect thickness starts with controlling your liquid reduction and choosing the right thickening method. We recommend simmering your beef stock mixture until it reduces by approximately 25% to concentrate both flavor and natural body. This reduction process creates a more robust base that requires less artificial thickening.
For the smoothest results, we use a beurre manié technique by combining equal parts softened butter and flour into a paste. Whisk this mixture into your simmering gravy gradually while maintaining low-medium heat. Cook the mixture for 5-7 minutes to eliminate any raw flour taste and allow the thickening properties to fully develop.
Alternatively, create a cornstarch slurry by mixing 2 tablespoons cornstarch with 3 tablespoons cold water until completely smooth. Add this mixture to your boiling broth while whisking continuously, then simmer until you achieve your desired consistency. Remember that cornstarch creates a slightly more translucent finish compared to flour-based thickeners.
| Thickening Method | Ratio | Cooking Time | Best For |
|---|---|---|---|
| Beurre Manié | 1:1 butter to flour | 5-7 minutes | Rich, velvety texture |
| Cornstarch Slurry | 2 tbsp cornstarch to 3 tbsp water | 2-3 minutes | Clear, glossy finish |
| Traditional Roux | 2 tbsp fat to 2 tbsp flour | 3-5 minutes | Deep, complex flavor |
Avoiding Lumps
Preventing lumps requires proper technique and timing throughout the thickening process. We always whisk vigorously when introducing any thickening agent to your hot liquid, maintaining constant motion to distribute particles evenly.
Temperature control plays a crucial role in lump prevention. Mix your cornstarch or flour with cold liquid before adding it to the hot gravy, as this technique helps particles disperse uniformly without clumping. Never dump dry flour directly into hot liquid, as this guarantees lumpy results.
Add your thickening agents in small increments rather than all at once. We incorporate beurre manié or cornstarch slurry gradually, whisking between each addition to ensure complete integration. This methodical approach gives you better control over both thickness and texture.
After cooking, strain your finished gravy through a fine-mesh sieve to remove any potential lumps and achieve a perfectly smooth consistency. This final step guarantees professional results even if minor clumping occurred during preparation.
Adjusting Flavor Balance
Proper seasoning transforms basic beef gravy into an extraordinary accompaniment that enhances your entire meal. We begin with a foundation of salt and freshly cracked black pepper, then build complexity with additional flavor enhancers.
Worcestershire sauce adds essential umami depth that complements the beef flavors without overwhelming the gravy. Start with 1 teaspoon and adjust according to your taste preferences. Beef bouillon paste or granules can intensify the meaty character if your base stock seems weak.
We finish our gravy with a tablespoon of cold butter whisked in at the very end, creating a silky texture and rich mouthfeel. This technique, known as mounting, adds professional polish to your final result.
Fresh herbs provide brightness that balances the rich, heavy nature of beef gravy. We prefer finely minced parsley, thyme, or chives stirred in just before serving. These herbs maintain their vibrant color and fresh flavor when added at the last moment.
Continuously taste your gravy throughout the cooking process, adjusting saltiness, acidity, and herbaceous notes until you achieve perfect balance. Each batch may require slight modifications based on the strength of your beef stock and personal preferences.
Make-Ahead Instructions

We love preparing this beef gravy ahead of time for stress-free entertaining and weeknight meal planning. Making gravy in advance saves precious time during busy cooking sessions while maintaining that rich homemade flavor we all crave.
Storage Guidelines
Our make-ahead beef gravy stays fresh in the refrigerator for up to 3 days when stored properly. Allow the finished gravy to cool completely at room temperature before transferring it to an airtight container. We recommend portioning the gravy into smaller containers for easier reheating and portion control.
For longer storage we freeze portions in freezer-safe containers for up to 3 months. Label each container with the date and contents to maintain proper rotation in your freezer inventory.
Reheating Process
Defrost frozen gravy in the refrigerator 1-2 days before you plan to serve it. Never thaw gravy at room temperature as this compromises food safety and texture quality.
We reheat our make-ahead gravy gently on the stovetop over medium-low heat to preserve its smooth consistency. Whisk the gravy frequently during reheating to prevent separation and ensure even warming throughout. Add small amounts of warm beef broth if the gravy becomes too thick after storage.
Texture Recovery Tips
Refrigerated gravy naturally thickens as it cools so we expect some consistency changes during storage. Start reheating with gentle heat and gradually increase temperature while whisking continuously. This method prevents the formation of lumps and maintains that velvety texture we worked hard to achieve.
If separation occurs during reheating we whisk vigorously or use an immersion blender to restore smoothness. Adding a tablespoon of cold butter at the end of reheating creates that glossy restaurant-quality finish we desire.
Make-Ahead Timeline
| Preparation Stage | Timeline | Storage Method |
|---|---|---|
| Complete gravy preparation | Up to 3 days ahead | Refrigerate in airtight container |
| Freeze portions | Up to 3 months ahead | Freezer-safe containers |
| Defrost frozen gravy | 1-2 days before serving | Refrigerator thawing |
| Final reheating | 10-15 minutes before serving | Stovetop over medium-low heat |
We taste and adjust seasonings after reheating since flavors can mellow during storage. A splash of Worcestershire sauce or pinch of fresh herbs brightens the flavor profile and brings back that just-made taste your family expects.
Storage and Reheating Tips

Proper storage techniques ensure our perfectly crafted beef gravy maintains its rich flavor and smooth texture for future meals. We recommend cooling the gravy completely before transferring it to storage containers to prevent condensation and bacterial growth.
Refrigerator Storage
Fresh beef gravy stays at peak quality when stored in an airtight container in the refrigerator for up to 3-4 days. Glass containers or food-grade plastic containers work best to prevent flavor absorption and maintain freshness. We always label our containers with the preparation date to track storage time accurately.
| Storage Method | Duration | Container Type |
|---|---|---|
| Refrigerator | 3-4 days | Airtight glass or plastic |
| Freezer | Up to 3 months | Freezer-safe containers |
Freezer Storage
Long-term storage becomes simple when we freeze our beef gravy in suitable freezer containers for up to 3 months. Portion the gravy into smaller containers for convenient thawing and reheating. Leave about an inch of headspace in containers to allow for expansion during freezing.
Reheating Methods
Gentle stovetop reheating preserves the gravy’s silky texture and prevents breaking. We heat the gravy over low heat while stirring occasionally to ensure even warming throughout. Medium heat can cause the emulsification to break and create an undesirable separated texture.
Thickened gravy often requires thinning after refrigeration since starches continue to absorb liquid during storage. We add small amounts of beef broth or water while reheating to restore the original consistency. Start with one tablespoon of liquid at a time to avoid over-thinning.
Thawing Frozen Gravy
Overnight refrigerator thawing provides the safest method for frozen gravy. Plan ahead by moving the frozen gravy to the refrigerator 24 hours before needed. Quick thawing methods like microwave defrosting can create hot spots that affect texture quality.
Avoid boiling the gravy during the reheating process as high temperatures can break down the thickening agents and create a grainy texture. We maintain low heat throughout the reheating process and whisk gently to restore smoothness. Taste and adjust seasonings after reheating since flavors can diminish slightly during storage.
Serving Suggestions

Our rich beef gravy transforms ordinary meals into memorable dining experiences. We recommend pouring this velvety sauce over classic roast beef or prime rib to create an elegant presentation that showcases the gravy’s deep, savory flavors. The combination of tender meat and our perfectly seasoned gravy creates a restaurant-quality dish at home.
Mashed potatoes become extraordinary when we generously ladle our beef gravy over creamy peaks. The gravy pools beautifully in the indentations while coating each spoonful with rich, beefy goodness. We also love serving it alongside roasted vegetables like carrots, Brussels sprouts, or green beans to add moisture and flavor to these hearty sides.
Yorkshire pudding provides the perfect vessel for our gravy, as the puffy pastry soaks up every drop of the savory sauce. We often serve individual Yorkshire puddings filled with gravy as an impressive side dish that guests always remember. The traditional pairing elevates both components to create an authentic British dining experience.
Comfort food favorites reach new heights when we incorporate our beef gravy. Meatloaf becomes more indulgent with a generous serving of gravy alongside or drizzled over the top. We frequently use this gravy to enhance beef stew by stirring in a few tablespoons during the final cooking stages for added richness and depth.
Open-faced roast beef sandwiches benefit tremendously from our gravy, which keeps the meat moist while adding layers of flavor. We recommend warming the sandwich briefly under the broiler after adding the gravy for an extra touch of elegance. This presentation works beautifully for both casual lunches and more formal occasions.
Casseroles and pot pies gain remarkable flavor when we incorporate our beef gravy as a base or finishing sauce. The gravy binds ingredients together while infusing the entire dish with its complex, wine-enhanced taste. We particularly enjoy using it in shepherd’s pie variations where the gravy replaces traditional tomato-based sauces.
Our beef gravy maintains its optimal temperature and consistency when served immediately after preparation. We always warm our serving dishes beforehand to prevent the gravy from cooling too quickly during service. This attention to temperature ensures that every bite delivers the full impact of our carefully crafted flavors.
Troubleshooting Common Issues

Even experienced cooks encounter gravy challenges from time to time. These simple fixes will help you rescue your beef gravy and achieve perfect results every time.
Gravy Too Thin
Insufficient thickener or excessive liquid creates thin gravy that won’t coat your food properly. We recommend creating a cornstarch slurry by mixing 1 tablespoon cornstarch with 2 tablespoons cold water until smooth. Slowly whisk this mixture into your simmering gravy while stirring continuously. Allow the gravy to cook for 2-3 minutes until it reaches your desired thickness.
Alternatively, you can reduce the gravy by simmering it uncovered over medium-low heat. This method concentrates the flavors while evaporating excess liquid naturally. Stir occasionally to prevent sticking and monitor the consistency closely.
| Thickening Method | Ratio | Cooking Time |
|---|---|---|
| Cornstarch Slurry | 1 tbsp cornstarch : 2 tbsp cold water | 2-3 minutes |
| Flour Roux | 2 tbsp butter : 2 tbsp flour | 3-5 minutes |
| Reduction Method | N/A | 10-15 minutes |
Gravy Too Thick
Excessive thickener creates gravy that resembles paste rather than a smooth sauce. We solve this by gradually whisking in hot beef broth or warm water. Add the liquid one tablespoon at a time while whisking vigorously to maintain smoothness. Continue adding liquid until you achieve the perfect consistency that coats the back of a spoon.
Never add cold liquid to hot gravy as this can cause lumps and temperature shock. Keep additional beef broth warm on a separate burner for easy incorporation when needed.
Lumpy Gravy
Lumps form when thickener contacts hot liquid directly without proper mixing. We prevent this by always creating a slurry with cold water before adding any thickener to hot gravy. Mix cornstarch or flour with cold water until completely smooth and lump-free.
If lumps have already formed, strain the gravy through a fine-mesh strainer into a clean saucepan. Press the solids with the back of a spoon to extract maximum flavor. For stubborn lumps, use an immersion blender to break them down completely. Whisk the strained gravy vigorously while reheating to restore its silky texture.
Remember to add thickener slurries slowly while whisking constantly. This technique ensures even distribution and prevents clumping that creates those unwanted lumps.
Recipe Variations

These elevated versions of our classic beef gravy transform ordinary meals into restaurant-quality experiences. Each variation builds upon our foundational technique while introducing unique flavor profiles that complement different dishes.
Red Wine Beef Gravy
This sophisticated variation adds remarkable depth through the addition of dry red wine. We begin by sautéing diced onions and garlic in butter until fragrant and golden. Pour in ½ cup of dry red wine and allow it to reduce by half, concentrating those rich flavors.
Add your beef broth to the reduced wine mixture and bring to a gentle simmer. Fresh thyme and rosemary elevate this gravy beyond the ordinary – we recommend ¼ teaspoon of each dried herb or double that amount if using fresh. Worcestershire sauce provides that essential umami backbone that makes this variation shine.
Thicken using our proven cornstarch slurry method, whisking continuously to maintain that silky smooth texture. This wine-enhanced gravy pairs beautifully with beef tips and roast beef, creating an elegant dining experience.
Mushroom Beef Gravy
Earthy mushrooms transform our base recipe into a hearty, satisfying gravy perfect for steaks and mashed potatoes. Start by sautéing sliced mushrooms with onions and garlic in butter or oil until the mushrooms release their moisture and develop a golden color.
The key lies in allowing the mushrooms to caramelize properly – this step builds the deep, earthy flavors that make this variation exceptional. Add your beef broth to the mushroom mixture and season with salt, pepper, and a splash of Worcestershire sauce.
We prefer using a combination of button and cremini mushrooms for optimal flavor complexity. Thicken with either cornstarch or flour-based roux, depending on your preference. This robust gravy creates a restaurant-quality experience when served over grilled steaks or creamy mashed potatoes.
Herb-Infused Beef Gravy
Fresh and dried herbs create aromatic layers that complement our rich beef base perfectly. Begin by sautéing your aromatics – onions and garlic form the foundation for this fragrant variation.
Add beef broth along with your herb selection: ¼ teaspoon each of dried thyme and rosemary creates the perfect balance. Fresh parsley adds brightness when stirred in just before serving. Worcestershire sauce remains essential for that savory umami depth we love.
The simmering process allows these herbs to marry with the beef flavors, creating complex aromatic notes throughout. Our cornstarch slurry thickening method ensures the herbs distribute evenly without creating texture issues. This versatile variation enhances any beef dish while adding sophisticated flavor dimensions that impress guests and family alike.
Conclusion
Mastering the perfect beef gravy transforms ordinary meals into extraordinary dining experiences. We’ve equipped you with the essential techniques, troubleshooting tips, and creative variations to create restaurant-quality gravy every time.
Remember that great gravy starts with quality drippings and patience during the roux-making process. Don’t rush the whisking – it’s your key to achieving that silky-smooth texture we all crave.
Whether you’re preparing Sunday dinner or elevating weeknight leftovers, this versatile gravy recipe adapts beautifully to your needs. Store extras for future meals, experiment with our flavor variations, and most importantly, taste as you go.
With these proven methods in your culinary arsenal, you’ll never settle for store-bought gravy again. Your family and guests will notice the difference that homemade beef gravy brings to the table.
Frequently Asked Questions
What equipment do I need to make perfect beef gravy?
You’ll need a heavy-bottomed saucepan or skillet for even heat distribution, a wire whisk to prevent lumps, a fine-mesh strainer for smooth texture, measuring cups and spoons, a wooden spoon, and a small ladle. Optional tools include a fat separator and instant-read thermometer for optimal results.
What are the essential ingredients for rich beef gravy?
The key ingredients include beef drippings, unsalted butter, flour for thickening, beef broth, and seasonings like garlic powder, onion powder, and Worcestershire sauce. You can also add aromatic vegetables like shallots, carrots, celery, fresh herbs, and dry red wine for enhanced flavor depth.
How do I prevent lumps in my beef gravy?
Whisk vigorously and continuously when adding liquid to your roux. Control the temperature by adding warm broth gradually rather than all at once. If lumps form, strain the gravy through a fine-mesh strainer or use an immersion blender to smooth it out.
How long can I store homemade beef gravy?
Properly stored beef gravy lasts 3-4 days in the refrigerator in airtight containers. For longer storage, freeze it for up to 3 months. Always cool completely before storing and reheat gently on the stovetop, whisking frequently to maintain smooth consistency.
How do I reheat beef gravy without ruining the texture?
Reheat gravy gently on the stovetop over low heat, whisking constantly. If it’s too thick, gradually add warm beef broth or water. Never boil the gravy during reheating as this can cause a grainy texture. Adjust seasonings after reheating since flavors may diminish during storage.
What’s the best way to thicken thin beef gravy?
Create a cornstarch slurry by mixing 1 tablespoon cornstarch with 2 tablespoons cold water. Whisk this into simmering gravy and cook for 2-3 minutes. Alternatively, make a beurre manié (flour-butter paste) or simply simmer the gravy longer to reduce and thicken naturally.
Can I make beef gravy ahead of time for entertaining?
Yes! Beef gravy can be made up to 3 days in advance and stored in the refrigerator. This actually allows flavors to develop further. Reheat gently on the stovetop, whisking frequently, and thin with warm broth if needed. Adjust seasonings before serving.
What dishes pair best with beef gravy?
Beef gravy complements roast beef, mashed potatoes, roasted vegetables, Yorkshire pudding, meatloaf, and open-faced sandwiches. It also enhances casseroles and pot pies. Serve warm to maintain its rich flavor and smooth consistency for the best dining experience.